Deliciously Easy: Unveiling the Magic of No-Bake Peanut Butter Bars
Are you tired of spending hours in the kitchen, especially when that sweet tooth craving hits? What if I told you there’s a delectable dessert that requires no oven, minimal effort, and delivers maximum flavor? Today, we’re diving into the world of effortless indulgence with the incredible No-Bake Peanut Butter Bars. Preparing these irresistible treats at home is not only incredibly satisfying but also allows you to control the quality of your ingredients, ensuring a healthier and more personalized dessert experience. These bars are a testament to how simple yet profoundly delicious homemade confections can be, making them an ideal choice for busy schedules or impromptu cravings. They perfectly exemplify the ease and joy of exploring No-Bake Dessert Recipes.
Ingredients & Kitchen Tools
To embark on this delightful culinary journey, gather the following:
- 1 ½ cups graham cracker crumbs: The foundation of our crust, providing a subtly sweet and crunchy base. You can make these by crushing whole graham crackers.
- ½ cup unsalted butter, melted: Binds the crumbs together, ensuring a firm, delicious crust.
- 1 ½ cups creamy peanut butter: The star ingredient, offering rich flavor and a smooth texture. Opt for natural peanut butter for a less sugary option.
- 1 cup powdered sugar: Adds sweetness and helps create a smooth, firm consistency in the peanut butter layer. Sift it for best results.
- 1 teaspoon vanilla extract: Enhances the overall flavor profile with its warm, aromatic notes.
- 1 ½ cups semi-sweet chocolate chips: Forms the luscious chocolate topping.
- ¼ cup unsalted butter: Used for melting with the chocolate, creating a glossy, pourable ganache.
Kitchen Tools:
- 9×13 inch baking pan: The perfect size for setting your bars.
- Parchment paper: Lines the pan, making removal and slicing incredibly easy.
- Large mixing bowls (2): One for the crust, one for the peanut butter filling.
- Rubber spatula: For mixing and spreading.
- Microwave-safe bowl or small saucepan: For melting butter and chocolate.
- Measuring cups and spoons: For accurate ingredient portions.
Prep Time & Cooking Schedule
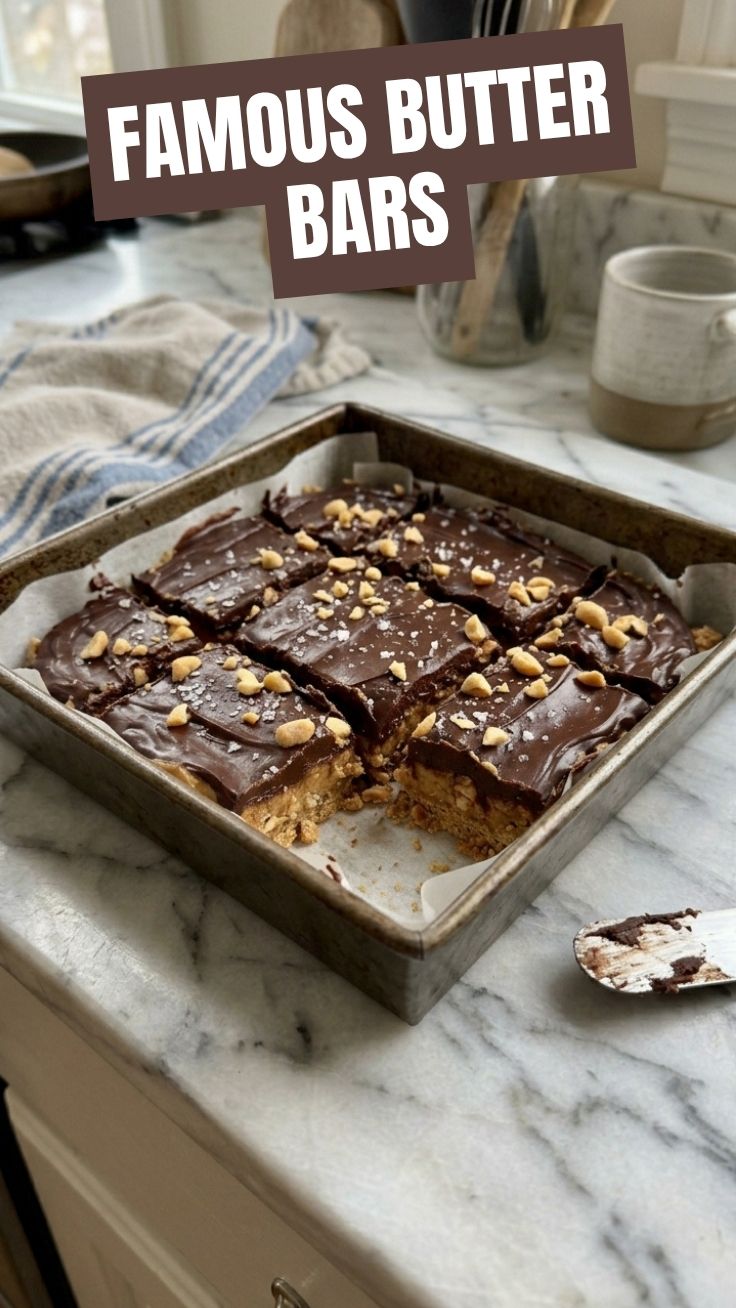
The beauty of these No-Bake Peanut Butter Bars lies in their minimal time commitment.
- Prep Time: 15-20 minutes
- Chill Time: 1-2 hours (essential for setting)
- Total Time: Approximately 1 hour 15 minutes to 2 hours 20 minutes
This recipe is ideal for a quick assembly during a lunch break or after dinner, followed by a chill in the refrigerator while you relax. Plan to make them a few hours before you intend to serve, or even the day before, as they only get better with a good chill.
Step-by-Step Instructions
Let’s get those delectable layers ready!
1. Prepare the Crust: In a large bowl, combine the graham cracker crumbs and ½ cup melted butter. Stir until the crumbs are evenly moistened. Press this mixture firmly into the bottom of your parchment-lined 9×13 inch baking pan. Use the back of a spoon or a flat-bottomed glass to ensure a compact, even layer. Place in the refrigerator to chill while you prepare the next layer.
2. Craft the Peanut Butter Layer: In another large mixing bowl, combine the creamy peanut butter, powdered sugar, and vanilla extract. Mix thoroughly until smooth and well combined. This mixture should be thick and slightly stiff. Carefully spread this peanut butter mixture evenly over the chilled graham cracker crust. Ensure a smooth, consistent layer for the best texture. These delightful No-Bake Peanut Butter Bars are truly coming to life with this creamy centerpiece.
3. Melt the Chocolate Topping: In a microwave-safe bowl or small saucepan, melt the chocolate chips and ¼ cup butter together. Heat in 30-second intervals in the microwave, stirring after each, until smooth and glossy. If using a saucepan, melt over low heat, stirring constantly.
4. Assemble and Chill: Pour the melted chocolate mixture over the peanut butter layer, spreading it gently and evenly with a spatula to cover the entire surface.
5. Set to Perfection: Place the pan back into the refrigerator for at least 1-2 hours, or until the chocolate topping is firm and set. This crucial step is what makes these part of the fantastic world of No-Bake Dessert Recipes.
6. Slice and Serve: Once fully chilled, lift the bars out of the pan using the parchment paper. Cut into desired squares or rectangles. For clean cuts, use a sharp knife warmed under hot water and wiped dry between slices.
Nutritional Benefits & Advantages
These bars offer more than just deliciousness. Peanut butter is a good source of healthy fats, protein, and fiber, contributing to satiety and sustained energy. When made with natural peanut butter, you’re getting a dose of heart-healthy monounsaturated fats. While a treat, they can be made with mindful ingredient choices for a slightly healthier spin compared to many baked desserts loaded with processed sugars and fats.
Tips Variations & Cooking Advice
- Flavor Boost: Add a pinch of sea salt to the chocolate topping for a gourmet salted caramel effect.
- Nut Butter Swap: While peanut butter is classic, feel free to use almond butter or cashew butter for a different flavor profile.
- Chocolate Experiment: Try dark chocolate chips for a richer, less sweet topping, or white chocolate for a sweeter contrast.
- Gluten-Free: Use gluten-free graham crackers or a nut-based crust (e.g., almond flour and melted butter) to make this recipe gluten-friendly.
- Vegan Option: Substitute dairy butter with a plant-based butter alternative and ensure your chocolate chips are dairy-free.
Common Mistakes to Avoid
- Not Chilling Enough: This is the most common mistake! Insufficient chilling will result in gooey, unmanageable bars. Patience is key.
- Over-Melting Chocolate: Be careful not to scorch the chocolate. Melt it gently and slowly to keep it smooth and shiny.
- Uneven Layers: Take the time to spread each layer evenly for a beautiful presentation and balanced flavor in every bite.
- Forgetting Parchment Paper: Without parchment paper, removal will be a messy and frustrating affair. Don’t skip this easy step!
Storage & Meal Prep Tips
Store leftover No-Bake Peanut Butter Bars in an airtight container in the refrigerator for up to one week. They can also be frozen for up to 2-3 months. To freeze, individually wrap each bar in plastic wrap, then place them in a freezer-safe bag or container. Thaw in the refrigerator for a few hours or at room temperature for about 30 minutes before enjoying. These are fantastic for meal prepping sweet treats for the week!
Conclusion
These No-Bake Peanut Butter Bars truly embody the perfect balance of simplicity and decadence. Their ease of preparation, combined with their irresistible flavor profile, makes them a go-to for any occasion requiring a sweet treat without the fuss of baking. We hope you’re inspired to try your hand at these simple yet spectacular No-Bake Dessert Recipes. Dive into the delicious world of no-bake, and prepare to impress yourself and your loved ones with minimal effort and maximum deliciousness!
FAQs
Q1: Can I use crunchy peanut butter instead of creamy?
A: Yes, you can! Crunchy peanut butter will add a delightful texture to your bars, though the peanut butter layer might be slightly less smooth.
Q2: My chocolate layer isn’t setting. What went wrong?
A: This usually means the bars weren’t chilled long enough. Ensure your refrigerator is cold enough and give them ample time (at least 2 hours) to firm up completely.
Q3: Can I add toppings to the chocolate layer?
A: Absolutely! Before the chocolate fully sets, sprinkle with chopped nuts, sea salt flakes, shredded coconut, or even a drizzle of caramel for extra flair.
Q4: How do I get clean cuts without cracking the chocolate?
A: The trick is to use a very sharp knife. For best results, run the knife under hot water, wipe it dry, and then make your cut. Repeat this process for each slice.
Q5: Are these suitable for school lunchboxes?
A: Yes, they are! As long as the school permits nut products, these bars are a fantastic homemade treat that holds up well. Just make sure they stay cool until lunchtime.