Unleash the Ultimate Flavor: Master the Art of the Homemade Chili Dog!
Are you ready to elevate your comfort food game to legendary status? The humble Hot Dog, when paired with a rich, savory homemade chili, transforms into an culinary masterpiece. Ditch the mediocre drive-thru versions and discover the profound satisfaction of crafting a truly exceptional Chili Dog right in your own kitchen! Beyond the unparalleled taste, preparing this classic at home allows for complete control over ingredients, catering to dietary preferences, and avoiding artificial additives. Get ready to impress your taste buds and your loved ones with this surprisingly simple yet utterly delicious recipe.
Ingredients & Kitchen Tools
- For the Chili:
* 1 tbsp Olive Oil: For sautéing aromatics and browning meat, adding a subtle richness.
* 1 lb Ground Beef (80/20 lean): The ideal fat content for flavor and texture in chili.
* 1 large Yellow Onion, finely chopped: Provides a foundational aromatic and sweetness.
* 2 cloves Garlic, minced: Essential for depth of flavor and culinary fragrance.
* 1 (14.5 oz) can Crushed Tomatoes: Forms the tangy, robust base of the chili.
* 1 (8 oz) can Tomato Sauce: Adds further body and tomato essence.
* 1 (15 oz) can Kidney Beans, drained and rinsed: Classic chili addition for texture and protein. (Optional: Black beans for variation).
* 2 tbsp Chili Powder: The cornerstone spice for authentic chili flavor.
* 1 tsp Cumin: Adds earthy warmth and complexity.
* 1/2 tsp Smoked Paprika: Contributes a smoky depth that elevates the chili.
* 1/4 tsp Cayenne Pepper: For a touch of heat; adjust to your preference.
* 1/2 tsp Salt: Enhances all flavors; adjust to taste.
* 1/4 tsp Black Pepper: A standard seasoning for balance.
* 1/2 cup Beef Broth (low sodium): Thins the chili to the desired consistency and adds umami.
* 8 all-beef Frankfurters: Quality dogs make all the difference! Choose your favorite brand.
* 8 Hot Dog Buns: Soft, fresh buns are crucial for a great eating experience.
- Optional Toppings:
* Shredded Cheddar Cheese: Melty, savory goodness.
* Diced White Onion: Adds a sharp, fresh crunch.
* Jalapeño Slices: For extra heat and a vibrant kick.
* Yellow Mustard: A classic tangy complement.
* Pickle Relish: Sweet and sour counterpoint.
- Kitchen Tools: Large skillet or Dutch oven, Wooden spoon or spatula, Measuring spoons and cups, Can opener.
Prep Time & Cooking Schedule
- Prep Time: 15 minutes (chopping vegetables, gathering ingredients).
- Cook Time (Chili): 30-45 minutes (simmering allows flavors to meld beautifully).
- Total Time: Approximately 1 hour.
The chili benefits immensely from a good simmer, so plan accordingly. If you have extra time, let the chili gently simmer for up to an hour for even deeper flavors. This also makes it a great make-ahead component for easy weeknight meals.
Step-by-Step Instructions
1. Start the Chili Base: Heat olive oil in a large skillet or Dutch oven over medium heat. Add the chopped yellow onion and cook until softened and translucent, about 5-7 minutes. Stir in the minced garlic and cook for another minute until fragrant, being careful not to burn it.
2. Brown the Beef: Add the ground beef to the skillet. Break it up with a wooden spoon and cook until fully browned, about 8-10 minutes. Drain any excess fat.
3. Build the Flavor: Stir in the chili powder, cumin, smoked paprika, cayenne pepper, salt, and black pepper. Cook for 1 minute, allowing the spices to toast and release their aromas. This step is crucial for developing deep flavor in your Chili Dog.
4. Simmer to Perfection: Pour in the crushed tomatoes, tomato sauce, beef broth, and drained kidney beans. Bring the mixture to a gentle boil, then reduce heat to low, cover, and simmer for at least 30 minutes, or up to an hour, stirring occasionally. The longer it simmers, the richer the flavor becomes. Taste and adjust seasonings as needed.
5. Prepare the Hot Dogs: While the chili simmers, prepare your hot dogs. You can grill, pan-fry, boil, or even air-fry them until heated through and slightly browned. Simultaneously, lightly toast your hot dog buns for an even better texture.
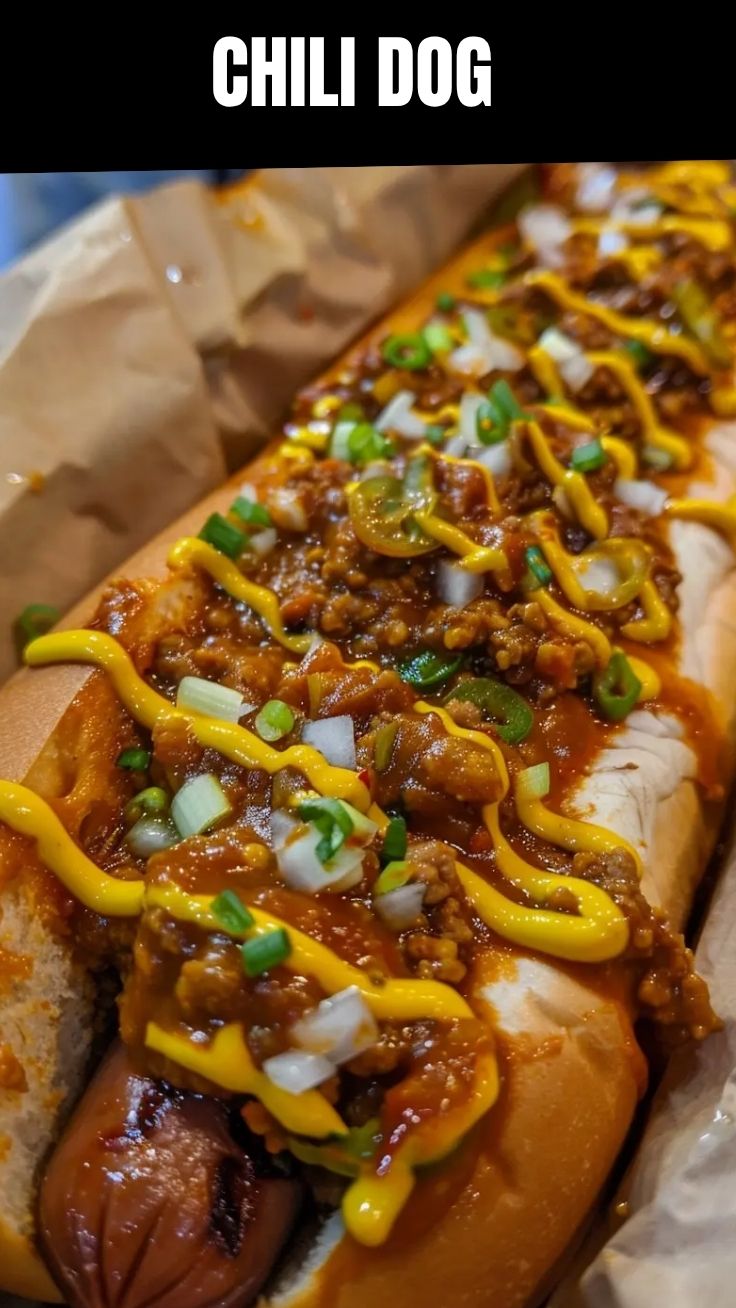
6. Assemble and Serve: Place a cooked hot dog into each toasted bun. Spoon a generous amount of hot chili over the hot dog. Top with your favorite optional toppings like shredded cheese, diced onions, or a squirt of mustard. Enjoy your homemade masterpiece!
Nutritional Benefits & Advantages
This homemade Chili Dog recipe, especially when made with lean ground beef and plenty of vegetables like onions and tomatoes, offers a good source of protein, essential for muscle repair and growth. The kidney beans contribute fiber, which aids digestion and promotes satiety. Cooking at home allows you to control sodium levels and avoid the high-fructose corn syrup and artificial preservatives often found in store-bought chili. Plus, making it from scratch means you’re adding vital antioxidants from the fresh tomatoes and beneficial spices like cumin, which has anti-inflammatory properties.
Tips, Variations & Cooking Advice
- Spicy Kick: For more heat, increase the cayenne pepper or add a dash of your favorite hot sauce to the chili.
- Vegetarian Option: Omit the ground beef and double the beans, adding lentils or a plant-based ground substitute for a delicious vegetarian chili.
- Slow Cooker Chili: You can prepare the chili in a slow cooker! After browning the beef and sautéing aromatics, transfer everything to your slow cooker and cook on low for 4-6 hours or high for 2-3 hours.
- Different Beans: Experiment with black beans or pinto beans instead of kidney beans for a different texture and flavor profile.
- Cheese Blends: Instead of just cheddar, try a Mexican blend or Monterey Jack for a creamier melt.
Common Mistakes to Avoid
- Under-Simmering the Chili: Rushing the simmer time means less developed flavors. Give it at least 30 minutes for the spices to meld.
- Not Draining Fat: Excess fat from the ground beef can make the chili greasy. Always drain off the fat after browning.
- Overcooking Hot Dogs: Overcooked frankfurters become tough and less flavorful. Cook just until heated through and lightly browned.
- Skipping Toasted Buns: A cold, untoasted bun can make the whole experience feel less premium. A quick toast elevates the texture.
Storage & Meal Prep Tips
Leftover chili can be stored in an airtight container in the refrigerator for up to 3-4 days. It actually tastes even better the next day as the flavors deepen! For longer storage, freeze the chili in freezer-safe containers or bags for up to 3 months. Thaw overnight in the refrigerator before reheating gently on the stovetop or in the microwave, adding a splash of beef broth if it’s too thick. Avoid freezing cooked Hot Dogs in their buns, as they tend to become soggy and unappetizing.
Conclusion
There you have it – the definitive guide to crafting a show-stopping homemade Chili Dog. With rich, savory chili and perfectly cooked frankfurters nestled in a soft bun, this recipe proves that classic comfort food can be both easy to make and incredibly rewarding. So gather your ingredients, follow these steps, and prepare to savor the best Chili Dog you’ve ever had. Don’t be afraid to experiment with toppings and make this iconic dish truly your own. Share your creations and let us know your favorite ways to enjoy a gourmet Hot Dog in the comments below!
FAQs
Q1: Can I make the chili ahead of time?
A1: Absolutely! The chili can be made up to 3-4 days in advance and stored in the refrigerator. In fact, many believe the flavor improves after a day or two.
Q2: What’s the best way to cook the Hot Dogs?
A2: For optimal flavor and texture, grilling or pan-frying your hot dogs is recommended. This creates a nice char and snap. Boiling is faster but results in a less robust flavor.
Q3: How can I make this Chili Dog recipe healthier?
A3: Use extra-lean ground beef or a plant-based alternative. Load up on extra vegetables in the chili, and opt for whole wheat buns if you prefer. You can also reduce the amount of cheese used as a topping.
Q4: My chili is too thin/thick. How can I fix it?
A4: If your chili is too thin, simmer it uncovered for a bit longer to allow some liquid to evaporate. If it’s too thick, add small amounts of beef broth or water until it reaches your desired consistency.