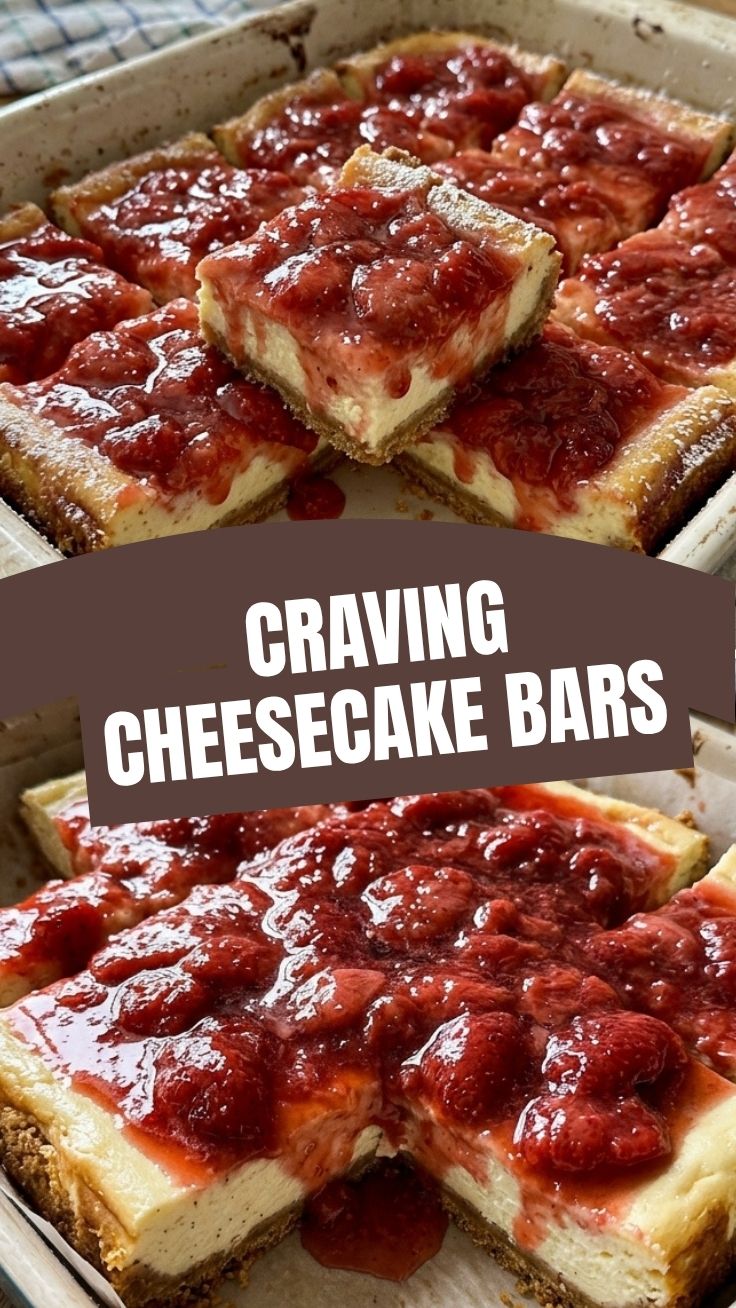
Indulge in Bliss: Crafting the Perfect Strawberry Cheesecake Bars at Home!
Ever wondered if you could recreate that divine, creamy, and fruity dessert experience right in your own kitchen? The answer is a resounding yes! Forget store-bought imitations; making this delectable Strawberry Cheesecake Bars recipe at home isn’t just about saving money, it’s about the joy of creating something truly special, tailored to your exact preferences. Imagine the aroma filling your home and the satisfaction of biting into a treat you’ve lovingly prepared. This comprehensive guide will equip you with everything you need to master these exquisite cheesecake bars, ensuring a perfect outcome every time. You’ll be delighted by how simple it is to achieve bakery-quality strawberry cheesecake bars.
Ingredients & Kitchen Tools
Here’s what you’ll need to create these irresistible treats:
- For the Crust:
* 2 cups Graham cracker crumbs: About 1 sleeve of graham crackers, finely crushed. Provides a sweet, buttery base.
* 1/2 cup (1 stick) unsalted butter, melted: Binds the crumbs together for a sturdy crust.
* 1/4 cup granulated sugar: Enhances the sweetness of the crust.
- For the Cheesecake Filling:
* 2 (8-ounce) blocks cream cheese, softened: Full-fat cream cheese yields the creamiest texture. Crucial for the rich cheesecake flavor.
* 1 cup granulated sugar: Sweetens the cheesecake to perfection.
* 2 large eggs, at room temperature: Adds richness and helps set the cheesecake.
* 1 teaspoon vanilla extract: Pure vanilla extract elevates the flavor profile.
* 1/4 cup sour cream or Greek yogurt: Adds a subtle tang and contributes to a smooth, creamy filling.
* 1/4 cup all-purpose flour: Helps prevent cracking and provides a slightly firmer texture.
- For the Strawberry Topping:
* 2 cups fresh strawberries, hulled and sliced: Choose ripe, flavorful berries for the best topping. Can also use frozen, thawed berries.
* 1/4 cup granulated sugar: Sweetens the strawberry topping.
* 1 tablespoon lemon juice: Brightens the flavor and acts as a natural preservative.
* 1 tablespoon cornstarch (mixed with 2 tablespoons cold water): Thickens the strawberry sauce.
- Kitchen Tools:
* 9×13-inch baking pan: For baking the bars. A light-colored pan prevents over-browning.
* Parchment paper: To line the pan for easy removal.
* Large mixing bowls: For preparing the crust and filling.
* Electric mixer (stand or hand-held): Essential for achieving a smooth, lump-free cheesecake filling.
* Rubber spatula: For scraping bowls and spreading ingredients.
* Saucepan: For preparing the strawberry topping.
* Measuring cups and spoons: For accurate ingredient measurements.
Prep Time & Cooking Schedule
- Prep Time: 30 minutes
- Bake Time: 45-55 minutes
- Chilling Time: Minimum 4 hours (preferably overnight)
Plan ahead! The chilling time is crucial for the cheesecake to set properly, ensuring clean slices and optimal texture. Start these Strawberry Cheesecake Bars in the morning for an evening dessert, or even the day before for ultimate convenience.
Step-by-Step Instructions
Follow these detailed steps to create your perfect Strawberry Cheesecake Bars:
1. Prepare the Crust: Preheat your oven to 350°F (175°C). Line a 9×13-inch baking pan with parchment paper, leaving an overhang on the sides for easy removal. In a medium bowl, combine the graham cracker crumbs, melted butter, and 1/4 cup granulated sugar. Press the mixture firmly and evenly into the bottom of the prepared pan. Bake for 10 minutes until lightly golden. Remove from oven and let cool slightly while you prepare the filling.
2. Make the Cheesecake Filling: In a large mixing bowl, using an electric mixer, beat the softened cream cheese until smooth and creamy. Gradually add 1 cup of granulated sugar and beat until well combined. Beat in the eggs one at a time, just until incorporated – do not overmix. Stir in the vanilla extract, sour cream (or Greek yogurt), and all-purpose flour until just combined and smooth. Overmixing eggs can introduce too much air, leading to cracks.
3. Bake the Cheesecake: Pour the cheesecake filling evenly over the cooled crust. Gently tap the pan on the counter a few times to release any air bubbles. Bake for 45-55 minutes, or until the edges are set and a 2-inch circle in the center still jiggles slightly when gently shaken. The internal temperature for a perfectly baked cheesecake should be around 150°F-155°F (65°C-68°C).
4. Cool and Chill: Turn off the oven, crack the door open slightly, and let the cheesecake cool gradually in the oven for 30 minutes. This helps prevent cracking. Remove from the oven and let cool completely on a wire rack at room temperature. Once completely cool, cover loosely with plastic wrap and refrigerate for at least 4 hours, or preferably overnight, to allow the cheesecake to firm up properly. A well-chilled cheesecake is key for neat cheesecake bars.
5. Prepare the Strawberry Topping: In a medium saucepan, combine the sliced strawberries, 1/4 cup granulated sugar, and lemon juice. Cook over medium heat, stirring occasionally, until the strawberries soften and release their juices, about 5-7 minutes. In a small bowl, whisk together the cornstarch and cold water until smooth, then stir into the strawberry mixture. Bring to a gentle simmer and cook, stirring constantly, until the sauce thickens, about 1-2 minutes. Remove from heat and let cool completely before spreading over the chilled cheesecake.
6. Assemble and Serve: Once the cheesecake is thoroughly chilled and the strawberry topping is cool, carefully lift the cheesecake out of the pan using the parchment paper overhang. Spread the strawberry topping evenly over the cheesecake. Slice into bars using a sharp, warm knife (run under hot water and wipe dry between cuts for the cleanest slices). Serve immediately and enjoy your homemade cheesecake bars!
Nutritional Benefits & Advantages
These Strawberry Cheesecake Bars offer more than just exquisite taste. Strawberries are a fantastic source of Vitamin C, antioxidants, and fiber, contributing to immune health and digestion. While a dessert, the cream cheese provides some calcium and protein. By making them at home, you control the quality of ingredients, opting for natural sugars and fresh fruits, avoiding artificial flavors and preservatives often found in commercial versions.
Tips, Variations & Cooking Advice
- Flavor Variations:
* Lemon Zest: Add 1-2 tablespoons of lemon zest to the cheesecake filling for a brighter, more citrusy flavor.
* Chocolate Swirl: Melt 1/2 cup of chocolate chips and drizzle over the cheesecake filling just before baking, then swirl with a knife.
* Different Fruit Toppings: Replace strawberries with blueberries, raspberries, or a mix of berries for a different fruit profile.
- Ingredient Swaps:
* Gluten-Free: Use gluten-free graham cracker crumbs for the crust.
* Reduced Sugar: You can slightly reduce the sugar in both the crust and filling if you prefer a less sweet dessert, but remember it affects texture.
- Crust Alternatives: Use crushed shortbread cookies or even an oat-based crumble for a different crust texture.
- Achieving a Smooth Filling: Ensure your cream cheese is completely softened to room temperature to prevent lumps. Scrape down the sides of the bowl frequently while mixing.
Common Mistakes to Avoid
- Overmixing the Cheesecake Filling: This incorporates too much air, leading to cracks as the cheesecake cools. Mix just until combined.
- Opening the Oven Door Too Early: Drastic temperature changes can cause the cheesecake to crack. Allow it to cool gradually in the oven.
- Not Chilling Long Enough: Impatience will result in crumbly, messy slices. Allow at least 4 hours, or ideally overnight, for the cheesecake to firm up properly.
- Using Cold Eggs/Cream Cheese: These won’t combine properly, leading to a lumpy filling. Ensure all dairy and eggs are at room temperature.
- Overbaking: An overbaked cheesecake will be dry and rubbery. Bake until the edges are set and the center still has a slight jiggle.
Storage & Meal Prep Tips
Store leftover Strawberry Cheesecake Bars in an airtight container in the refrigerator for up to 3-5 days. For longer storage, freeze individual bars wrapped tightly in plastic wrap and then aluminum foil for up to 1-2 months. Thaw frozen bars in the refrigerator overnight before serving. Do not store the topping separately if already assembled; it’s best to top just before serving if you’re making a large batch to extend freshness.
Conclusion
There you have it – a comprehensive guide to creating truly spectacular Strawberry Cheesecake Bars right in your own kitchen! The satisfaction of baking these delightful treats, customizing them to your taste, and sharing them with loved ones is unmatched. These creamy, dreamy cheesecake bars are guaranteed to impress, whether for a special occasion or a simple weeknight indulgence. Don’t hesitate to give this recipe a try; you’ll be amazed at your culinary prowess! Share your creations in the comments below!
FAQs
Q1: Can I use frozen strawberries for the topping?
A1: Yes, you can! Thaw them completely and drain any excess liquid before using them in the recipe. The cooking time might be slightly shorter.
Q2: My cheesecake cracked. What went wrong?
A2: Common causes of cracking include overmixing the batter, overbaking, or cooling the cheesecake too quickly (sudden temperature changes). Try cooling gradually in the oven with the door ajar.
Q3: How can I make these bars dairy-free?
A3: Use dairy-free cream cheese alternatives and a plant-based butter for the crust. Ensure your graham crackers are also dairy-free.
Q4: Can I bake this as a full cheesecake instead of bars?
A4: Yes, you can. You’ll need a springform pan (9-inch or 10-inch) and the baking time will be longer, likely 60-75 minutes. A water bath is also recommended for whole cheesecakes to prevent cracking.