The Ultimate Guide to Crafting the Perfect Summer Berry Trifle
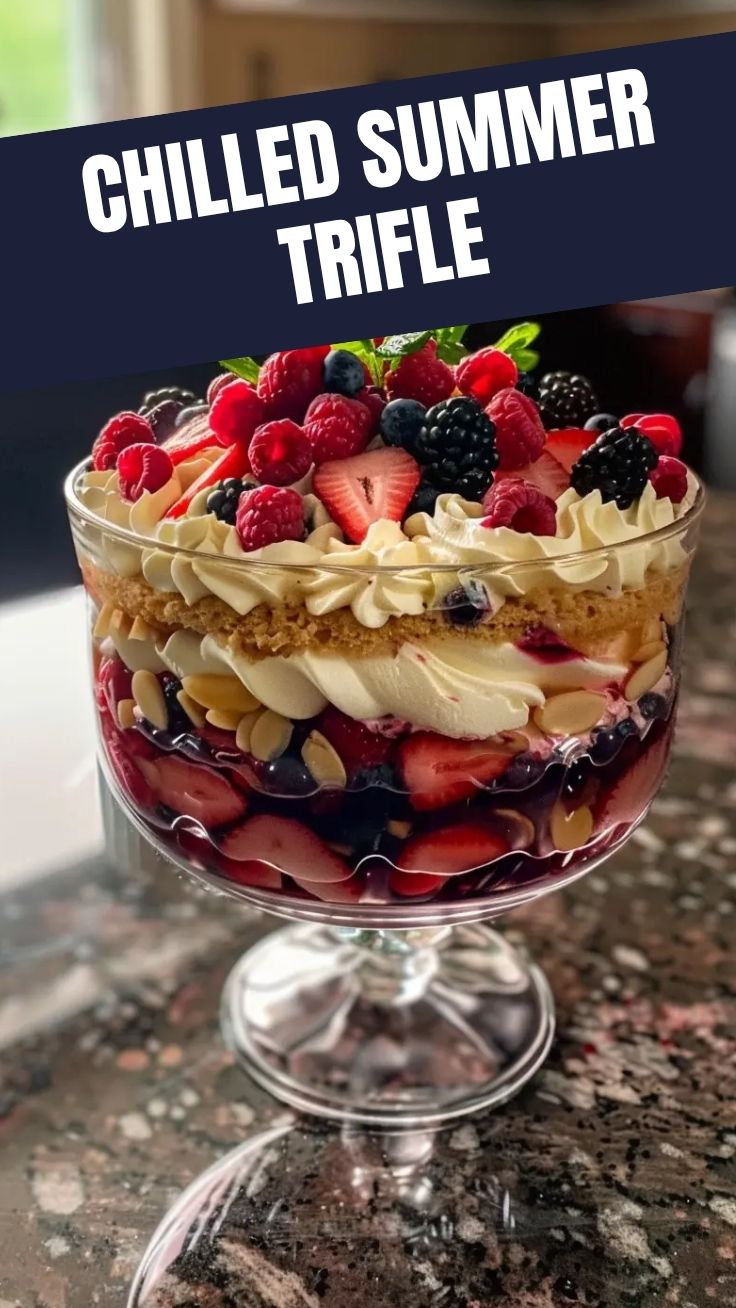
Ever wondered how to capture sunshine in a dessert? Look no further than this delightful Summer Berry Trifle! Preparing this vibrant, layered creation at home isn’t just about making a sweet treat; it’s about curating an experience – a symphony of fresh berries, delicate cream, and soft cake that transports you to a summer picnic with every spoonful. This trifecta of textures and flavors is surprisingly simple to assemble, offering a rewarding culinary adventure for even novice bakers. If you’re searching for impressive Dessert Recipes that are both beautiful and delicious, this trifle is an absolute must-try.
Ingredients & Kitchen Tools
Gathering your mise en place is the first step to a flawless dessert. Here’s what you’ll need:
- 1 lb fresh mixed berries (strawberries, blueberries, raspberries): Washed, hulled, and sliced if large. These provide burst of natural sweetness and vibrant color.
- 1 (10.75-ounce) pound cake (store-bought or homemade): Sliced into 1/2-inch thick pieces. The foundation of our trifle, absorbing flavors beautifully.
- 1 (3.4-ounce) package instant vanilla pudding mix: Prepared according to package directions, then chilled. Creates a smooth and creamy layer.
- 2 cups heavy whipping cream: Chilled. Whipped to perfection for an airy topping.
- 1/2 cup granulated sugar: For sweetening the whipped cream. Adjust to your preference.
- 1 tsp vanilla extract: Enhances the flavor of whipped cream and pudding.
- Large glass trifle dish (3-4 quarts): The star of the show for showcasing those beautiful layers.
- Electric mixer or stand mixer: For whipping cream effortlessly.
- Mixing bowls: Various sizes for preparing pudding and cream.
- Spatula: For spreading layers evenly.
- Sharp knife & cutting board: For slicing cake and berries.
Prep Time & Cooking Schedule
Good things take time, but this trifle minimizes the fuss!
- Prep Time: 25 minutes (includes washing berries and slicing cake).
- Chill Time: 30 minutes (for prepared pudding).
- Assembly Time: 15-20 minutes.
- Total Time: Approximately 1 hour 15 minutes.
Plan to prepare your pudding at least 30 minutes in advance to allow it to set properly. Once assembled, the trifle benefits from marrying in the refrigerator for at least 1 hour, or up to 4 hours, allowing the flavors to meld beautifully.
Step-by-Step Instructions
Let’s build this edible masterpiece!
1. Prepare the Pudding: In a medium bowl, whisk the instant vanilla pudding mix with the amount of cold milk specified on the package. Whisk for 2 minutes until thickened. Cover and refrigerate for at least 30 minutes to allow it to set firmly.
2. Make the Whipped Cream: In a large, chilled mixing bowl, combine the cold heavy whipping cream, granulated sugar, and vanilla extract. Beat with an electric mixer on medium-high speed until stiff peaks form (the cream should hold its shape and not collapse). Be careful not to overbeat, or it will become grainy.
3. Prepare Cake and Berries: While the pudding chills, wash, hull, and slice your fresh mixed berries. Slice the pound cake into 1/2-inch thick pieces. You can cut these into cubes or leave them as slices, depending on your preferred aesthetic.
4. First Layer – Cake: Arrange about one-third of the pound cake slices at the bottom of your trifle dish, covering the base. Don’t worry if there are small gaps; they will be filled by other layers. This forms the absorbent foundation for our Summer Berry Trifle.
5. Second Layer – Berries: Spread about one-third of the mixed berries over the cake layer.
6. Third Layer – Pudding: Carefully spoon about one-third of the chilled vanilla pudding over the berries, spreading it gently to create an even layer.
7. Fourth Layer – Whipped Cream: Dollop one-quarter of the whipped cream over the pudding layer and gently spread it out.
8. Repeat Layers: Continue layering in the same order: cake, berries, pudding, whipped cream. Repeat this sequence until you have used all ingredients, ending with a generous layer of whipped cream on top. When considering Dessert Recipes, the visual appeal of these layers is key!
9. Chill: Cover the trifle with plastic wrap and refrigerate for at least 1 hour before serving. This allows the flavors to meld and the cake to soften slightly from the pudding.
Nutritional Benefits & Advantages
This Summer Berry Trifle isn’t just a treat for the taste buds; it offers some wholesome advantages too! Fresh berries are packed with antioxidants, vitamins (especially Vitamin C), and fiber, contributing to overall health and aiding digestion. While it’s a dessert, the inclusion of substantial fruit layers adds important nutrients. The dairy from the pudding and whipped cream provides calcium, essential for bone health. Moderate portions allow for enjoyment without overindulging, making it a more balanced sweet option compared to some richer, flour-heavy Dessert Recipes.
Tips, Variations & Cooking Advice
- Liqueur Boost: For an adult twist, lightly brush the pound cake slices with a fruit liqueur like Chambord or Cointreau before layering.
- Cream Cheese Whipped Cream: For a richer, tangier cream layer, beat 4 oz softened cream cheese with the heavy cream, sugar, and vanilla.
- Lemon Zest: Add a teaspoon of lemon zest to the pudding or whipped cream for a bright, citrusy note that complements the berries.
- Gluten-Free: Use a gluten-free pound cake or ladyfingers. Ensure your pudding mix is also gluten-free.
- Dairy-Free: Swap dairy milk for a non-dairy alternative in the pudding, and use a coconut cream or other non-dairy whipped topping.
- Chocolate Lovers: Alternate layers with chocolate pudding or sprinkle mini chocolate chips between fruit layers.
Common Mistakes to Avoid
- Warm Pudding: Ensure your pudding is thoroughly chilled and set before layering. Warm pudding will lead to a soupy trifle.
- Overbeating Cream: Whipped cream goes from perfectly stiff to grainy butter quickly. Watch it closely and stop as soon as stiff peaks form.
- Soggy Cake: While some moisture is good, don’t drench the cake in liquids (unless using a deliberate liqueur). The layers should be distinct initially.
- Not Chilling Long Enough: The trifle needs time in the fridge for flavors to blend and layers to firm up slightly. Patience is key!
Storage & Meal Prep Tips
This Summer Berry Trifle tastes best when enjoyed fresh, within 2-3 days. Cover it tightly with plastic wrap and store it in the refrigerator. The cake will become softer over time as it absorbs moisture from the other layers. We don’t recommend freezing a fully assembled trifle, as the textures of the fresh berries and whipped cream can degrade upon thawing, becoming watery or mealy. For meal prep, you can prepare the pudding and whip the cream a day in advance, storing them separately in the fridge. Slice your cake and berries just before assembly for ultimate freshness.
Conclusion
Creating a vibrant Summer Berry Trifle at home is a truly rewarding experience, resulting in a dessert that’s as beautiful to behold as it is delicious to eat. This layered marvel, with its fresh berries, creamy pudding, and delicate cake, is the perfect showstopper for any gathering. By following these simple steps and tips, you’re well on your way to mastering one of the most delightful Dessert Recipes out there. We encourage you to try this recipe, experiment with your favorite fruit combinations, and share your stunning creations with us!
FAQs
Q1: Can I use frozen berries instead of fresh?
A1: While fresh berries are ideal for their texture and vibrant appearance, you can use frozen berries if thawed and drained thoroughly to prevent excess moisture from making the trifle soggy.
Q2: How far in advance can I make this trifle?
A2: For optimal freshness and texture, assemble the trifle no more than 4-6 hours before serving. You can prepare individual components (pudding, whipped cream) a day in advance.
Q3: What if I don’t have a trifle dish?
A3: A large clear glass bowl or even individual clear glasses can work beautifully. The key is to use a transparent container to showcase the lovely layers.
Q4: Can I use a different type of cake?
A4: Absolutely! Angel food cake, sponge cake, or even shortcake biscuits can be excellent substitutes for pound cake, offering slight variations in texture and flavor.
Q5: How can I adjust the sweetness?
A5: You can reduce the sugar in the whipped cream or choose a less sweet pudding mix. The natural sweetness of ripe berries also plays a big role, so choose them wisely!