From Scratch to Sensation: Crafting the Ultimate Chicken Pot Pie
Ever wonder what true comfort tastes like? It’s a golden, flaky crust embracing a creamy, savory filling – a culinary hug in a bowl. While store-bought options exist, nothing quite compares to the rich aroma and satisfying texture of a homemade Chicken Pot Pie. Preparing this classic dish at home not only allows you to control the quality of your ingredients but also infuses it with a personal touch that elevates a simple meal into a memorable experience. This isn’t just about food; it’s about creating warmth and deliciousness from your own kitchen. And let me tell you, perfecting your very own Chicken Pot Pie Recipe is a journey worth savoring.
Ingredients & Kitchen Tools
To embark on this delightful culinary adventure, gather the following:
For the Filling:
- 2 tbsp unsalted butter: Essential for sautéing and building a rich base.
- 1 medium yellow onion, chopped: Adds aromatic depth.
- 2 carrots, peeled and diced: Contributes sweetness and texture.
- 2 celery stalks, diced: Provides a subtle, earthy flavor.
- 1 cup frozen peas: For a pop of vibrant color and sweetness (no need to thaw).
- 1 cup frozen corn: Another colorful and sweet addition (no need to thaw).
- ½ cup all-purpose flour: The thickening agent for our creamy sauce.
- 2 cups chicken broth (low sodium preferred): The liquid base for the sauce.
- 1 cup whole milk: Adds creaminess and richness.
- 2 cups cooked chicken, shredded or cubed: Leftover rotisserie chicken works wonderfully here for convenience.
- ½ tsp dried thyme: Classic herb for a savory profile.
- ¼ tsp black pepper: Essential seasoning.
- ½ tsp salt (or to taste): Adjust according to your preference and broth sodium level.
For the Crust:
- 2 sheets refrigerated pie crust: The easiest option for a quick and delicious pie. Alternatively, you can make your own.
Kitchen Tools:
- Large skillet or Dutch oven: For cooking the filling.
- 9-inch pie dish: The vessel for your glorious pie.
- Whisk: For smooth sauce consistency.
- Measuring cups and spoons: For precise ingredient amounts.
- Cutting board and knife: For prepping vegetables.
- Rolling pin (if making homemade crust): For even dough.
Prep Time & Cooking Schedule
- Prep Time: 20 minutes (assuming pre-cooked chicken).
- Cook Time: 30-35 minutes.
- Resting Time: 10 minutes (after baking, to allow the filling to set and prevent spills).
This recipe is designed to be a relatively quick weeknight meal if you utilize pre-cooked chicken. If you’re cooking chicken from scratch, factor in an additional 20-30 minutes for boiling or roasting.
Step-by-Step Instructions
1. Sauté Aromatics: In a large skillet or Dutch oven over medium heat, melt the butter. Add the chopped onion, carrots, and celery. Sauté for 5-7 minutes, until the vegetables are softened.
2. Thicken the Base: Sprinkle the flour over the softened vegetables. Cook, stirring constantly, for 1-2 minutes to create a roux. This helps eliminate the raw flour taste.
3. Build the Sauce: Gradually whisk in the chicken broth and then the milk, ensuring no lumps form. Bring the mixture to a gentle simmer, stirring frequently, until the sauce thickens to your desired consistency (usually 5-7 minutes).
4. Combine Ingredients: Stir in the cooked chicken, frozen peas, frozen corn, dried thyme, black pepper, and salt. Taste and adjust seasonings as needed. This flavorful Chicken Pot Pie filling is now ready!
5. Assemble the Pie: Preheat your oven to 400°F (200°C). Carefully unroll one pie crust and fit it into your 9-inch pie dish. Pour the warm chicken filling evenly into the crust.
6. Top and Seal: Place the second pie crust over the filling. Trim any excess dough from the edges and crimp the edges together to seal the pie. Cut a few slits in the top crust to allow steam to escape during baking. For a golden finish, you can brush the top with an egg wash (1 egg beaten with 1 tbsp water).
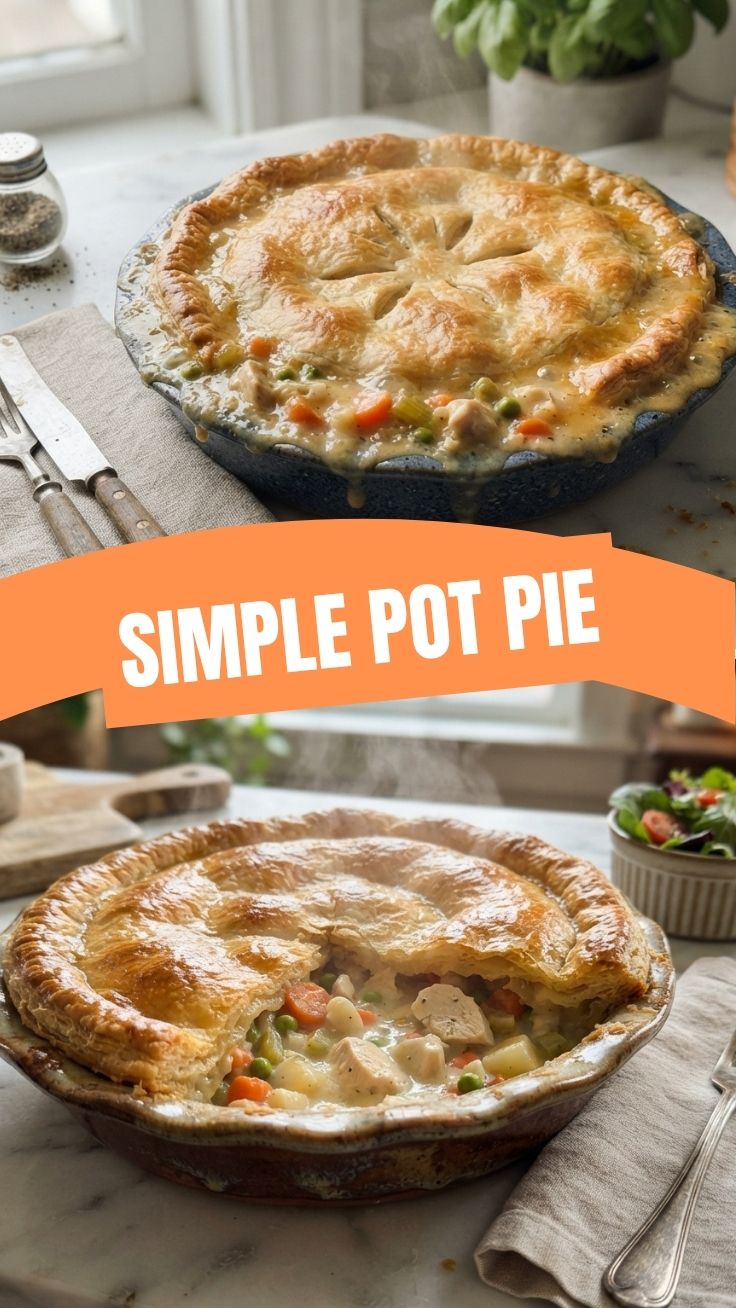
7. Bake to Perfection: Bake for 30-35 minutes, or until the crust is golden brown and the filling is bubbly. The perfect Chicken Pot Pie Recipe is just a bake away!
8. Rest and Serve: Let the pie rest for at least 10 minutes before slicing and serving. This allows the filling to set and prevents it from being too runny.
Nutritional Benefits & Advantages
This homemade Chicken Pot Pie offers a balanced meal. Chicken provides lean protein, essential for muscle repair and growth. The medley of vegetables – carrots, celery, peas, and corn – contributes a significant amount of vitamins, minerals, and dietary fiber, promoting digestive health and overall well-being. Using low-sodium broth and controlling the salt content allows for a healthier alternative to many pre-made versions.
Tips, Variations & Cooking Advice
- Homemade Crust: For an even more authentic experience, try your hand at a homemade flaky pie crust. It’s worth the effort!
- Vegetable Swap: Feel free to experiment with other vegetables like diced potatoes, green beans, mushrooms, or even spinach.
- Herb Power: Add a bay leaf to the filling while simmering and remove before assembling for extra depth. Fresh parsley or sage can also be lovely additions.
- Creamier Texture: For an extra rich filling, substitute half-and-half or heavy cream for a portion of the whole milk.
- Individual Portions: Use ramekins or muffin tins for individual mini pot pies. Adjust baking time accordingly (around 20-25 minutes).
- Gluten-Free: Use a gluten-free pie crust and gluten-free all-purpose flour for the roux.
Common Mistakes to Avoid
- Under-seasoning: Always taste the filling before putting it in the pie dish and adjust salt and pepper.
- Overfilling: Don’t overfill the pie dish, as it can bubble over during baking and make a mess.
- Skipping the Vents: Cutting slits in the top crust is crucial for steam to escape, preventing a soggy crust or an explosion of filling.
- Cutting Too Soon: Patience is key! Letting the pie rest for 10 minutes allows the filling to set, making for cleaner slices.
Storage & Meal Prep Tips
Leftover Chicken Pot Pie can be stored in an airtight container in the refrigerator for up to 3-4 days. To reheat, cover loosely with foil and bake in a preheated oven at 350°F (175°C) until warmed through (about 20-30 minutes), or microwave individual slices, though the crust may lose some crispness. You can also freeze individual slices or the entire pie (unbaked or baked). If freezing unbaked, cover tightly with foil and plastic wrap; bake from frozen at 375°F (190°C) for 60-75 minutes, or until golden and bubbly.
Conclusion
There’s truly nothing quite like the comforting embrace of a homemade Chicken Pot Pie. From its golden, flaky crust to its rich, savory filling, it’s a dish that warms the soul and satisfies the palate. We hope this comprehensive guide inspires you to create your own masterpiece. Whether you’re a seasoned chef or a kitchen novice, mastering this Chicken Pot Pie Recipe is a rewarding experience that will bring joy to your table. So, roll up your sleeves, gather your ingredients, and prepare to delight your taste buds! Share your creations with us – we love seeing your culinary triumphs!
FAQs
Q1: Can I use different types of meat?
A1: Absolutely! Turkey (especially leftover Thanksgiving turkey) is a fantastic substitute for chicken. You could also use diced ham or even a vegetarian protein like chickpeas or firm tofu.
Q2: My pie crust is browning too quickly. What should I do?
A2: If your crust starts to brown before the filling is fully heated, loosely tent the pie with aluminum foil for the remainder of the baking time.
Q3: How can I make the filling thicker?
A3: If your filling isn’t as thick as you’d like, you can cook it on the stovetop for a few extra minutes before assembling the pie. Alternatively, mix a tablespoon of cornstarch with a tablespoon of cold water, and slowly whisk it into the simmering filling until it thickens.
Q4: Can I prepare the filling ahead of time?
A4: Yes! You can prepare the filling up to 2 days in advance and store it in an airtight container in the refrigerator. When you’re ready to bake, simply warm it gently on the stovetop before assembling the pie.
Q5: What’s the best way to get a perfectly flaky crust?
A5: For a truly flaky crust (especially if making your own), ensure your butter is very cold and work quickly to avoid overworking the dough. Many find success with using half butter and half shortening for extra flakiness.