Master Homemade Crispy Breadsticks: Your Guide to Bakery-Quality Snacking!
Ever wished you could recreate those irresistible, crunchy Breadsticks from your favorite Italian restaurant right in your own kitchen? That satisfying snap, the savory aroma, and the perfect balance of seasoning can elevate any meal or stand alone as a delightful snack. While store-bought options exist, nothing beats the fresh, warm taste of homemade. This comprehensive guide will walk you through crafting your own perfect Breadsticks from scratch, transforming simple ingredients into a culinary masterpiece. We’ll even explore how to infuse them with rich garlic flavor, turning them into delectable Garlic breadsticks that will have everyone reaching for more. Get ready to impress your family and friends with these surprisingly easy-to-make, bakery-quality treats!
Ingredients & Kitchen Tools
Crafting the perfect Breadsticks requires a few key ingredients and tools. Here’s what you’ll need:
Ingredients:
- All-Purpose Flour (3 cups): The base for our dough, providing structure and texture.
- Active Dry Yeast (2 ¼ teaspoons): The leavening agent that makes our breadsticks light and airy.
- Warm Water (1 cup, 105-115°F / 40-46°C): Activates the yeast. Too hot will kill it, too cold won’t activate it.
- Granulated Sugar (1 teaspoon): Feeds the yeast, aiding in its activation.
- Salt (1 teaspoon): Enhances flavor and controls yeast activity.
- Olive Oil (2 tablespoons + extra for brushing): Adds richness to the dough and helps with crispness.
- Garlic Powder (1 teaspoon, optional): For making savory Garlic breadsticks.
- Dried Oregano or Italian Seasoning (1 teaspoon, optional): Adds aromatic depth.
- Parmesan Cheese (¼ cup, grated, optional): For a cheesy topping.
Kitchen Tools:
- Large Mixing Bowl: For combining and kneading the dough.
- Measuring Cups and Spoons: For accurate ingredient measurements.
- Whisk: To combine dry ingredients.
- Dough Scraper or Spatula: For handling sticky dough.
- Clean Kitchen Towel or Plastic Wrap: For covering the dough during rising.
- Baking Sheets: To bake the breadsticks.
- Parchment Paper: Prevents sticking and makes cleanup easier.
- Rolling Pin: To shape the dough.
- Pizza Cutter or Knife: For cutting the breadsticks.
- Pastry Brush: For brushing with olive oil.
Prep Time & Cooking Schedule
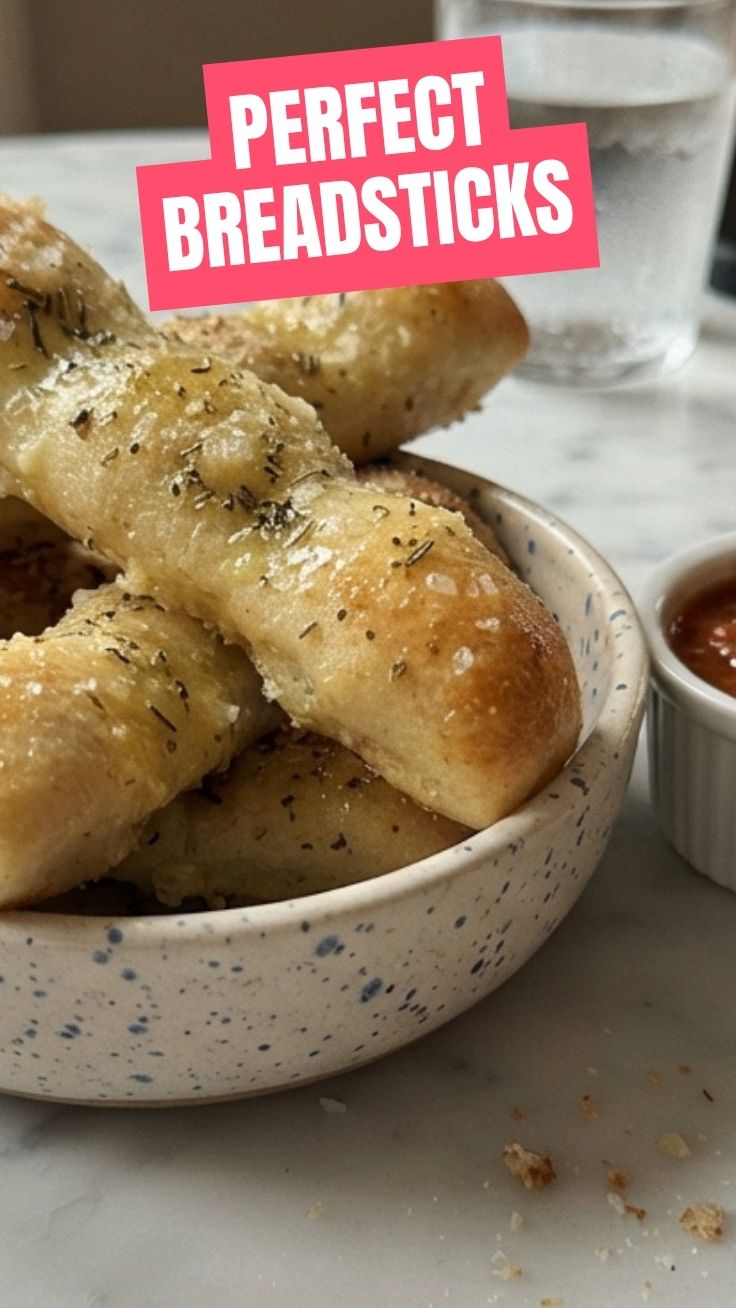
Planning is key for perfect homemade Breadsticks. Here’s a breakdown to help you schedule your baking:
- Prep Time: 20 minutes (active dough preparation)
- First Rise Time: 60-90 minutes (until doubled in size)
- Shaping Time: 15-20 minutes
- Second Rise Time: 20-30 minutes
- Bake Time: 15-20 minutes
- Total Time: Approximately 2 hours 30 minutes to 3 hours 30 minutes
The rising times are crucial; ensure your kitchen is warm enough to promote yeast activity. Don’t rush these steps, as proper rising contributes significantly to the final texture.
Step-by-Step Instructions
Follow these clear, step-by-step directions to create your perfect Breadsticks:
1. Activate the Yeast: In your large mixing bowl, combine the warm water, sugar, and yeast. Stir gently and let it sit for 5-10 minutes until foamy. This indicates the yeast is active.
2. Combine Dry Ingredients: Whisk together the flour and salt in a separate bowl. If making Garlic breadsticks, add the garlic powder and dried herbs to the flour mixture now.
3. Form the Dough: Add 2 tablespoons of olive oil to the activated yeast mixture. Gradually add the flour mixture to the wet ingredients, mixing until a shaggy dough forms.
4. Knead the Dough: Transfer the dough to a lightly floured surface and knead for 5-7 minutes until it’s smooth and elastic. The dough should spring back when lightly pressed.
5. First Rise: Lightly grease the mixing bowl with olive oil. Place the dough in the bowl, turning once to coat. Cover with a clean kitchen towel or plastic wrap and let it rise in a warm place for 60-90 minutes, or until it has doubled in size.
6. Preheat Oven & Prepare Baking Sheets: While the dough is on its second rise, preheat your oven to 400°F (200°C). Line two baking sheets with parchment paper.
7. Shape the Breadsticks: Gently punch down the risen dough to release air. Divide the dough into two equal portions. Roll each portion into a rectangle, about ¼-inch thick. Using a pizza cutter or knife, cut the dough into long strips, about ½-inch wide.
8. Second Rise: Arrange the strips on the prepared baking sheets, leaving a little space between each. Cover loosely and let them rise for another 20-30 minutes.
9. Bake: Lightly brush the tops of the Breadsticks with olive oil. If desired, sprinkle with extra salt, Parmesan cheese, or more garlic powder for an enhanced Garlic breadsticks flavor. Bake for 15-20 minutes, or until golden brown and crispy.
10. Cool: Transfer the baked breadsticks to a wire rack to cool slightly before serving.
Nutritional Benefits & Advantages
Homemade Breadsticks offer several nutritional advantages over their store-bought counterparts. By making them yourself, you control the ingredients, reducing preservatives, excess sodium, and unhealthy fats. They provide complex carbohydrates for sustained energy and, when made with whole wheat flour (an optional variation), can boost fiber intake, aiding digestion. Olive oil contributes healthy monounsaturated fats. When infused with garlic, they also offer the potential health benefits of allicin, an antioxidant found in garlic. These are a satisfying snack or accompaniment that can be part of a balanced diet when enjoyed in moderation.
Tips, Variations & Cooking Advice
- Herb Power: Experiment with different dried herbs like rosemary, thyme, or a blend of Italian seasonings to customize the flavor.
- Cheesy Delight: Before baking, sprinkle grated Parmesan or a blend of Italian cheeses over the breadsticks for a richer, cheesier crust.
- Gluten-Free Version: Substitute all-purpose flour with a 1:1 gluten-free flour blend. Note that the dough’s texture might differ slightly.
- Whole Wheat: For a healthier, nuttier flavor and increased fiber, substitute up to half of the all-purpose flour with whole wheat flour.
- Crispier Texture: For extra crispy breadsticks, reduce the oven temperature to 375°F (190°C) and bake for a longer duration, around 25-30 minutes, keeping an eye on browning.
- Thinner or Thicker: Adjust the thickness of your dough strips; thinner strips will be crispier, while thicker ones will have a chewier interior.
Common Mistakes to Avoid
- Inactive Yeast: Not checking if your yeast is active before adding flour can result in flat, dense breadsticks. Always look for foam!
- Not Enough Kneading: Undernourished dough won’t develop enough gluten, leading to a weak structure and crumbly breadsticks. Knead until smooth and elastic.
- Over-flouring: Adding too much flour during kneading can make the breadsticks dry and tough. Use just enough to prevent sticking.
- Under-baking: Removing breadsticks too early will result in a soft, doughy texture instead of the desired crispness. Bake until golden brown.
- Crowding the Baking Sheet: Placing too many breadsticks on one sheet prevents proper air circulation, leading to uneven baking and less crispiness.
Storage & Meal Prep Tips
Homemade Breadsticks are best enjoyed fresh, but they can be stored to maintain their deliciousness:
- Room Temperature: Store cooled breadsticks in an airtight container at room temperature for up to 2-3 days. To regain crispness, re-crisp them in a preheated oven at 350°F (175°C) for 5-7 minutes.
- Freezing Baked Breadsticks: For longer storage, allow baked breadsticks to cool completely. Freeze them in a single layer on a baking sheet until solid, then transfer to a freezer-safe bag or container for up to 2-3 months. Reheat from frozen in a 375°F (190°C) oven for 10-15 minutes, or until heated through and crisp.
- Freezing Unbaked Dough: You can also freeze the dough after the first rise. Wrap it tightly in plastic wrap and then in foil. Thaw overnight in the refrigerator, then proceed with shaping and the second rise.
Conclusion
There you have it – your definitive guide to crafting perfect, crispy homemade Breadsticks. From understanding the yeast to achieving that golden-brown finish, every step contributes to a delightful culinary experience. Whether you prefer them plain, sprinkled with herbs, or transformed into savory Garlic breadsticks, this recipe empowers you to create bakery-quality treats right in your own kitchen. Don’t be shy – give this recipe a try and share your results! There’s nothing quite like the satisfaction of baking your own bread, and these crispy sticks are a fantastic place to start.
FAQs
Q1: My dough isn’t rising. What went wrong?
A1: The most common reasons are inactive yeast (water too hot or too cold, or old yeast), a cold environment for rising, or insufficient kneading. Ensure your water is within the specified temperature range and your yeast is fresh. Find a warm spot for your dough to rise.
Q2: Can I use different types of flour?
A2: Yes, you can experiment! For a chewier breadstick, use bread flour. For a healthier option, substitute up to half of the all-purpose flour with whole wheat flour. Just be aware that different flours absorb liquid differently, so you might need to adjust the water slightly.
Q3: How do I make these extra crispy?
A3: To maximize crispness, roll the dough thinner, ensure even baking by not crowding the pan, and consider baking at a slightly lower temperature (e.g., 375°F / 190°C) for a longer duration to dry them out more. Cooling them on a wire rack is also essential.
Q4: Can I prepare the dough ahead of time?
A4: Absolutely! After the first rise, you can punch down the dough, place it in an oiled bowl, cover it tightly with plastic wrap, and refrigerate for up to 24 hours. Let it come to room temperature for about 30-60 minutes before shaping and proceeding with the second rise.
Q5: What’s the best way to serve these breadsticks?
A5: Homemade breadsticks are incredibly versatile! They’re perfect with marinara sauce, pesto, hummus, or a simple olive oil and balsamic vinegar dip. They also make an excellent accompaniment to soups, salads, and pasta dishes.