The Secret to Perfectly Chewy Molasses Cookies: A Home Baker’s Guide
Have you ever bitten into a cookie that instantly transports you back to cozy holiday memories, filled with warmth and a subtle spice that dances on your palate? That’s the magic of a perfectly baked Molasses Cookies. While store-bought versions can be tempting, mastering this timeless classic at home not only fills your kitchen with an irresistible aroma but also allows you to control the quality of ingredients, ensuring a wholesome and truly delicious treat. Today, we’re diving deep into crafting the ultimate batch of these spiced delights, providing you with a definitive Molasses cookie recipe that will impress even the most discerning palates. Get ready to bake!
Ingredients & Kitchen Tools
- All-Purpose Flour (2 ¾ cups): The backbone of our cookies, providing structure.
- Ground Ginger (2 tsp): Adds a warm, spicy kick, quintessential for molasses cookies.
- Ground Cinnamon (1 ½ tsp): Sweetens and deepens the spice profile.
- Ground Cloves (½ tsp): Provides a pungent, aromatic balance to the other spices.
- Baking Soda (2 tsp): Our leavening agent, creating that characteristic chewy texture.
- Salt (½ tsp): Enhances all the flavors and balances sweetness.
- Unsalted Butter (¾ cup, 1 ½ sticks), softened: Provides richness and tender crumb.
- Granulated Sugar (½ cup, plus ½ cup for rolling): For sweetness and that signature sparkly exterior.
- Packed Brown Sugar (½ cup): Adds moisture and a deeper, caramel-like flavor.
- Large Egg (1): Binds ingredients and adds richness.
Unsulfured Molasses (⅓ cup): The star of the show, providing distinct flavor, color, and chewiness. Avoid blackstrap, which can be too bitter.*
- Kitchen Mixer (stand or hand): For efficient creaming of butter and sugars.
- Mixing Bowls (various sizes): For combining wet and dry ingredients.
- Whisk: To aerate and combine dry ingredients.
- Spatula: For scraping down bowls and folding.
- Baking Sheets: Preferably light-colored to prevent over-browning.
- Parchment Paper or Silicone Mats: For non-stick baking and easy cleanup.
- Small Scoop (1.5-inch diameter): Ensures uniform cookie size.
Prep Time & Cooking Schedule
- Prep Time: 20 minutes
- Chill Time: 30 minutes (minimum, but up to 2 hours for best results)
- Cook Time: 8-10 minutes per batch
- Resting Time (after baking): 5 minutes on the baking sheet, then transfer to a wire rack to cool completely.
This recipe is perfect for an afternoon baking project. The chilling time is crucial for developing flavor and preventing the cookies from spreading too much, so plan accordingly.
Step-by-Step Instructions
1. Whisk Dry Ingredients: In a medium bowl, whisk together the flour, ground ginger, ground cinnamon, ground cloves, baking soda, and salt. Set aside.
2. Cream Butter and Sugars: In a large bowl, using an electric mixer on medium speed, beat the softened butter with ½ cup granulated sugar and the packed brown sugar until light and fluffy, about 2-3 minutes. Scrape down the sides of the bowl.
3. Add Wet Ingredients: Beat in the large egg until just combined, then slowly add the unsulfured molasses, mixing until fully incorporated.
4. Combine Wet and Dry: Gradually add the dry ingredient mixture to the wet ingredients, mixing on low speed until just combined. Be careful not to overmix; overdeveloping the gluten can lead to tough cookies.
5. Chill the Dough: Cover the bowl with plastic wrap and chill the Molasses Cookies dough in the refrigerator for at least 30 minutes, or up to 2 hours. This step is vital for the texture and flavor of your Molasses cookie recipe.
6. Preheat Oven & Prepare Baking Sheets: Preheat your oven to 375°F (190°C). Line two baking sheets with parchment paper or silicone baking mats.
7. Roll in Sugar: Place the remaining ½ cup of granulated sugar in a shallow dish. Scoop rounded tablespoons of dough (about 1.5 inches) and roll them into balls. Roll each ball generously in the granulated sugar until fully coated.
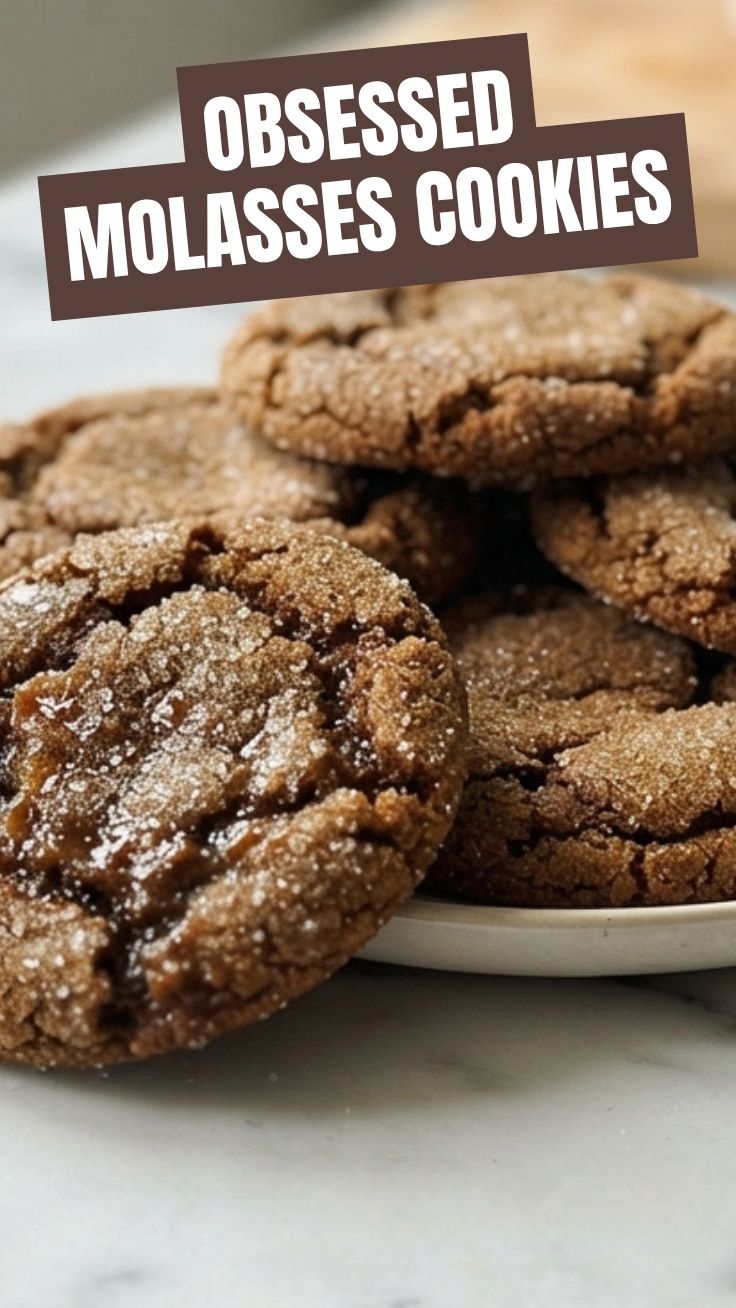
8. Bake: Place the sugar-coated dough balls about 2 inches apart on the prepared baking sheets. Bake for 8-10 minutes, or until the edges are set and the centers are still slightly soft and puffy. They will crinkle as they cool.
9. Cool: Let the cookies cool on the baking sheets for 5 minutes before transferring them to a wire rack to cool completely.
Nutritional Benefits & Advantages
Molasses isn’t just for flavor; it’s also a good source of essential minerals! It contains iron, calcium, magnesium, and potassium, contributing a boost of micronutrients compared to refined sugars. The spices like ginger and cinnamon also offer antioxidant and anti-inflammatory properties. These cookies, when enjoyed in moderation, can be a soul-satisfying treat that offers more than just empty calories.
Tips, Variations & Cooking Advice
- Spice It Up: Experiment with a pinch of white pepper or nutmeg for an extra layer of complexity.
- Texture Control: For chewier cookies, bake for exactly 8 minutes. For a slightly crisper edge, go for 10 minutes.
- Gluten-Free: Substitute all-purpose flour with a 1:1 gluten-free baking blend that contains xanthan gum.
- Dairy-Free: Use a high-quality plant-based butter substitute.
- Molasses Choice: Always opt for unsulfured molasses, often labeled “light” or “dark.” Blackstrap molasses is too strong and bitter for this recipe.
- Don’t Overbake! This is the key to chewy molasses cookies. They should look slightly underdone in the center when you pull them out of the oven.
Common Mistakes to Avoid
- Overmixing the Dough: This develops gluten, leading to tough, cake-like cookies instead of chewy ones. Mix until just combined.
- Skipping the Chill Time: Chilling the dough solidifies the butter, which prevents the cookies from spreading too much and allows the spices to meld, resulting in richer flavor.
- Not Rolling in Sugar: The sugar coating isn’t just for looks; it creates a crisp, sweet crust that contrasts beautifully with the soft interior.
- Baking Too Many at Once: Overcrowding your baking sheet can lead to uneven baking and prevent proper air circulation. Leave plenty of space between cookies.
Storage & Meal Prep Tips
Store baked Molasses Cookies in an airtight container at room temperature for up to 5 days. For longer storage, you can freeze the baked cookies for up to 3 months. Thaw at room temperature. You can also freeze the raw cookie dough balls (without sugar coating) for up to 2 months. When ready to bake, roll in sugar and bake directly from frozen, adding an extra minute or two to the baking time.
Conclusion
There’s nothing quite like the comforting aroma and delightful chew of homemade Molasses Cookies. By following this comprehensive guide and our definitive Molasses cookie recipe, you’re not just baking a treat—you’re creating memories and enjoying a truly classic confection. I encourage you to try this recipe and share your delicious results! What are your favorite holiday cookies? Let us know in the comments below!
FAQs
Q1: Why are my molasses cookies hard instead of chewy?
A1: This usually indicates overmixing the dough or overbaking. Ensure you mix just until combined and pull them from the oven when the centers still look slightly soft.
Q2: Can I use light brown sugar instead of dark brown sugar?
A2: Yes, but dark brown sugar offers a richer, more pronounced molasses flavor and more moisture. Using light brown sugar might result in a slightly less chewy and flavorful cookie.
Q3: My cookies spread too much. What went wrong?
A3: This is often due to insufficient chilling time for the dough, using butter that’s too soft, or too warm an oven. Make sure your butter is softened but not melted, and always chill the dough.
Q4: Can I make this recipe ahead of time?
A4: Absolutely! The dough can be made and refrigerated for up to 3 days. You can also freeze scooped dough balls for up to 2 months, baking them from frozen by adding a few extra minutes to the baking time.