Unleash Your Inner Baker: The Ultimate Guide to Perfect Chocolate Crinkle Cookies
Ever wondered what it takes to bake a batch of incredibly soft, chewy, and decadently rich chocolate crinkle cookies that are as beautiful to look at as they are delicious to eat? Well, wonder no more! Preparing these delightful treats at home is not just about satisfying a sweet craving; it’s an opportunity to create cherished memories, fill your kitchen with an irresistible aroma, and impress your loved ones with your baking prowess. This comprehensive guide will walk you through every step, ensuring your homemade Chocolate Crinkle Cookies turn out perfectly every time, rivaling any bakery creation. Get ready to master those iconic crinkles and discover the joy of baking. And don’t forget, these aren’t just any chocolate cookies; they’re the ultimate Crinkle Cookies.
Ingredients & Kitchen Tools
Gathering your mise en place (everything in its place) is the first step to a smooth baking experience.
Ingredients:
- All-Purpose Flour (1 ¾ cups): Provides structure to the cookies. Sifting is recommended for a lighter texture.
- Unsweetened Cocoa Powder (¾ cup): The key to that deep chocolate flavor and color. Dutch-processed cocoa offers a darker hue.
- Granulated Sugar (1 ½ cups): Sweetens the cookies and helps with browning.
- Vegetable Oil (½ cup): Creates a moist, tender crumb; ensures those signature crinkles. Can substitute with canola or melted coconut oil.
- Large Eggs (2): Binds ingredients and adds richness.
- Vanilla Extract (1 teaspoon): Enhances the chocolate flavor. Use good quality extract for best results.
- Baking Powder (1 teaspoon): A leavening agent that helps the cookies rise.
- Salt (½ teaspoon): Balances sweetness and enhances overall flavor.
- Powdered Sugar (1 cup, for rolling): Essential for coating and creating the “crackle” effect. Don’t skip this!
Kitchen Tools:
- Large Mixing Bowls (2): For wet and dry ingredients.
- Whisk: To combine dry ingredients.
- Electric Mixer (Stand or Handheld): For creaming wet ingredients.
- Spatula: For scraping down bowls and folding.
- Measuring Cups and Spoons: For accurate ingredient portions.
- Baking Sheets: Non-stick or lined with parchment paper. Parchment paper is highly recommended for easy clean-up and even baking.
- Small Bowl: For rolling the cookie dough in powdered sugar.
- Wire Rack: For cooling baked cookies.
Prep Time & Cooking Schedule
- Prep Time: 20 minutes
- Chill Time: 2 hours (minimum, or overnight for best results)
- Cook Time: 10-12 minutes per batch
- Resting Time (after baking): 5 minutes on the baking sheet, then transfer to a wire rack to cool completely.
The chill time is crucial for developing the characteristic crinkles. Don’t rush this step! It allows the dough to firm up, making it easier to handle and preventing excessive spreading in the oven, which would diminish the crinkle effect.
Step-by-Step Instructions
Follow these detailed steps to achieve the perfect batch of Chocolate Crinkle Cookies. These instructions are designed to guide you through mastering the art of creating stunning Crinkle Cookies.
1. Combine Dry Ingredients: In a large bowl, whisk together the all-purpose flour, cocoa powder, baking powder, and salt. Set aside.
2. Combine Wet Ingredients: In another large bowl, using an electric mixer, beat the granulated sugar and vegetable oil until thoroughly combined and light – about 2-3 minutes.
3. Add Eggs & Vanilla: Beat in the eggs one at a time, ensuring each is fully incorporated before adding the next. Stir in the vanilla extract.
4. Combine Wet and Dry: Gradually add the dry ingredients to the wet ingredients, mixing on low speed until just combined. Do not overmix; overmixing can lead to tough cookies. The dough will be quite soft.
5. Chill the Dough: Cover the bowl with plastic wrap and refrigerate for at least 2 hours, or preferably overnight. This step is non-negotiable for the best crinkle effect.
6. Preheat Oven & Prepare for Rolling: Once chilled, preheat your oven to 350°F (175°C). Line baking sheets with parchment paper. Place the powdered sugar in a shallow bowl.
7. Form & Roll Cookies: Scoop rounded tablespoons of dough. Roll each piece into a smooth ball between your palms. This helps create an even surface for the powdered sugar.
8. Generously Coat: Roll each dough ball generously in the powdered sugar, ensuring it’s completely covered. A thick coating is key for pronounced crinkles.
9. Bake: Place the coated dough balls about 2 inches apart on the prepared baking sheets. Bake for 10-12 minutes, or until the edges are set but the centers are still slightly soft. Do not overbake!
10. Cool: Remove from the oven and let cool on the baking sheet for 5 minutes before transferring to a wire rack to cool completely.
Nutritional Benefits & Advantages
While Chocolate Crinkle Cookies are a treat, they do offer some surprising benefits. Dark cocoa powder, a primary ingredient, is rich in antioxidants, particularly flavonoids, which can help combat free radicals in the body. It also contains minerals like iron, magnesium, and zinc. Baking at home allows for control over ingredient quality, potentially opting for organic or minimally processed components, and adjusting sugar levels to your preference. The act of baking itself can also be a therapeutic and enjoyable activity, promoting mental well-being!
Tips Variations & Cooking Advice
- Spice it up: Add a pinch of cayenne pepper or chili powder to the cocoa mixture for a subtle, intriguing kick.
- Mint Chocolate: Incorporate ½ teaspoon of peppermint extract for a festive, refreshing twist.
- Espresso Boost: A teaspoon of instant espresso powder mixed with the cocoa powder will deepen the chocolate flavor without adding a coffee taste.
- Gluten-Free: Substitute the all-purpose flour with a 1:1 gluten-free baking flour blend.
- Dairy-Free: This recipe is naturally dairy-free thanks to the use of vegetable oil!
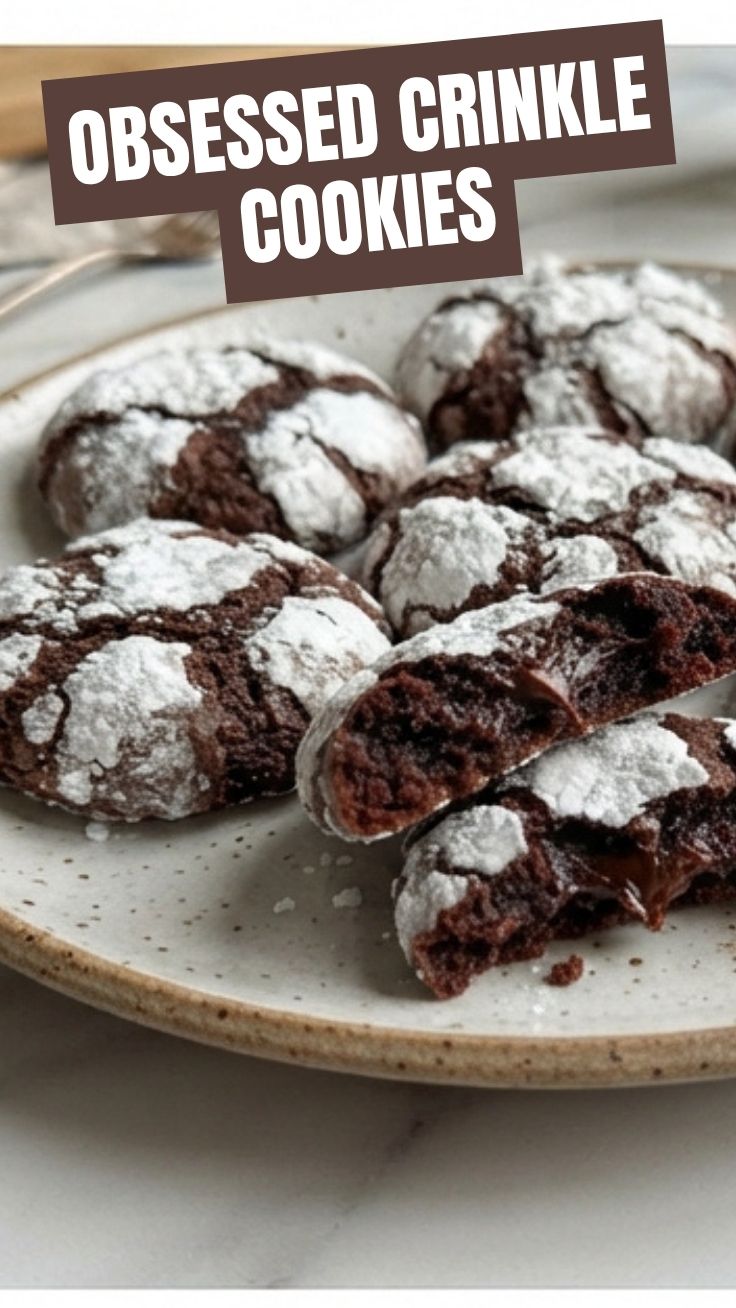
- Perfect Crinkles: Ensure your powdered sugar coating is thick and even. The contrast between the baked dough and the sugar is what creates that beautiful cracked effect.
- Don’t Overbake: The center of the cookies should be slightly soft when removed from the oven. They will firm up as they cool. Overbaking leads to dry, hard cookies.
- Room Temperature Eggs: For better incorporation and a smoother dough, let your eggs come to room temperature before mixing.
Common Mistakes to Avoid
- Not Chilling the Dough: This is the biggest culprit for flat, un-crinkled cookies. Chilling is essential.
- Not Enough Powdered Sugar: A skimpy coating will result in barely visible crinkles. Be generous!
- Overmixing the Dough: Develops too much gluten, leading to tough cookies. Mix until just combined.
- Overbaking: Results in dry, crumbly cookies. Err on the side of underbaking slightly.
- Placing Too Close on Baking Sheet: Cookies will spread slightly, so give them room to prevent them from merging.
Storage & Meal Prep Tips
- Room Temperature: Store Chocolate Crinkle Cookies in an airtight container at room temperature for up to 5 days.
- Freezing Baked Cookies: Once completely cooled, place cookies in a single layer on a baking sheet and freeze until solid (1-2 hours). Transfer to a freezer-safe bag or container, separating layers with parchment paper. They will stay fresh for up to 3 months. Thaw at room temperature.
- Freezing Dough: Roll cookie dough into balls, generously coat in powdered sugar, then freeze on a baking sheet. Once frozen solid, transfer to a freezer bag. Bake from frozen, adding an extra 2-3 minutes to the baking time.
Conclusion
There you have it – the ultimate guide to phenomenal Chocolate Crinkle Cookies! By following these detailed steps, embracing the essential chill time, and generously coating your dough in powdered sugar, you’re guaranteed to achieve those perfectly cracked, moist, and utterly delicious treats. Baking these classic Crinkle Cookies is a truly rewarding experience, transforming simple ingredients into a festive and irresistible dessert. So, preheat your ovens, gather your ingredients, and embark on this delightful baking adventure. Don’t forget to share your beautifully crinkled creations with us in the comments below! Happy baking!
FAQs
Q1: Why are my crinkle cookies flat and not cracking?
A1: The most common reason is insufficient chilling of the dough. Chilling is crucial for the dough to firm up and for the cracks to form during baking. Also, ensure a thick coating of powdered sugar.
Q2: Can I use butter instead of vegetable oil?
A2: While you can, it will change the texture of the cookie. Vegetable oil contributes to a chewier, more cake-like texture and helps enhance the crinkle effect. Butter tends to make cookies spread more and can result in a crispier texture.
Q3: My cookies are too dry. What went wrong?
A3: This usually means they were overbaked. Keep a close eye on them; the centers should look slightly underdone when you pull them out of the oven. They will continue to cook slightly as they cool on the baking sheet.
Q4: How important is the powdered sugar coating?
A4: Extremely important! A generous, even coating of powdered sugar is what creates that iconic crinkle pattern. Without it, the cookies will simply bake into chocolate rounds with little to no crackling.
Q5: Can I make the cookie dough ahead of time?
A5: Absolutely! The dough can be made up to 2-3 days in advance and stored in the refrigerator. In fact, longer chilling times often result in even better flavor development and more pronounced crinkles.