The Ultimate Guide to Crafting the Most Delicious Homemade Pumpkin Muffins!
Ever wondered how to capture that quintessential taste of autumn in a single bite? Imagine the aroma of warming spices filling your kitchen, promising a treat that’s both comforting and incredibly satisfying. Today, we’re diving deep into the art of making the perfect homemade Pumpkin Muffins, a value proposition transcending mere baking. Preparing these delightful morsels at home allows you to control the quality of your ingredients, ensuring fresh, wholesome goodness and a flavor profile far superior to anything store-bought. You’ll be amazed at how easily you can transform simple ingredients into a fall masterpiece, primarily when harnessing the natural sweetness and vibrant color of fresh pumpkin purée.
Ingredients & Kitchen Tools
- All-Purpose Flour (2 cups): The backbone of our muffins, providing structure.
- Granulated Sugar (1 cup): For essential sweetness and a tender crumb.
- Light Brown Sugar (1/2 cup, packed): Adds molasses notes and extra moisture.
- Baking Powder (2 teaspoons): Our primary leavening agent for a light, airy texture.
- Baking Soda (1 teaspoon): Works with the pumpkin’s acidity for rise and tenderization.
- Ground Cinnamon (1 teaspoon): The quintessential warming spice.
- Ground Nutmeg (1/2 teaspoon): Adds depth and a hint of earthy sweetness.
- Ground Ginger (1/2 teaspoon): A subtle spicy kick that complements the pumpkin.
- Salt (1/2 teaspoon): Balances flavors and enhances sweetness.
- Canned Pumpkin Purée (15 oz can, not pie filling): The star ingredient, providing moisture, color, and classic flavor.
- Large Eggs (2): Binds ingredients and adds richness.
- Vegetable Oil (1/2 cup): Ensures a moist, tender muffin. You can substitute with melted unsalted butter for a richer flavor.
- Milk (1/4 cup): Adds additional moisture and helps achieve the perfect batter consistency.
- Vanilla Extract (1 teaspoon): Enhances all the other flavors.
- Optional additions: Chocolate chips (1 cup), chopped pecans or walnuts (1/2 cup) for added texture and flavor.
Kitchen Tools:
- Large Mixing Bowls (2): One for dry ingredients, one for wet.
- Whisk: For combining dry ingredients thoroughly.
- Rubber Spatula: For gentle mixing and scraping bowls.
- Measuring Cups & Spoons: For accurate ingredient quantities.
- Muffin Tin (12-cup): The vessel for our delightful muffins.
- Paper Liners: For easy removal and cleanup.
- Ice Cream Scoop (optional): For evenly portioning batter.
Prep Time & Cooking Schedule
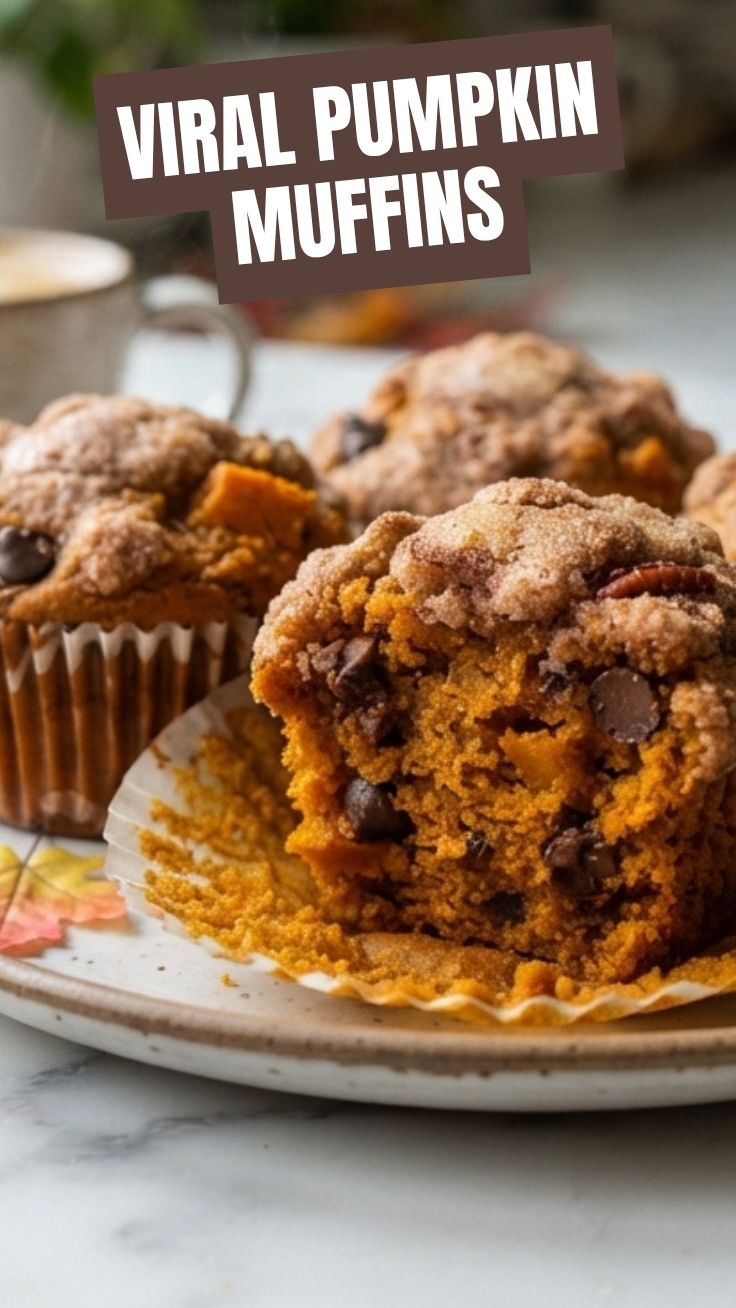
- Prep time: 15 minutes
- Cook time: 20-25 minutes
- Cooling time: 10-15 minutes
This recipe is designed for efficiency. With just 15 minutes of hands-on prep, you can have a batch of warm, fragrant Pumpkin Muffins ready before the morning rush. The baking time is forgiving, allowing you to multitask while they achieve their golden-brown perfection. Don’t rush the cooling process; allowing them to cool slightly in the tin before transferring to a wire rack helps prevent sticking and maintains their beautiful shape.
Step-by-Step Instructions
1. Preheat & Prepare: Preheat your oven to 400°F (200°C). Line a 12-cup muffin tin with paper liners. This crucial first step ensures even baking and easy release.
2. Combine Dry Ingredients: In a large bowl, whisk together the all-purpose flour, granulated sugar, light brown sugar, baking powder, baking soda, ground cinnamon, ground nutmeg, ground ginger, and salt. Whisking thoroughly ensures the leavening agents and spices are evenly distributed, leading to a consistently risen and flavorful Pumpkin Muffins.
3. Combine Wet Ingredients: In a separate medium bowl, whisk together the canned pumpkin purée, large eggs, vegetable oil, milk, and vanilla extract until smooth and well combined.
4. Combine Wet and Dry: Pour the wet ingredients into the dry ingredients. Using a rubber spatula, gently fold until just combined. Overmixing will develop the gluten, resulting in tough muffins. A few lumps are perfectly fine! If adding chocolate chips or nuts, fold them in now.
5. Fill Muffin Tin: Divide the batter evenly among the 12 prepared muffin cups, filling each about two-thirds full. An ice cream scoop works wonders for consistency.
6. Bake: Bake for 20-25 minutes, or until a wooden skewer inserted into the center of a muffin comes out clean. Keep an eye on them; ovens can vary!
7. Cool: Let the muffins cool in the tin for 5 minutes before transferring them to a wire rack to cool completely.
Nutritional Benefits & Advantages
Beyond their irresistible taste, these homemade Pumpkin Muffins offer several nutritional advantages. The star ingredient, pumpkin, is a powerhouse of vitamins and minerals. It’s rich in Vitamin A (from beta-carotene), which is vital for vision and immune function, and a good source of Vitamin C, potassium, and fiber. The fiber content aids in digestion and can help promote a feeling of fullness. By making them at home, you avoid artificial flavors, excessive preservatives, and high-fructose corn syrup often found in commercial baked goods.
Tips, Variations & Cooking Advice
- Spice it Up: For an extra autumnal kick, add 1/4 teaspoon of ground cloves or allspice to the dry ingredients.
- Texture Play: Introduce a crunchy topping! Sprinkle some turbinado sugar, chopped nuts, or a streusel topping (butter, flour, brown sugar) before baking.
- Healthier Swaps: Replace half of the all-purpose flour with whole wheat pastry flour for added fiber, or swap half of the oil with unsweetened applesauce for reduced fat.
- Dairy-Free: Use your preferred plant-based milk (almond, soy, oat) instead of dairy milk.
- Gluten-Free: Substitute the all-purpose flour with an equal amount of your favorite gluten-free all-purpose baking blend that contains xanthan gum.
- Mini Muffins: Reduce the baking time to 12-15 minutes for delightful mini versions.
Common Mistakes to Avoid
- Overmixing the Batter: This is the cardinal sin of muffin making! Overmixing develops gluten, leading to dense, tough muffins. Mix until just combined.
- Overfilling Muffin Cups: Filling cups too high can cause muffins to overflow and create a chaotic mess. Aim for two-thirds full.
- Opening the Oven Door Frequently: This causes temperature fluctuations, which can make muffins sink. Resist the urge until near the end of baking.
- Not Greasing/Lining the Tin: Even “non-stick” tins can sometimes stick. Liners or a good spray of non-stick cooking spray are your best friends.
- Underbaking: A raw center is no fun. Always test for doneness with a skewer.
Storage & Meal Prep Tips
Homemade Pumpkin Muffins are best enjoyed fresh, but they store beautifully. Store them in an airtight container at room temperature for up to 3-4 days. To keep them from getting soggy, you can place a piece of paper towel at the bottom of the container to absorb excess moisture. For longer storage, muffins freeze exceptionally well. Once completely cooled, place them in a freezer-safe bag or container for up to 3 months. Thaw at room temperature or gently reheat in a microwave or oven for a “freshly baked” experience. They are excellent for meal prepping as an on-the-go breakfast or a heartwarming snack.
Conclusion
There you have it – your definitive guide to baking supremely moist and wonderfully spiced homemade Pumpkin Muffins. This recipe is more than just a set of instructions; it’s an invitation to fill your home with comforting aromas and treat your loved ones (or yourself!) to tender goodness, all while benefiting from the wholesome properties of pure pumpkin. We encourage you to try this recipe, experiment with the variations, and savor every bite. Share your baking triumphs in the comments below – we’d love to hear how your pumpkin masterpieces turn out!
FAQs
Q: Can I use fresh pumpkin instead of canned?
A: Absolutely! You’ll need to cook and purée your fresh pumpkin until smooth. Ensure it’s thick and doesn’t contain excess water, which could alter the batter consistency.
Q: Why are my muffins dense and tough?
A: The most common culprit is overmixing the batter. Mix just until the wet and dry ingredients are combined, leaving a few lumps helps maintain a tender crumb.
Q: Can I reduce the sugar in this recipe?
A: Yes, you can generally reduce the granulated sugar by up to 1/4 cup without significantly impacting the texture, though the sweetness level will be lower.
Q: My muffins are sticking to the liners. What did I do wrong?
A: This usually happens if the muffins aren’t fully baked or if they cool too quickly in the tin. Ensure they pass the skewer test and allow them to cool slightly in the tin before transferring.