Unlock the Secret to the Juiciest Homemade Turkey Breast: A Culinary Masterclass
Are you ready to elevate your culinary game and create a dish that will impress every palate? Look no further than a perfectly roasted Turkey Breast. While often associated with festive occasions, mastering the art of a succulent turkey breast opens up a world of delicious possibilities for everyday meals and gourmet delights. Preparing this lean, versatile protein at home not only guarantees freshness and quality but also allows you to control the flavors and ingredients, ensuring a wholesome and personalized experience. And let’s not forget the incredible leftovers – imagine the gourmet Turkey Sandwich you’ll be enjoying for days to come!
Ingredients & Kitchen Tools
Gather your culinary arsenal! Here’s what you’ll need to create this show-stopping dish:
- 1 (3-4 pound) Boneless, Skin-on Turkey Breast: The star of our show. Look for a fresh, high-quality breast for the best results.
- 2 tablespoons unsalted butter, softened: Adds richness and helps crisp the skin.
- 1 tablespoon fresh rosemary, chopped: Aromatic and classic with turkey.
- 1 tablespoon fresh thyme, chopped: Adds an earthy, savory note.
- 1 teaspoon garlic powder: For a subtle, even garlic flavor.
- 1 teaspoon onion powder: Enhances the savory depth.
- 1 teaspoon smoked paprika: Adds a beautiful color and a hint of smokiness.
- 1/2 teaspoon black pepper: Freshly ground is always best.
- 1 teaspoon salt (or to taste): Essential for bringing out the flavors.
- 1 cup chicken or vegetable broth: For moisture and to create a flavorful pan sauce.
- Optional: 1 lemon, sliced: For a bright, citrusy aroma.
- Optional: Fresh cranberries: A festive touch and tart counterpoint.
Kitchen Tools:
- Roasting Pan with a Rack: Essential for even cooking and crispy skin.
- Meat Thermometer: Non-negotiable for ensuring perfect doneness and food safety.
- Small Bowl: For mixing herbs and spices.
- Pastry Brush: For basting.
- Sharp Knife: For carving.
- Cutting Board: For prep and carving.
Prep Time & Cooking Schedule
- Prep Time: 15 minutes
- Cook Time: 60-90 minutes (depending on size)
- Resting Time: 15-20 minutes
Planning is key to a stress-free cooking experience. You’ll want to allow enough time for the initial seasoning and then the crucial resting period after cooking to ensure a moist and flavorful result.
Step-by-Step Instructions
1. Preheat and Prepare: Preheat your oven to 375°F (190°C). Pat the Turkey Breast thoroughly dry with paper towels. This is a critical step for achieving wonderfully crispy skin.
2. Make the Herb Butter: In a small bowl, combine the softened butter, chopped rosemary, thyme, garlic powder, onion powder, smoked paprika, salt, and black pepper. Mix until well combined.
3. Season the Breast: Gently loosen the skin over the turkey breast, being careful not to tear it. Spread about half of the herb butter mixture directly onto the meat under the skin. Then, rub the remaining herb butter all over the exterior of the skin.
4. Roast to Perfection: Place the seasoned turkey breast on a rack within your roasting pan. Pour the chicken or vegetable broth into the bottom of the pan. If using, arrange lemon slices and cranberries around the breast in the pan.
5. Bake and Baste: Roast for 60-90 minutes, or until the internal temperature reaches 160°F (71°C) when measured with a meat thermometer inserted into the thickest part of the breast, avoiding the bone. Baste every 20-30 minutes with the pan juices to keep it moist and promote browning.
6. The All-Important Rest: Once cooked, remove the turkey breast from the oven, cover loosely with foil, and let it rest for 15-20 minutes. This allows the juices to redistribute throughout the meat, guaranteeing a moist and tender result. This resting period is also crucial if you plan to immediately transform some of it into a delightful Turkey Sandwich.
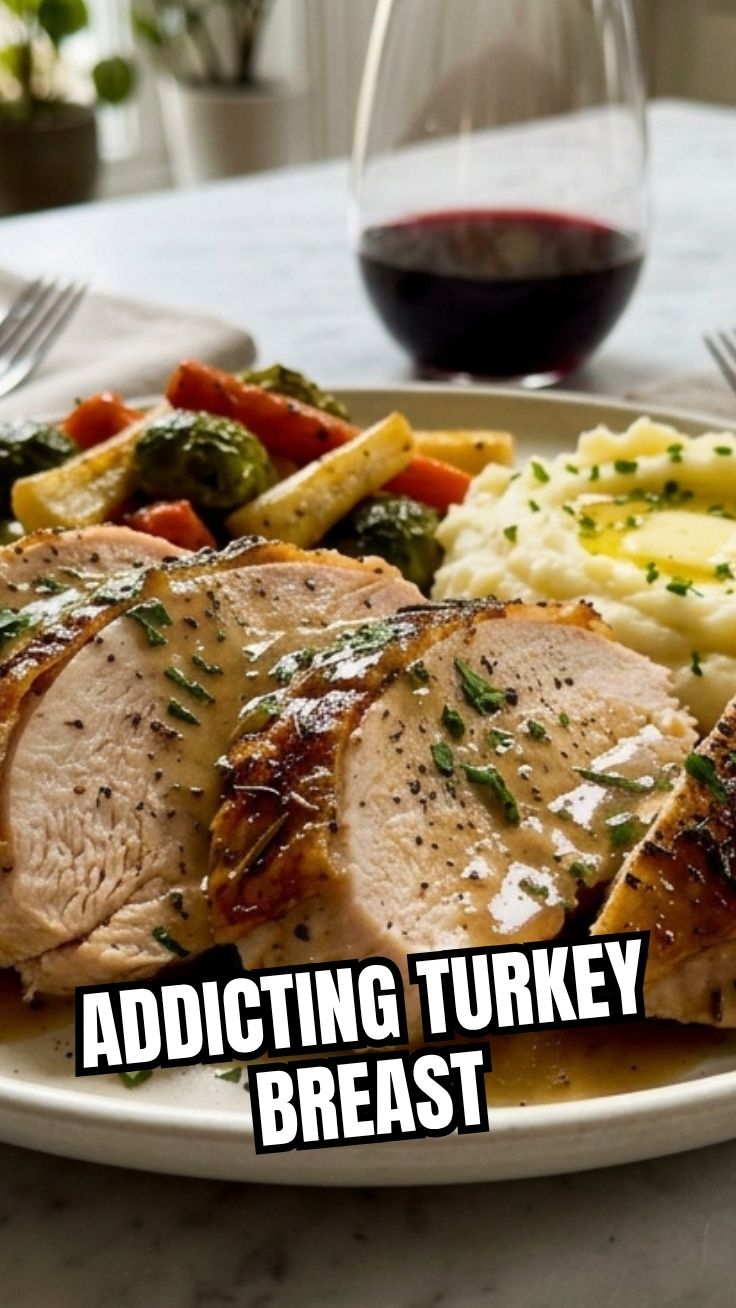
7. Carve and Serve: Carve against the grain into desired slices and serve immediately with your favorite sides.
Nutritional Benefits & Advantages
Turkey breast is a powerhouse of nutrition! It’s an excellent source of lean protein, essential for muscle growth and repair, and keeps you feeling full and satisfied. It’s also rich in B vitamins (like B6 and niacin), which are vital for energy metabolism, and minerals such as selenium and phosphorus. Choosing skinless turkey breast further reduces fat content, making it a heart-healthy choice.
Tips Variations & Cooking Advice
- Brining for Extra Juiciness: For an exceptionally moist turkey, consider a simple brine (salt and water) overnight.
- Flavor Boosters: Experiment with different herbs like sage or oregano. A citrus zest (orange or lemon) rubbed into the skin can also add brightness.
- Spicy Kick: Add a pinch of cayenne pepper or red pepper flakes to the herb butter for a little heat.
- Alternative Cooking Methods: You can adapt this recipe for a slow cooker (cook on low for 3-4 hours, or high for 2-3 hours) or even an air fryer for smaller breasts (cook at 350°F/175°C for 45-60 minutes).
- Glaze it Up: For a festive touch, brush a cranberry-orange glaze during the last 15 minutes of cooking.
- Portion Control: A 3-4 pound breast typically serves 6-8 people. Adjust ingredient quantities for larger or smaller breasts.
Common Mistakes to Avoid
- Overcooking: The most common culprit for dry turkey. Always use a meat thermometer and aim for 160°F (71°C) before resting, as it will continue to cook a few degrees more out of the oven.
- Not Resting: Skipping the resting period means all those delicious juices will run out onto your cutting board instead of staying in the meat.
- Not Drying the Skin: Moist skin means rubbery skin, not crispy. Pat it dry!
- Ignoring Pan Juices: Don’t waste the flavorful pan juices! These are a goldmine for gravy or moistening your carved turkey.
Storage & Meal Prep Tips
Leftover Turkey Breast is a gift! Store carved turkey in an airtight container in the refrigerator for up to 3-4 days. For longer storage, freeze sliced turkey in freezer-safe bags or containers for up to 2-3 months. Thaw overnight in the refrigerator before reheating. Reheat gently in the microwave or a low oven with a splash of broth to prevent drying out. It’s perfect for meal prepping a quick and satisfying Turkey Sandwich, salads, or adding to soups and casseroles.
Conclusion
Mastering the perfect Turkey Breast is a culinary achievement that brings immense satisfaction and endless meal possibilities. From a show-stopping centerpiece to the versatile base for an exceptional Turkey Sandwich, this recipe is designed to deliver succulent, flavorful results every time. Give it a try, experiment with your personal touches, and share your delicious creations with us! We’d love to hear how your turkey breast turned out.
FAQs
1. Can I use a bone-in turkey breast?
Yes, absolutely! Bone-in turkey breasts often offer even more flavor. Adjust cooking time as needed, typically 15-20 minutes longer per pound, always relying on your meat thermometer for accuracy.
2. How do I make gravy from the pan drippings?
After removing the turkey, strain the pan drippings. In a saucepan, melt 2 tablespoons of butter, whisk in 2 tablespoons of flour to create a roux, then gradually whisk in the pan drippings and a bit more broth until thickened to your desired consistency. Season to taste.
3. What are some good side dishes for roasted turkey breast?
Classic pairings include mashed potatoes, roasted vegetables (carrots, Brussels sprouts), green bean casserole, stuffing, and cranberry sauce.
4. My turkey skin isn’t crispy. What went wrong?
Ensure you patted the skin very dry before seasoning. Also, make sure your oven temperature is accurate, and avoid covering the turkey with foil for too long during cooking, as this can steam the skin.
5. Can I prepare this recipe ahead of time for meal prep?
Yes, you can certainly cook and carve the turkey breast ahead of time. Store it properly in the refrigerator, and it will be ready for quick meals, salads, or your next Turkey Sandwich!