The Ultimate Guide to Crafting the Perfect Homemade Stuffing: A Savory Masterpiece
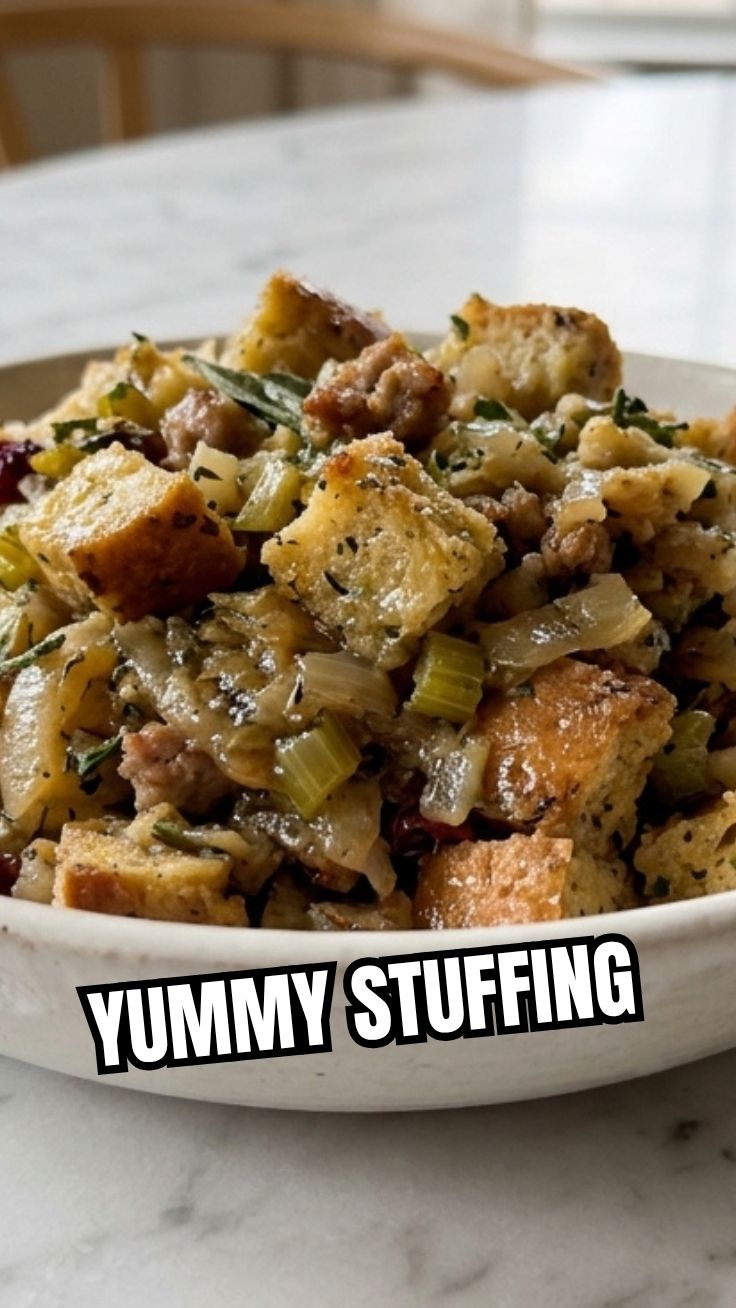
Ever wondered how to elevate your holiday meals or Sunday roasts from simply delicious to truly unforgettable? The secret often lies in the sides, and few dishes command as much nostalgic affection and culinary potential as a well-made homemade Stuffing. Forget the dry, bland versions of the past; this guide will empower you to create a savory masterpiece that’s bursting with flavor, perfectly textured, and incredibly satisfying. Preparing this classic at home allows for unparalleled customization, ensuring every bite is tailored to your taste and dietary preferences, far surpassing any store-bought alternative. Imagine a side dish so delightful, it could almost steal the show from the main course! This comprehensive guide will walk you through every step, ensuring your Stuffing is incredibly moist, flavorful, and a perfect complement to your meal, whether you’re using it as a holiday staple or as a delightful side with your favorite roasted meats or even a savory alternative to a sweet plush. Let’s dive in and transform your culinary prowess!
Ingredients & Kitchen Tools
To embark on this flavorful journey, gather the following:
- 1 loaf (1 pound) day-old artisanal bread: Stale bread is crucial for absorbing moisture without becoming mushy. Sourdough or challah work wonderfully.
- 1 cup unsalted butter (2 sticks): Adds rich flavor and helps brown the vegetables. Can substitute with olive oil for a dairy-free option.
- 2 large yellow onions, finely chopped: Provides a foundational sweet and savory flavor.
- 4 stalks celery, finely chopped: Adds a refreshing crunch and aromatic depth.
- 8 ounces cremini mushrooms, sliced: Optional, but adds an earthy, umami note.
- 4 cloves garlic, minced: Essential for pungent aromatic flavor.
- 1 tablespoon fresh rosemary, finely chopped: Offers a fragrant, piney aroma.
- 1 tablespoon fresh sage, finely chopped: Crucial for that classic holiday flavor profile.
- 1 teaspoon fresh thyme, finely chopped: Contributes earthy, subtle notes.
- 1 teaspoon salt: Enhances all flavors.
- ½ teaspoon black pepper: Provides a gentle warmth and spice.
- 4 cups low-sodium chicken or vegetable broth: The liquid base for moisture and flavor. Adjust as needed for desired consistency. For a vegetarian option, ensure vegetable broth is used.
- 2 large eggs, lightly beaten: Acts as a binder, creating a cohesive texture.
- ½ cup fresh parsley, chopped: For a fresh, vibrant finish.
Kitchen Tools:
- Large baking dish (9×13 inch)
- Large skillet or Dutch oven
- Sharp knife and cutting board
- Measuring cups and spoons
- Large mixing bowl
- Whisk
Prep Time & Cooking Schedule
- Prep Time: 30 minutes
- Cook Time: 40-50 minutes
- Resting Time: 10 minutes (after baking)
This recipe is designed for ease. You can chop your vegetables and cube your bread the day before to streamline your cooking process. The resting time after baking allows the flavors to meld and the Stuffing to set, ensuring a perfect texture when serving.
Step-by-Step Instructions
1. Prepare the Bread: Preheat your oven to 300°F (150°C). Cut the day-old bread into 1-inch cubes. Spread them in a single layer on a baking sheet and toast for 15-20 minutes, or until lightly golden and dry. This crucial step prevents soggy Stuffing. Let cool completely.
2. Sauté Aromatics: In a large skillet or Dutch oven, melt the butter over medium heat. Add the chopped onions and celery. Cook, stirring occasionally, for 8-10 minutes until softened and translucent. Add the sliced mushrooms (if using) and cook for another 5-7 minutes until they release their liquid and begin to brown.
3. Add Garlic and Herbs: Stir in the minced garlic, fresh rosemary, sage, and thyme. Cook for 1-2 minutes until fragrant, being careful not to burn the garlic.
4. Combine Ingredients: Transfer the toasted bread cubes to a large mixing bowl. Add the sautéed vegetable mixture, salt, and pepper. Toss gently to combine.
5. Moisten the Mixture: In a separate bowl, whisk together the chicken or vegetable broth and lightly beaten eggs. Pour this liquid mixture over the bread and vegetable mixture. Toss gently until all the bread cubes are evenly moistened. If you prefer a very moist Stuffing, you can add a little extra broth, ¼ cup at a time, until you achieve your desired consistency – don’t over-saturate! This is where the magic happens, ensuring a beautiful, integrated texture, unlike the dense consistency you might find in a firm plush.
6. Bake: Preheat your oven to 375°F (190°C). Lightly grease a 9×13 inch baking dish. Transfer the Stuffing mixture into the prepared dish, spreading it evenly.
7. Cover and Uncover: Cover the baking dish with aluminum foil and bake for 30 minutes. Remove the foil and bake for an additional 10-15 minutes, or until the top is golden brown and crispy.
8. Garnish and Serve: Remove from the oven and let rest for 10 minutes before serving. Garnish with fresh chopped parsley.
Nutritional Benefits & Advantages
This homemade Stuffing, while indulgent, offers valuable nutrients. The fresh vegetables contribute essential vitamins, minerals, and dietary fiber, promoting digestive health. Using whole-grain bread boosts fiber content further. Homemade versions also allow you to control sodium and fat, a significant advantage over pre-packaged options, making it a more wholesome choice for your holiday table.
Tips, Variations & Cooking Advice
- Flavor Boost: Add cooked sausage, crumbled bacon, or diced apples for extra flavor and texture.
- Herbal Variations: Experiment with different fresh herbs like marjoram or chives.
- Gluten-Free: Use gluten-free bread for a delicious alternative.
- Dairy-Free: Substitute butter with olive oil or a plant-based butter alternative and use vegetable broth.
- Nutty Crunch: Add ½ cup toasted pecans or walnuts for an extra layer of texture.
- Broth Adjustment: The amount of broth can vary based on your bread’s dryness. Start with 4 cups and add more if the mixture seems too dry.
Common Mistakes to Avoid
- Using fresh bread: Fresh bread will become soggy and gummy. Always use day-old or toasted bread cubes.
- Over-saturating with liquid: Too much broth will result in a mushy Stuffing. Add liquid gradually until absorbed.
- Over-mixing: Once the liquid is added, mix gently to avoid compacting the bread.
- Skipping the resting time: This allows the flavors to meld and the texture to set.
Storage & Meal Prep Tips
Leftover Stuffing can be stored in an airtight container in the refrigerator for up to 3-4 days. To freeze, place cooled Stuffing in a freezer-safe container or bag for up to 2-3 months. Reheat in the oven at 350°F (175°C) until warmed through, covering with foil initially to prevent drying out and uncovering for the last few minutes for crispness.
Conclusion
Crafting your own homemade Stuffing is a rewarding culinary experience that promises to elevate any meal. With its rich aromas, comforting textures, and customizable flavors, it’s a dish that truly embodies the spirit of home cooking. By following these detailed steps and tips, you’re well on your way to creating a Stuffing that will impress everyone, becoming a cherished part of your family’s traditions. This recipe offers a delightful and flavorful alternative to the store-bought variety, and while it won’t be as soft and cuddly as a favorite plush, it will certainly bring warmth and satisfaction to your table. We encourage you to try this recipe and share your delicious results!
FAQs
Q1: Can I make this Stuffing ahead of time?
A1: Yes, you can prepare the mixture (without baking) up to a day in advance. Store it covered in the refrigerator and bake as directed when ready to serve. You may need to add an extra 5-10 minutes to the baking time if starting from cold.
Q2: What kind of bread is best for Stuffing?
A2: Day-old artisanal bread like sourdough, challah, or French bread works best. Avoid very soft sandwich bread, as it tends to get mushy. The key is a bread with good structure that can absorb the liquid without disintegrating, much like selecting the right material for a sturdy plush.
Q3: How do I prevent my Stuffing from being dry?
A3: Ensure your bread cubes are adequately moistened with broth. Don’t be afraid to add a little extra broth if the mixture still seems dry before baking. Covering the dish with foil for the initial baking period also helps retain moisture.
Q4: Can I use fresh herbs instead of dried?
A4: Absolutely! Fresh herbs provide a brighter, more vibrant flavor. If substituting dried herbs for fresh, use about one-third of the amount (e.g., 1 teaspoon dried for 1 tablespoon fresh).
Q5: What if I don’t have all the specified vegetables?
A5: The onions and celery are foundational. However, you can omit the mushrooms if you don’t have them or substitute with other vegetables like carrots, bell peppers, or leeks, although this will alter the traditional flavor slightly.