Bake Your Way to Bliss: The Ultimate Decadent Chocolate Cake Experience
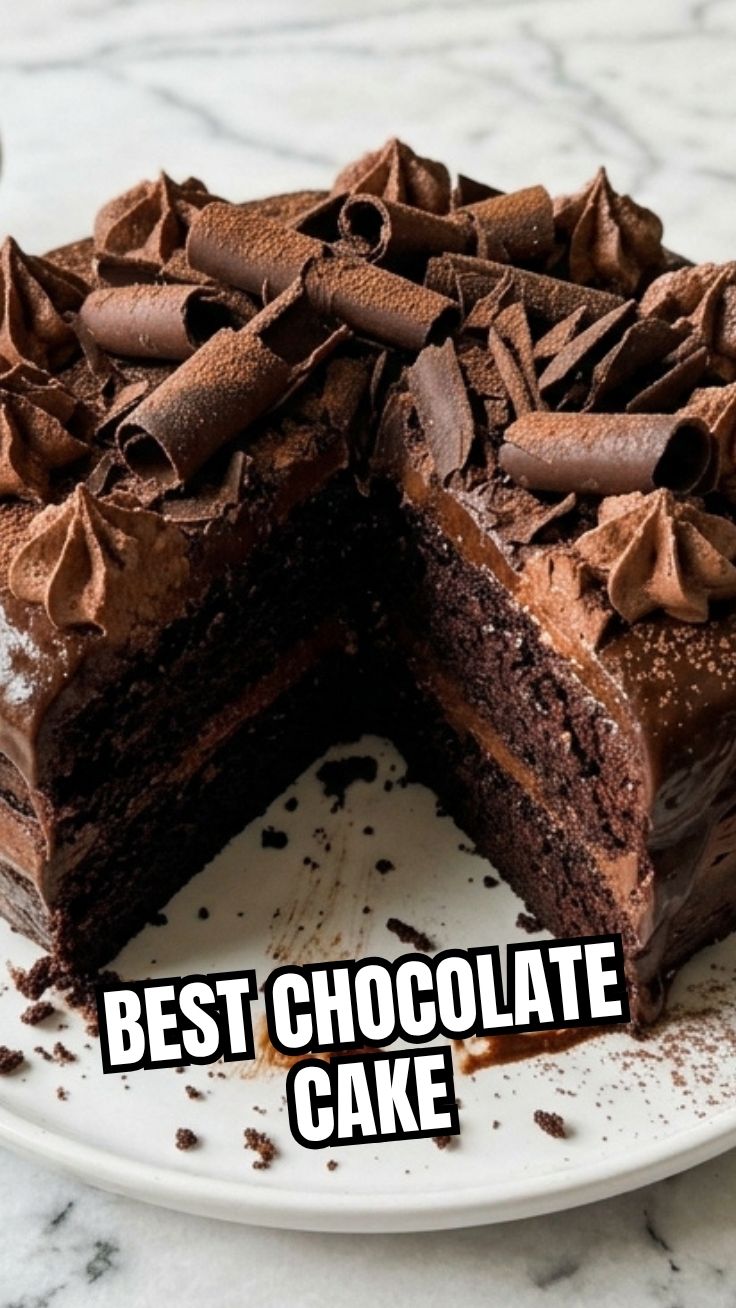
Ever wonder if you can truly recreate that intensely rich, deeply satisfying Chocolate Cake experience right in your own kitchen? The answer is a resounding yes, and it’s far more rewarding than you might imagine. Forget store-bought imitations; mastering this classic dessert at home not only saves you money but also allows for unparalleled control over ingredients, ensuring a truly premium taste. Imagine biting into a slice of pure comfort, adorned with a luscious chocolate frosting – a feeling you can easily achieve with our comprehensive guide. This isn’t just about baking; it’s about crafting a memorable moment, a perfect indulgence for any occasion. Let’s dive into making the ultimate dessert that will impress everyone.
Ingredients & Kitchen Tools
To embark on this delightful baking journey, gather the following:
- For the Cake:
* 2 cups all-purpose flour: Provides structure and tenderness.
* 1 ¾ cups granulated sugar: For sweetness and moisture.
* ¾ cup unsweetened cocoa powder (good quality): Crucial for deep chocolate flavor.
* 1 ½ teaspoons baking soda: Leavening agent for a light texture.
* 1 teaspoon salt: Balances sweetness and enhances flavor.
* 1 cup buttermilk: Adds tanginess and keeps the cake moist; can substitute with milk + 1 tbsp vinegar.
* ½ cup vegetable oil: Contributes to a rich, moist crumb.
* 2 large eggs: Binds ingredients and adds structure.
* 1 teaspoon vanilla extract: Enhances all flavors.
* 1 cup hot water or brewed coffee: Activates cocoa and baking soda, creating a more intense chocolate flavor.
- For the chocolate frosting:
* 1 cup unsalted butter (softened): Base for a creamy frosting.
* 3 ½ cups powdered sugar (confectioners’ sugar): For sweetness and smooth texture.
* ¾ cup unsweetened cocoa powder: For chocolate flavor in the frosting.
* ½ cup milk (or heavy cream): Adjusts consistency.
* 1 teaspoon vanilla extract: Flavor enhancement.
* Pinch of salt: Balances sweetness.
- Kitchen Tools:
* Two 9-inch round cake pans: Essential for evenly baked layers.
* Mixing bowls (large and medium): For combining ingredients.
* Whisk and rubber spatula: For mixing and scraping.
* Electric mixer (stand or hand-held): Highly recommended for frosting.
* Measuring cups and spoons: For accurate ingredient proportions.
* Parchment paper: Prevents sticking and ensures easy release.
* Cooling racks: For proper cake cooling.
* Offset spatula or butter knife: For spreading frosting.
Prep Time & Cooking Schedule
- Prep Time: 25-30 minutes (This includes gathering ingredients, sifting, and mixing the batter).
- Cook Time: 30-35 minutes for cakes (Allow additional time for oven preheating).
- Resting Time: 15-20 minutes for cakes after baking before inverting, plus at least 1 hour for cakes to cool completely before frosting. This rest is crucial for preventing the cake from breaking and ensuring the frosting doesn’t melt.
- Total Time (Hands-on & Waiting): Approximately 2.5-3 hours. Plan ahead, especially if you want to assemble and serve on the same day. The cooling period for the cake layers is non-negotiable for a professional finish.
Step-by-Step Instructions
1. Preheat & Prepare: Preheat your oven to 350°F (175°C). Grease and flour two 9-inch round cake pans, then line the bottoms with parchment paper. This ensures easy release.
2. Combine Dry Ingredients: In a large mixing bowl, whisk together the flour, granulated sugar, cocoa powder, baking soda, and salt. Ensure there are no lumps.
3. Mix Wet Ingredients: In a separate medium bowl, whisk together the buttermilk, vegetable oil, eggs, and vanilla extract until well combined.
4. Combine Wet and Dry: Pour the wet ingredients into the dry ingredients. Mix on low speed with an electric mixer, or by hand with a whisk, until just combined. Do not overmix.
5. Add Hot Liquid: Slowly add the hot water or brewed coffee to the batter, mixing until just smooth. The batter will be thin, and that’s perfectly normal for a moist Chocolate Cake.
6. Bake: Divide the batter evenly between the prepared cake pans. Bake for 30-35 minutes, or until a wooden skewer inserted into the center comes out clean.
7. Cool: Let the cakes cool in the pans for 15-20 minutes before inverting them onto cooling racks to cool completely. This is critical before you apply the chocolate frosting.
8. Prepare Frosting: While cakes cool, beat softened butter in a large bowl with an electric mixer until light and fluffy. Gradually add powdered sugar, cocoa powder, milk, vanilla extract, and salt. Beat on low until combined, then increase speed and beat until smooth and creamy. Add more milk if needed for desired consistency.
9. Assemble & Frost: Once cakes are completely cool, level the tops if necessary. Place one cake layer on your serving plate or cake stand. Spread a generous layer of chocolate frosting over the top. Carefully place the second cake layer on top. Frost the top and sides of the entire cake.
Nutritional Benefits & Advantages
This homemade Chocolate Cake, while an indulgence, offers certain advantages. Dark cocoa powder, a primary ingredient, is rich in antioxidants, particularly flavonoids, which have been linked to improved heart health and reduced inflammation. By making it at home, you control the quality of ingredients, opting for organic and high-quality cocoa, and avoiding artificial flavors, preservatives, and excessive hydrogenated fats often found in commercial cakes. While it’s a treat, the act of baking can also be a mindful, stress-reducing activity, offering a delicious reward at the end.
Tips, Variations & Cooking Advice
- Elevate Flavor: Add a pinch of espresso powder to your cake batter for a deeper, more intense chocolate flavor.
- Buttermilk Substitute: If you don’t have buttermilk, add 1 tablespoon of white vinegar or lemon juice to a measuring cup, then fill the rest with regular milk until it reaches 1 cup. Let it sit for 5 minutes before using.
- Gluten-Free: Substitute the all-purpose flour with a 1:1 gluten-free baking blend that contains xanthan gum.
- Dairy-Free: Use dairy-free milk (almond or oat milk), dairy-free butter, and dairy-free buttermilk substitute.
- Cream Cheese Frosting: For a tangy twist, replace some of the butter in the frosting with cream cheese.
- Portion Control: Bake in a 9×13 inch pan for a sheet cake, or use muffin tins for convenient cupcakes. Adjust baking times accordingly.
Common Mistakes to Avoid
- Overmixing the Batter: This develops gluten too much, leading to a tough, dry cake. Mix until just combined.
- Undercooking/Overcooking: Use the skewer test! A clean skewer means it’s done. Overbaking leads to dryness.
- Frosting a Warm Cake: This is a cardinal sin! The frosting will melt and slide off, creating a messy result. Ensure cakes are completely cool.
- Not Greasing and Flourishing Pans Properly: This leads to cakes sticking and breaking when trying to release them.
Storage & Meal Prep Tips
Your magnificent Chocolate Cake can be stored at room temperature, covered, for up to 3 days. For longer freshness, refrigerate it in an airtight container for up to 5-7 days. To reheat (if desired, though it’s delicious cold or at room temperature), let it sit out at room temperature for 30 minutes to an hour before serving to soften the chocolate frosting and cake. You can also freeze unfrosted cake layers wrapped tightly in plastic wrap and then foil for up to 2-3 months. Thaw frozen layers in the refrigerator overnight before frosting.
Conclusion
Crafting your own decadent Chocolate Cake from scratch is an incredibly rewarding experience, resulting in a dessert that consistently outshines any store-bought alternative. With its rich, moist crumb and the irresistible allure of a perfectly smooth chocolate frosting, this recipe is guaranteed to become a household favorite. Don’t be afraid to experiment with variations or personalize it to your taste. Bake it for a special occasion, a cozy evening in, or simply to satisfy that undeniable craving for chocolate. Share your baking triumphs with us – we can’t wait to see your delicious creations!
FAQs
1. Can I use oil instead of butter in the cake?
* Yes, the recipe already calls for vegetable oil, which contributes to the moist texture.
2. My cake came out dry. What went wrong?
* Common culprits are overbaking, too much flour, or not enough liquid. Ensure accurate measurements and watch baking times closely.
3. How can I make my chocolate frosting less sweet?
* Gradually reduce the amount of powdered sugar, adding it slowly until you reach your desired sweetness. You can also add an extra pinch of salt to balance the sweetness.
4. Can I make this into cupcakes?
* Absolutely! Line a muffin tin with paper liners, fill ¾ full, and bake for 18-22 minutes, or until a skewer comes out clean.
5. How do I prevent the frosting from melting when it’s hot outside?
* For warmer climates, use a frosting recipe that incorporates shortening or chilled butter. You can also add a tablespoon of cornstarch to your powdered sugar to increase its stability.