Reinvent Your Lunch: The Ultimate Guide to Crafting a Perfect Tuna Salad
Ever dream of a lunch that’s both deliciously satisfying and incredibly easy to make? Imagine a meal that cradles your taste buds with creamy textures, zesty notes, and wholesome goodness. Today, we’re diving deep into the art of creating the perfect batch of Tuna Salad, a culinary cornerstone that elevates any midday meal. Preparing this at home not only saves you money but also empowers you with complete control over the ingredients, ensuring a fresher, more flavorful experience than anything you’d find pre-made. And let’s be honest, nothing beats the satisfaction of a homemade Tuna Sandwich, customized exactly to your liking.
Ingredients & Kitchen Tools
- Canned Tuna (2 cans, 5 oz each, packed in water or olive oil, drained): The star of our show. Water-packed is lighter, while oil-packed offers richer flavor.
- Mayonnaise (½ cup): Binds everything together and provides that luscious creamy texture. You can adjust the amount to your preference.
- Celery (2 stalks, finely diced): Adds a refreshing crunch and subtle earthy notes.
- Red Onion (¼ cup, finely minced): Offers a sharp, pungent kick that balances the creaminess. For a milder flavor, soak in ice water for 5 minutes after mincing.
- Fresh Dill (2 tablespoons, chopped): Bright, herbaceous, and adds a classic, aromatic touch.
- Dijon Mustard (1 teaspoon): Provides a tangy depth that elevates the overall flavor profile.
- Lemon Juice (1 tablespoon, fresh): Essential for brightening up the flavors and cutting through the richness.
- Salt & Black Pepper (to taste): Basic seasonings to enhance all the other ingredients.
- Optional Add-ins: Capers for briny bursts, hard-boiled eggs for extra protein, or sweet pickle relish for a touch of sweetness.
Kitchen Tools:
- Medium mixing bowl: For combining all ingredients.
- Fork: To flake the tuna and mix.
- Cutting board and sharp knife: For prepping the vegetables and herbs.
- Measuring cups and spoons: For precise ingredient measurements.
Prep Time & Cooking Schedule
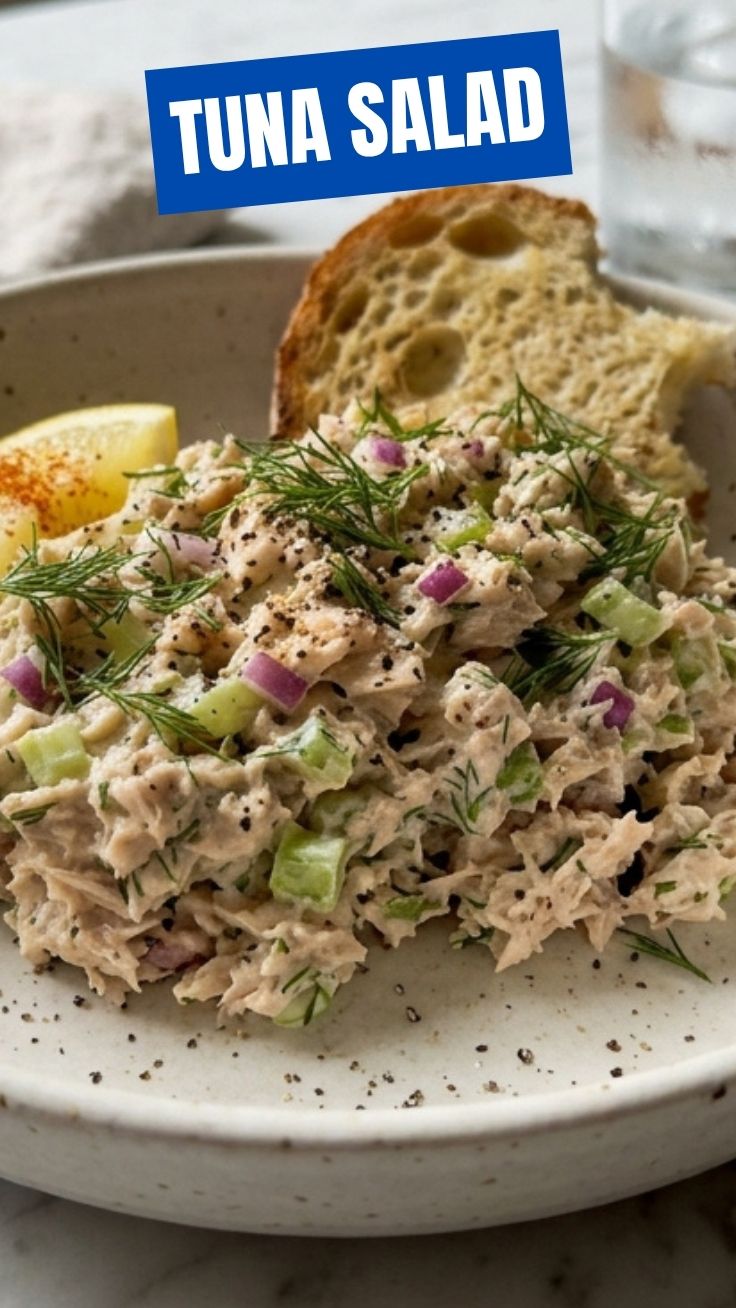
This recipe is incredibly quick, making it perfect for a busy week!
- Prep Time: 15 minutes
- Cook Time: 0 minutes
- Resting Time (Optional): 15-30 minutes (Allows flavors to meld beautifully)
Plan to prepare this delightful Tuna Salad in the morning for a fresh lunchtime treat, or even the night before, as the flavors only deepen with a little time in the fridge. The beauty of this recipe lies in its minimal effort and maximum reward.
Step-by-Step Instructions
1. Drain and Flake the Tuna: Open the cans of tuna and drain them thoroughly. Transfer the tuna to your medium mixing bowl. Use a fork to gently flake the tuna into smaller, bite-sized pieces. Avoid over-mashing; a little texture is good!
2. Chop the Veggies and Herbs: On your cutting board, finely dice the celery and mince the red onion. Chop the fresh dill. Precision here ensures an even distribution of flavor and pleasant texture in every bite.
3. Combine Remaining Ingredients: Add the mayonnaise, diced celery, minced red onion, chopped fresh dill, Dijon mustard, and fresh lemon juice to the bowl with the flaked tuna.
4. Season and Mix: Season generously with salt and black pepper to taste. Start with a pinch and adjust as needed. Gently mix all the ingredients until well combined. Ensure the mayonnaise coats everything evenly, creating that quintessential creamy Tuna Salad texture. Avoid over-mixing, which can make the tuna mushy.
5. Chill (Optional but Recommended): For optimal flavor, cover the bowl and refrigerate the tuna salad for at least 15-30 minutes. This allows the flavors to meld and intensify, transforming it into the perfect filling for a mouthwatering Tuna Sandwich.
6. Serve and Enjoy: Serve your freshly made tuna salad on its own, in a sandwich, atop a bed of lettuce, or with crackers.
Nutritional Benefits & Advantages
Tuna is a fantastic source of lean protein, essential for muscle repair and satiety. It’s also packed with Omega-3 fatty acids, which are known to support heart health and brain function. When prepared with fresh vegetables like celery and onion, this dish adds valuable fiber and vitamins to your diet. Opting for lighter mayonnaise or Greek yogurt can further reduce caloric intake while maintaining creaminess. This Tuna Salad is not just delicious; it’s a powerhouse of beneficial nutrients, proving that healthy eating can be incredibly flavorful.
Tips, Variations & Cooking Advice
- Creamy Alternatives: For a lighter option, substitute half or all the mayonnaise with Greek yogurt or mashed avocado.
- Flavor Boosts: Add a pinch of smoked paprika for a smoky depth, or a dash of hot sauce for a spicy kick. A spoonful of capers or chopped olives can introduce a briny complexity.
- Veggie Power: Incorporate finely chopped bell peppers for sweetness and color, or shredded carrots for an added earthy crunch.
- Herb Swap: Don’t have dill? Fresh parsley, chives, or even a modest amount of tarragon work wonderfully as substitutes.
- Gluten-Free/Dairy-Free: This recipe is naturally gluten-free. For a dairy-free version, ensure your mayonnaise is dairy-free. Serve on gluten-free bread or lettuce wraps.
Common Mistakes to Avoid
- Not Draining the Tuna Properly: Excess water makes the salad watery and dilutes the flavors. Squeeze out as much liquid as possible.
- Over-mixing: Mashing the tuna too much can result in a pasty texture. Aim for distinct flakes with some body.
- Skipping the Fresh Lemon Juice: This vital ingredient brightens the entire dish. Don’t omit it!
- Ignoring Seasoning: Taste as you go! Adjust salt, pepper, and lemon juice to achieve perfect balance.
- Serving Immediately Without Chilling: While edible, a brief chill allows the flavors to truly meld and deepen.
Storage & Meal Prep Tips
Your freshly prepared Tuna Salad can be stored in an airtight container in the refrigerator for up to 3-4 days. It’s an excellent candidate for meal prep, providing several days of delicious lunches. We do not recommend freezing tuna salad, as the mayonnaise and vegetables can separate and become watery upon thawing, compromising the texture. To maintain optimal freshness and crispness, store it separately from bread or crackers if preparing a Tuna Sandwich in advance. Assemble just before serving for the best experience.
Conclusion
Crafting your own Tuna Salad is more than just assembling ingredients; it’s about creating a versatile, flavorful, and incredibly satisfying meal that can be enjoyed in countless ways. From a classic Tuna Sandwich to a crisp lettuce wrap, this recipe offers endless possibilities. We hope this guide inspires you to whip up a batch and rediscover the simple joy of a truly great tuna salad. Share your creations and favorite variations in the comments below!
FAQs
1. Can I use fresh tuna instead of canned?
Absolutely! Poach or grill fresh tuna, then flake it. Just be aware that the texture and flavor will be different but equally delicious.
2. How can I make this spicier?
Add a pinch of cayenne pepper, a dash of hot sauce (like Sriracha), or finely minced jalapeños for an elevated kick.
3. What’s the best way to serve tuna salad other than a sandwich?
It’s excellent on crackers, as a lettuce wrap, stuffed into bell peppers or avocados, or as a topping for a green salad.
4. My tuna salad turned out too dry/too wet. What should I do?
If too dry, gradually add more mayonnaise or a splash of lemon juice. If too wet, ensure you’ve drained the tuna properly. Adding a bit more finely diced celery or a tablespoon of breadcrumbs can also help absorb excess moisture.
5. Is there a vegan alternative for this recipe?
Yes! You can use mashed chickpeas, white beans, or a plant-based tuna substitute as the base, then follow the remaining steps for a delicious vegan “tuna” salad.