Craving the Ultimate Comfort? Master the Art of the Homemade Chicken Sandwich!
Are you tired of bland, uninspired fast-food options that leave you feeling… unsatisfied? Imagine sinking your teeth into a perfectly crispy, juicy, and flavor-packed Chicken Sandwich, crafted right in your own kitchen. This isn’t just about saving money; it’s about elevating a simple dish to an epic culinary experience. Preparing a homemade version, even a fiery Nashville Hot Chicken Sandwich, offers unparalleled control over ingredients, freshness, and, most importantly, flavor. Let’s unlock the secrets to a truly unforgettable Chicken Sandwich that will have you ditching the drive-thru for good.
Ingredients & Kitchen Tools
Boneless, Skinless Chicken Thighs (4 large or 6 small): Thighs offer superior juiciness and flavor compared to breasts. Substitution: Chicken breasts can be used, but adjust cooking time to prevent dryness.*
- Buttermilk (2 cups): Tenderizes the chicken and forms the base for a flavorful dredge.
All-Purpose Flour (2 cups): For the crispy coating. Substitution: Gluten-free flour blend can be used for a GF version.*
- Cornstarch (1/2 cup): Adds extra crispiness to the breading.
- Smoked Paprika (1 tbsp): Adds warmth and a subtle smoky depth.
- Garlic Powder (1 tsp): A foundational aromatic.
- Onion Powder (1 tsp): Enhances savory notes.
- Cayenne Pepper (1 tsp, or more for heat): Essential for a kick, especially if aiming for that Nashville flair.
- Salt (to taste): Crucial for seasoning at every stage.
- Black Pepper (to taste): Freshly ground is always best.
- Pickle Brine (1/4 cup): Adds acidity and flavor to the buttermilk marinade.
- Dill Pickle Slices: The classic accompaniment for a refreshing tang.
Mayonnaise (1/2 cup): For a creamy spread. Substitution: Truffle mayo or spicy mayo for an elevated touch.*
Brioche Buns (4-6, depending on chicken quantity): Soft, slightly sweet, and sturdy enough to hold up to the fillings. Substitution: Potato buns or regular hamburger buns.*
Vegetable Oil (4-6 cups): For deep frying. Substitution: Canola or peanut oil.*
Kitchen Tools:
- Large Mixing Bowls (2-3): For marinating, dredging, and mixing seasonings.
- Whisk: To combine dry ingredients.
- Deep Pot or Dutch Oven: For deep frying.
- Thermometer (Candy or Digital Meat): Crucial for monitoring oil temperature and chicken doneness.
- Wire Rack with Baking Sheet: To drain excess oil and keep chicken crispy.
- Tongs: For handling chicken safely.
- Paper Towels: For blotting excess oil.
- Cutting Board & Sharp Knife: For prep work.
Prep Time & Cooking Schedule
- Marinating Time: 2-4 hours (or overnight for best results)
- Prep Time: 20 minutes
- Cooking Time: 15-20 minutes (per batch of chicken)
- Total Time: Approximately 2.5 hours (with minimum marination) or 15 minutes active cooking.
Plan to marinate your chicken well in advance. This tenderizes the meat and infuses it with flavor. The actual cooking is relatively quick once the oil is heated, making it a great weekend project or a celebratory weeknight meal.
Step-by-Step Instructions
1. Marinate the Chicken: Pat the chicken thighs dry. In a large bowl, combine buttermilk, pickle brine, a pinch of salt, and a dash of pepper. Add the chicken thighs, ensuring they are fully submerged. Cover and refrigerate for at least 2 hours, orpreferably overnight.
2. Prepare the Dredge: In another large bowl, whisk together the all-purpose flour, cornstarch, smoked paprika, garlic powder, onion powder, cayenne pepper, remaining salt, and black pepper. Mix thoroughly until no lumps remain.
3. Set Up Frying Station: Pour vegetable oil into a deep pot or Dutch oven, filling it about 3-4 inches deep. Heat the oil over medium-high heat until it reaches 350-375°F (175-190°C). Use a thermometer to monitor the temperature continuously.
4. Dredge the Chicken: One by one, remove a chicken thigh from the buttermilk marinade, allowing excess to drip off. Dip it into the flour mixture, pressing firmly to ensure a thick, even coating. Shake off any excess flour. Repeat for all chicken pieces. For an extra crispy Chicken Sandwich, double dredge: after the first flour coat, dip it back into the buttermilk mixture (or just the residual marinade) and then into the flour again.
5. Fry the Chicken: Carefully lower 1-2 chicken pieces into the hot oil, being careful not to overcrowd the pot. Fry for 6-8 minutes per side, or until golden brown and cooked through (internal temperature reaches 165°F / 74°C). The vibrant flavors of a Nashville Hot Chicken Sandwich begin with this perfect fry.
6. Drain and Rest: Using tongs, transfer the fried chicken to a wire rack set over a baking sheet to drain excess oil. This ensures the chicken stays crispy. Lightly sprinkle with a pinch of salt immediately after frying.
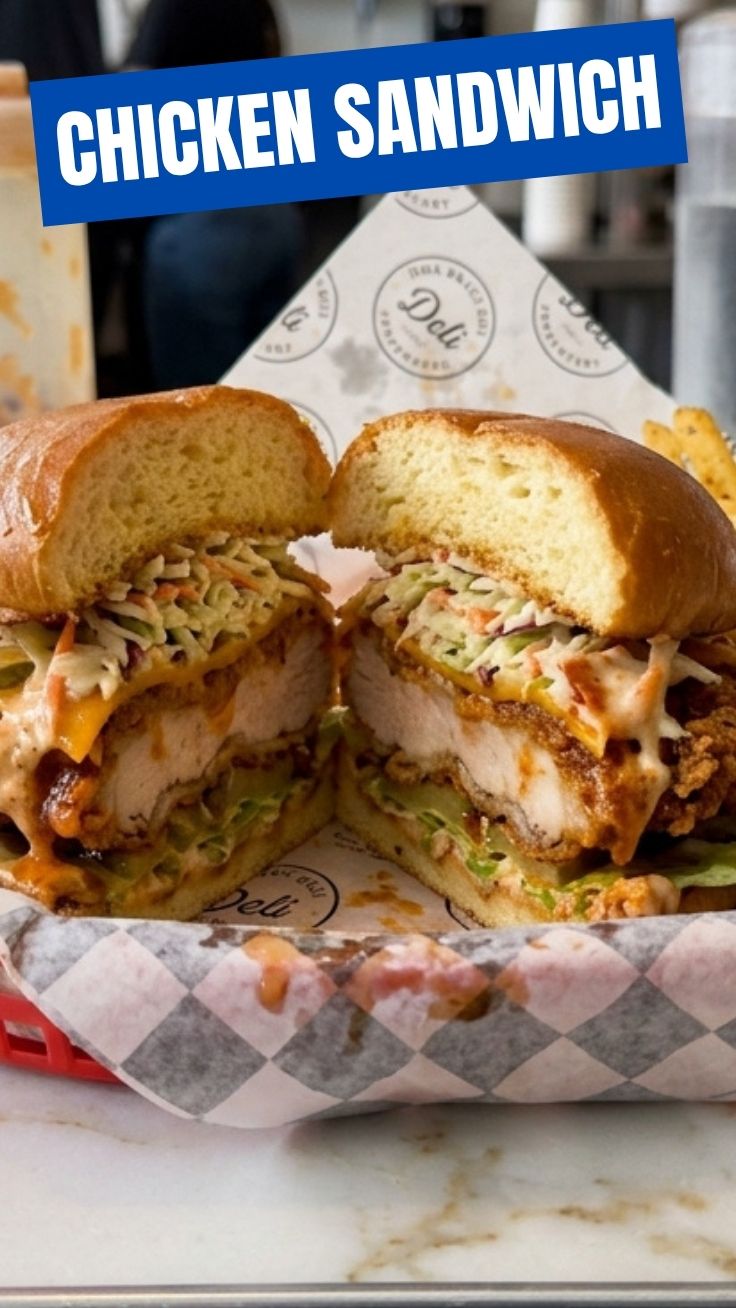
7. Toast Buns & Assemble: Lightly butter and toast the brioche buns. Spread mayonnaise on both sides of the toasted bun. Place a crispy chicken thigh on the bottom bun, layer with plenty of dill pickle slices, and crown with the top bun. Serve immediately.
Nutritional Benefits & Advantages
Chicken thighs are a good source of protein, essential for muscle repair and growth, and contain iron, which supports healthy blood circulation. Including a vibrant pickle adds probiotics (if fermented) and a refreshing crunch. By making this at home, you control the type and amount of oil, sodium, and sugar, avoiding hidden additives often found in restaurant versions. This allows for a more wholesome and satisfying meal tailored to your dietary needs.
Tips, Variations & Cooking Advice
- Nashville Hot Twist: For a true Nashville Hot Chicken Sandwich, after frying, brush the hot chicken liberally with a mixture of hot oil (from the frying pan), cayenne pepper, brown sugar, paprika, and a touch of butter.
- Spice Level: Adjust cayenne pepper to your preference. Add a pinch of chili flakes to the dredge for extra heat.
- Sauce It Up: Experiment with different sauces—honey mustard, comeback sauce, or a spicy sriracha mayo.
- Coleslaw Crunch: Adding a fresh, crunchy coleslaw to your sandwich provides an excellent textural contrast and cuts through the richness.
- Air Fryer Option: For a healthier alternative, air fry the dredged chicken at 375°F (190°C) for 18-22 minutes, flipping halfway, until crispy and cooked through. It won’t be quite as crispy as deep-fried but still delicious.
Common Mistakes to Avoid
- Overcrowding the Pot: Frying too many chicken pieces at once drops the oil temperature, leading to soggy, oily chicken. Fry in batches.
- Insufficient Oil Temperature: Oil that isn’t hot enough results in greasy chicken that absorbs too much oil. Too hot, and the outside burns before the inside cooks. Use a thermometer!
- Not Resting the Chicken: Resting allows the juices to redistribute, leading to a more tender and juicy final product.
- Skipping the Marinade: The buttermilk marinade is key for tenderizing and flavor. Don’t rush this step.
Storage & Meal Prep Tips
Leftover fried chicken can be stored in an airtight container in the refrigerator for up to 3-4 days. To reheat and maintain crispiness, place the chicken on a wire rack over a baking sheet and bake in a preheated oven at 375°F (190°C) for 10-15 minutes, or until heated through and crispy. Avoid microwaving, as it will make the breading soggy. The components can be prepped ahead: marinate chicken, prepare the dredge, and make any sauces. Assemble the sandwich just before serving for optimal texture.
Conclusion
Crafting your own delicious Chicken Sandwich at home is a rewarding culinary journey that delivers unmatched flavor and satisfaction. Whether you prefer a classic crispy delight or the fiery kick of a Nashville Hot Chicken Sandwich, this recipe provides everything you need to create a masterpiece. Don’t just eat; create an experience. Give this recipe a try and share your mouth-watering results in the comments below! What’s your go-to topping? Let us know!
FAQs
Q1: Can I use chicken breast instead of thighs?
A1: Yes, chicken breast can be used. However, be mindful that it can dry out quicker, so adjust frying times accordingly and consider brining for extra moisture.
Q2: What if I don’t have buttermilk?
A2: You can make a homemade buttermilk substitute by adding 1 tablespoon of lemon juice or white vinegar to 1 cup of regular milk and letting it sit for 5-10 minutes until it slightly curdles.
Q3: How do I ensure my chicken is extra crispy?
A3: The cornstarch in the dredge, the double dredging technique, frying at the correct oil temperature (350-375°F), and draining on a wire rack are all crucial for maximum crispiness.
Q4: Can I make this sandwich gluten-free?
A4: Absolutely! Substitute the all-purpose flour with a high-quality gluten-free flour blend. Ensure your buns are also gluten-free.
Q5: What’s the best way to prevent the breading from falling off?
A5: Press the flour mixture firmly onto the chicken during dredging, ensure the chicken is adequately marinated but not excessively wet when it goes into the flour, and avoid overcrowding the frying pot.