The Irresistible Aroma of Homemade Bliss: Crafting Perfect Cinnamon Rolls from Scratch
Ever wonder what makes a house truly feel like home? Often, it’s the simplest things – a warm cup of coffee, a comfy blanket, or the heavenly scent of freshly baked goods filling the air. Few aromas evoke such universal comfort and nostalgia as that of baking Cinnamon Rolls. Creating these delectable treats from scratch isn’t just about making a dessert; it’s about crafting an experience, indulging in a moment of pure culinary delight, and filling your kitchen with the irresistible allure of sweet, spiced dough. The joy of pulling a pan of golden-brown, swirling spirals from the oven, glistening with a perfectly melted glaze, is unparalleled. This comprehensive guide will walk you through every step of making these iconic pastries, ensuring a batch of perfect rolls infused with exquisite Cinnamon that will delight your senses and impress your loved ones. Get ready to embark on a baking adventure that promises warmth, flavor, and a truly rewarding culinary journey.
Ingredients & Kitchen Tools
To embark on your journey to perfect Cinnamon Rolls, gather the following:
For the Dough:
- ½ cup warm milk (105-115°F): Activates the yeast. Any dairy or non-dairy milk works.
- 2 ¼ teaspoons active dry yeast (one standard packet): The leavening agent that makes the rolls fluffy.
- ¼ cup granulated sugar: Feeds the yeast and adds sweetness to the dough.
- 1 large egg, room temperature: Adds richness and helps with texture.
- ¼ cup unsalted butter, melted: Contributes tenderness and flavor.
- 2 ½ – 3 cups all-purpose flour, plus more for dusting: The main structural component of the dough. Start with 2.5 and add as needed.
- ½ teaspoon salt: Balances sweetness and enhances flavor.
For the Filling:
- ½ cup unsalted butter, softened: Acts as a binder for the spices.
- ¾ cup packed light brown sugar: Provides deep, caramel notes.
- 2 tablespoons ground Cinnamon: The star spice, delivering warmth and aroma.
- Optional: 1 teaspoon vanilla extract or a pinch of nutmeg for extra depth.
For the Cream Cheese Frosting:
- 4 ounces cream cheese, softened: The classic tangy base for the frosting.
- ¼ cup unsalted butter, softened: Adds richness and smoothness.
- 1 ½ cups powdered sugar: For sweetness and a smooth, thick consistency.
- ½ teaspoon vanilla extract: Enhances the overall flavor profile.
- 1-2 tablespoons milk or cream: To achieve the desired frosting consistency.
Kitchen Tools:
- Large mixing bowl: For dough preparation.
- Measuring cups and spoons: For accurate ingredient quantities.
- Whisk or stand mixer with dough hook: For mixing and kneading.
- Rolling pin: To flatten and shape the dough.
- 9×13 inch baking pan: To bake the rolls.
- Spatula or offset spatula: For spreading the filling and frosting.
- Sharp knife or unflavored dental floss: For cutting dough into individual rolls.
Prep Time & Cooking Schedule
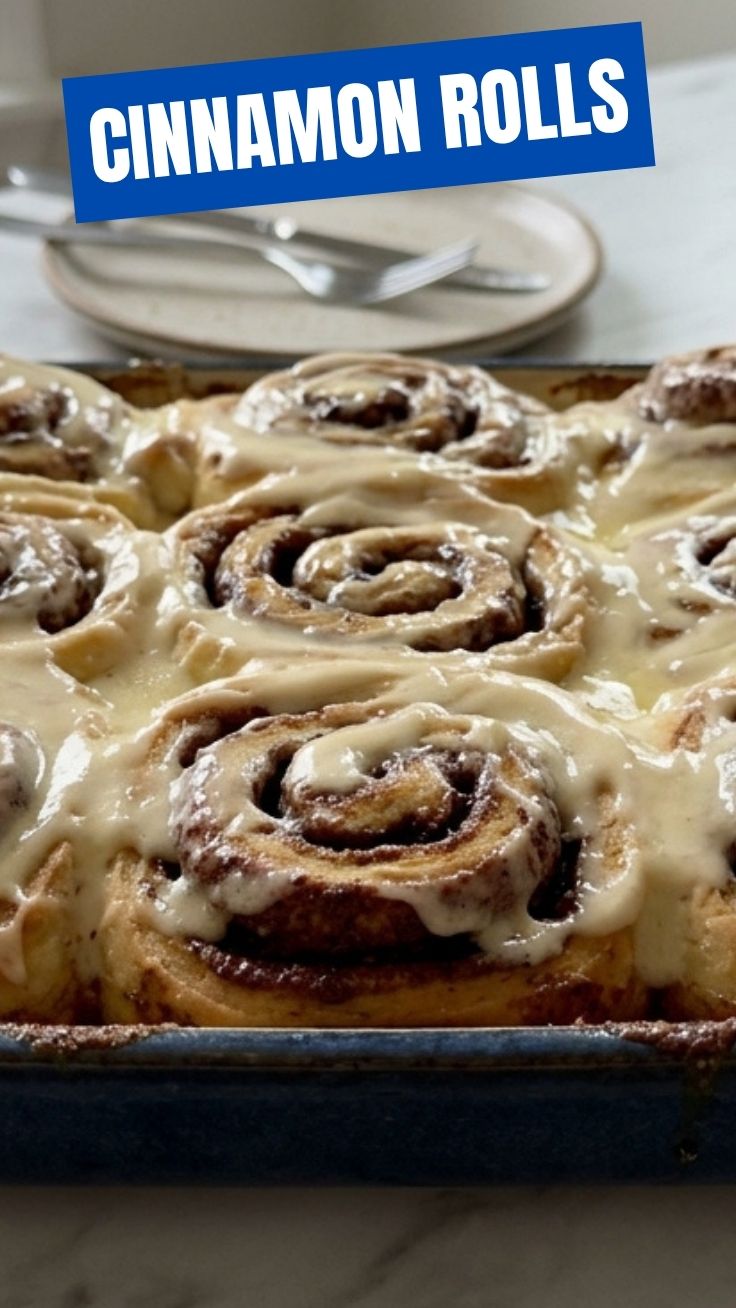
Crafting these delightful pastries requires a bit of time, but the process is incredibly rewarding.
- Active Prep Time: 30 minutes (mixing dough, preparing filling, shaping).
- First Rise (Proofing): 1-1.5 hours (until doubled in size). This is crucial for light, airy rolls.
- Second Rise (After Shaping): 30-45 minutes (allows rolls to puff up again).
- Bake Time: 20-25 minutes.
- Cooling Time: 10-15 minutes before frosting.
Total time from start to finish is approximately 3-4 hours, which includes resting periods. This makes them a perfect weekend baking project or a luxurious treat planned in advance.
Step-by-Step Instructions
1. Activate the Yeast: In your large mixing bowl, combine the warm milk, yeast, and ¼ cup granulated sugar. Stir gently and let it sit for 5-10 minutes until foamy. This confirms your yeast is alive and active.
2. Prepare the Dough: Add the egg, melted butter, 2 ½ cups of flour, and salt to the yeast mixture. Mix with a spoon or a dough hook on a stand mixer until a shaggy dough forms. Gradually add more flour, a tablespoon at a time, until the dough comes together and is no longer excessively sticky.
3. Knead the Dough: Turn the dough out onto a lightly floured surface. Knead for 5-8 minutes until it’s smooth and elastic. If using a stand mixer, knead on medium-low speed for 5-7 minutes.
4. First Rise: Lightly grease the mixing bowl with oil. Place the dough in the bowl, turning once to coat. Cover with plastic wrap or a clean kitchen towel and let it rise in a warm spot for 1 to 1.5 hours, or until doubled in size.
5. Prepare the Filling: While the dough rises, combine the softened butter, brown sugar, and ground Cinnamon in a small bowl. Mix until well combined and paste-like.
6. Shape the Rolls: Once the dough has risen, gently punch it down. Roll it out on a lightly floured surface into a large rectangle, approximately 18×12 inches. Evenly spread the Cinnamon Rolls filling over the entire surface of the dough, leaving a small border on one long edge.
7. Roll and Cut: Starting from the long edge opposite the border, carefully roll the dough tightly into a log. Use a sharp knife or unflavored dental floss to cut the log into 12 equal-sized rolls (about 1.5 inches thick each).
8. Second Rise: Arrange the cut rolls in a lightly greased 9×13 inch baking pan, leaving a little space between them. Cover the pan and let them rise again in a warm spot for 30-45 minutes, or until puffy.
9. Bake: Preheat your oven to 375°F (190°C). Bake the rolls for 20-25 minutes, or until golden brown and cooked through. If they brown too quickly, tent loosely with foil.
10. Prepare Frosting: While the rolls cool slightly, beat together the softened cream cheese, butter, powdered sugar, and vanilla extract until smooth and creamy. Add milk or cream, one tablespoon at a time, until you reach your desired consistency.
11. Frost and Serve: Once the rolls are out of the oven and have cooled for about 10-15 minutes (they should still be warm), spread the cream cheese frosting generously over them. Serve immediately and enjoy!
Nutritional Benefits & Advantages
Beyond their incredible taste, homemade Cinnamon Rolls offer a few advantages. By making them yourself, you control the quality of ingredients, opting for organic or local where possible. Cinnamon itself is a powerhouse spice, known for its anti-inflammatory properties, antioxidant content, and potential to help regulate blood sugar levels. While these rolls are undoubtedly a treat, enjoying them homemade means less artificial additives and preservatives found in store-bought versions. The act of baking itself can also be a mindful and stress-reducing activity, offering benefits for mental well-being.
Tips, Variations & Cooking Advice
- Overnight Rolls: To enjoy fresh rolls in the morning, prepare the dough and shape the rolls up to step 8. Cover the pan tightly with plastic wrap and refrigerate overnight. In the morning, let them come to room temperature for 30-45 minutes before baking.
- Gluten-Free: Substitute the all-purpose flour with a 1:1 gluten-free baking blend that contains xanthan gum. Adjust liquid as needed, as GF flours can absorb differently.
- Dairy-Free: Use a non-dairy milk alternative (almond, soy, oat) and dairy-free butter for both the dough and filling. For the frosting, use dairy-free cream cheese and butter alternatives.
- Spice It Up: Add a pinch of cardamom, nutmeg, or allspice to the filling for a more complex flavor profile.
- Nutty Addition: Sprinkle chopped pecans or walnuts over the filling before rolling for added crunch.
Common Mistakes to Avoid
- Over-flouring the Dough: Too much flour results in dry, tough rolls. Add flour gradually and stop when the dough is no longer excessively sticky.
- Insufficient Kneading: Undern-kneaded dough won’t develop enough gluten, leading to dense rolls. Keep kneading until smooth and elastic.
- Wrong Yeast Temperature: Water that’s too hot will kill the yeast; too cold, and it won’t activate. Aim for 105-115°F.
- Skipping the Rises: Each proofing stage is vital for a light, airy texture. Don’t rush them!
- Overbaking: This will dry out your rolls. Keep an eye on them and remove them from the oven once golden brown.
Storage & Meal Prep Tips
Leftover Cinnamon Rolls are a rare commodity, but if you happen to have any, store them in an airtight container at room temperature for up to 2-3 days. For longer storage, refrigerate for up to a week. To reheat, warm them gently in the microwave for 15-30 seconds, or in a preheated oven at 300°F (150°C) for 5-10 minutes until warmed through. The frosting tends to melt beautifully when reheated. For convenient meal prep, you can freeze unbaked rolls after the second rise. Place them on a baking sheet to freeze solid, then transfer to a freezer-safe bag for up to 1-2 months. When ready to bake, thaw overnight in the refrigerator, then let them come to room temperature for about an hour before baking as directed.
Conclusion
There’s truly nothing quite like the comforting embrace of a homemade Cinnamon Roll. From the gentle warmth of the yeasted dough to the fragrant burst of sweet Cinnamon and the creamy tang of the frosting, every bite is a celebration of flavor and a testament to the joy of baking from scratch. This recipe empowers you to create bakery-quality treats right in your own kitchen, filling your home with an aroma that spells pure happiness. Don’t be shy about experimenting with variations, and certainly, don’t hesitate to share these delightful creations with friends and family. Happy baking!
FAQs
Q1: My dough isn’t rising. What went wrong?
A1: The most common culprit is inactive yeast. Ensure your milk was within the 105-115°F temperature range. If it was too hot, it killed the yeast; too cold, and it won’t activate. Also, make sure your yeast isn’t expired.
Q2: Can I reduce the amount of sugar in the recipe?
A2: While you can slightly reduce the sugar in the dough and frosting, do so minimally, especially in the dough, as sugar feeds the yeast. The filling is heavily reliant on the brown sugar for its distinctive flavor and texture.
Q3: How do I get perfectly even rolls when cutting?
A3: For truly perfect rolls, use unflavored dental floss. Slide it under the rolled dough, cross the ends over the top, and pull to slice through cleanly without squishing the spirals. A very sharp, un-serrated knife can also work well.
Q4: My rolls came out dry. What can I do next time?
A4: Dry rolls are usually a result of overbaking or adding too much flour during kneading. Ensure you’re not adding more flour than necessary to the dough, and bake just until golden brown, testing for doneness. An oven thermometer can help verify your oven’s actual temperature.
Q5: Can I make the cream cheese frosting ahead of time?
A5: Yes, you can prepare the frosting up to 2-3 days in advance and store it in an airtight container in the refrigerator. Before using, let it come to room temperature and re-whip it briefly to restore its creamy consistency.