Master the Art of Homemade Brownies: Your Ultimate Guide to Fudgy Perfection
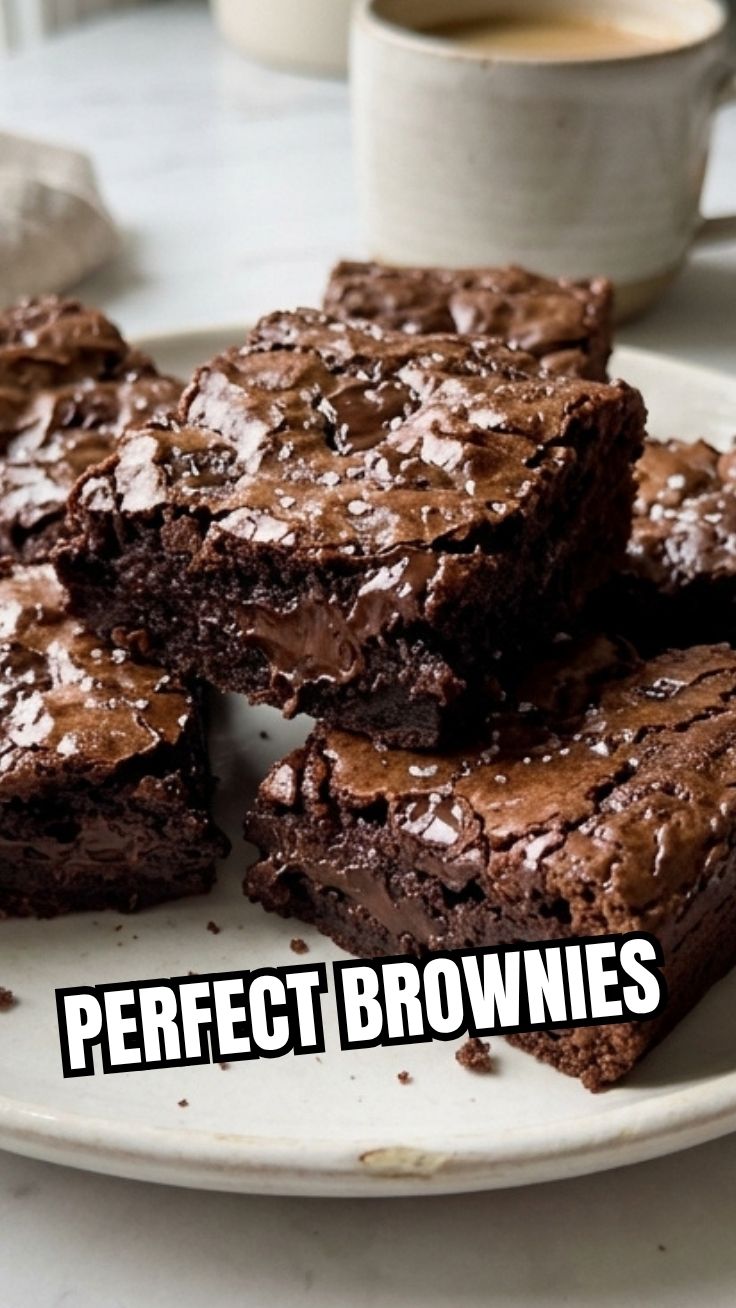
Are you ready to transform your kitchen into a haven of irresistible aromas and gooey delights? Creating the perfect Brownies at home isn’t just about mixing ingredients; it’s an act of culinary magic that promises unmatched satisfaction. Forget store-bought imitations; truly exceptional chocolate brownies are born from a thoughtful blend of quality components and a sprinkle of baking passion. This comprehensive guide will empower you to craft chewy, fudgy, and utterly divine Brownies that will leave everyone craving more. Mastering this classic treat means you’ll always have a crowd-pleasing dessert on hand, a comforting snack for a cozy evening, or the perfect base for an indulgent sundae. Let’s delve into making these decadent squares from scratch!
Ingredients & Kitchen Tools
Crafting the perfect batch requires a few essential items:
- 1 cup (2 sticks) unsalted butter, melted: Provides richness and a fudgy texture.
- 2 cups granulated sugar: Sweetness and contributes to the crusty top.
- 4 large eggs: Binds the ingredients and adds moisture.
- 1 teaspoon vanilla extract: Enhances the overall flavor profile.
- 1 cup all-purpose flour: Structure for the brownies; can be substituted with a 1:1 gluten-free flour blend for a gluten-free option.
- ¾ cup unsweetened cocoa powder: The star ingredient for that deep chocolate flavor. Choose Dutch-processed for a darker color and milder taste.
- ½ teaspoon baking powder: Provides a slight lift, ensuring they’re not too dense.
- ¼ teaspoon salt: Balances the sweetness and enhances chocolate flavor.
- 1 cup chocolate chips (optional): For an extra layer of chocolatey goodness. Use semi-sweet, milk, or dark chocolate, depending on preference.
Kitchen Tools:
- 9×13 inch baking pan: Ideal size for a standard batch.
- Parchment paper: Lines the pan for easy removal and cleanup.
- Large mixing bowls: For wet and dry ingredients.
- Whisk: For combining ingredients smoothly.
- Spatula: For scraping bowls and folding.
- Measuring cups and spoons: For precise ingredient measurements.
Prep Time & Cooking Schedule
- Prep time: 15 minutes
- Cook time: 25-30 minutes
- Resting time: 30-60 minutes (crucial for setting and achieving fudgy texture)
Plan your baking session to allow ample resting time after they come out of the oven. This helps the Brownies set properly, preventing them from falling apart when cut and ensuring that desirable fudgy consistency.
Step-by-Step Instructions
1. Preheat & Prep: Preheat your oven to 350°F (175°C). Line a 9×13 inch baking pan with parchment paper, leaving an overhang on the sides for easy lifting. Lightly grease the parchment.
2. Melt Butter & Sugar: In a large mixing bowl, combine the melted butter and granulated sugar. Whisk thoroughly until well combined and smooth. This foundational step is key to a glossy top.
3. Add Wet Ingredients: Beat in the eggs one at a time, ensuring each is fully incorporated before adding the next. Stir in the vanilla extract. The mixture should be light and slightly frothy.
4. Combine Dry Ingredients: In a separate medium bowl, whisk together the all-purpose flour, unsweetened cocoa powder, baking powder, and salt.
5. Combine Wet and Dry: Gradually add the dry ingredient mixture to the wet ingredients, mixing until just combined. Be careful not to overmix, as this can lead to dry, cakey Brownies. If using, fold in the chocolate chips at this stage. We’re aiming for that perfect chewy texture with these rich chocolate brownies.
6. Bake: Pour the batter evenly into the prepared baking pan. Bake for 25-30 minutes, or until a toothpick inserted into the center comes out with moist crumbs, but not wet batter. Overbaking will result in dry brownies.
7. Cool: Allow the brownies to cool completely in the pan on a wire rack before cutting. This resting period is vital for the structure and fudginess.
Nutritional Benefits & Advantages
While often seen as an indulgence, homemade Brownies made with real ingredients can offer surprising benefits. Dark cocoa powder is rich in antioxidants, which can help combat free radicals in the body. Furthermore, making them at home allows you to control sugar content and choose high-quality butter, avoiding artificial additives often found in pre-made mixes or store-bought versions. The eggs contribute protein, and opting for whole wheat flour slightly increases fiber.
Tips, Variations & Cooking Advice
- Fudgier Brownies: Decrease the flour by ¼ cup for an even denser, fudgier texture.
- Cakey Brownies: Increase the flour by ¼ cup and add an extra ¼ teaspoon of baking powder.
- Flavor Boosts: Add a pinch of espresso powder to enhance the chocolate flavor without making the brownies taste like coffee. A swirl of cream cheese through the batter before baking creates delicious cream cheese brownies.
- Nutty Delights: Fold in 1 cup of chopped walnuts or pecans with the chocolate chips for added flavor and crunch.
- Gluten-Free: Substitute all-purpose flour with a 1:1 gluten-free baking blend.
- Dairy-Free: Use a plant-based butter substitute and ensure your chocolate chips are dairy-free.
Common Mistakes to Avoid
- Overmixing: Overmixing develops gluten, leading to dry, tough Brownies instead of the desired fudgy texture. Mix until just combined.
- Overbaking: A common pitfall! Brownies continue to cook slightly as they cool. Remove them from the oven when a toothpick comes out with moist crumbs, not liquid batter. If it comes out clean, they are likely overbaked.
- Cutting Too Soon: Patience is a virtue here. Cutting warm brownies leads to messy, uneven squares. Allow them to cool completely (at least an hour, preferably two) to fully set.
- Using Too Much Flour: This can result in dry, crumbly brownies. Measure your flour accurately, ideally by weight for best results.
Storage & Meal Prep Tips
Cooled Brownies can be stored in an airtight container at room temperature for up to 3-4 days. For longer storage, freeze individual squares wrapped tightly in plastic wrap and then placed in a freezer-safe bag for up to 3 months. Thaw at room temperature or gently warm in the microwave for a few seconds. They make for an excellent make-ahead dessert or snack!
Conclusion
Crafting your own delicious Brownies is a rewarding experience, transforming simple ingredients into a truly special treat. With this guide, you’re now equipped to bake the perfect batch of fudgy, delectable chocolate brownies every time. Experiment with variations, avoid common pitfalls, and savor the rich, comforting taste of homemade goodness. We encourage you to try this recipe, share your baking successes, and explore the endless possibilities of this classic dessert!
FAQs
1. Why are my brownies cakey instead of fudgy?
This often happens due to overmixing the batter or adding too much flour. Also, ensure you don’t overbake them; a slightly underbaked brownie will be fudgier once cooled.
2. Can I add nuts or other mix-ins to the brownies?
Absolutely! Walnuts, pecans, white chocolate chips, or even chopped Oreos are popular additions. Fold them in during the final stage of mixing the batter.
3. How do I get that crackly top on my brownies?
The crackly top is often achieved by whisking the melted butter and sugar very well until light and airy before adding the eggs. The sugar dissolving and caramelizing creates this effect.
4. My brownies are sticking to the pan, what went wrong?
Ensure you line your pan with parchment paper and lightly grease it. Also, make sure they are completely cooled before attempting to cut and remove them.
5. How long do homemade brownies last?
When stored in an airtight container at room temperature, homemade brownies typically stay fresh for 3-4 days. They can be frozen for up to 3 months for longer storage.