Craving the Ultimate Comfort? Unveiling the Secret to Perfect Homemade Chocolate Chip Cookies
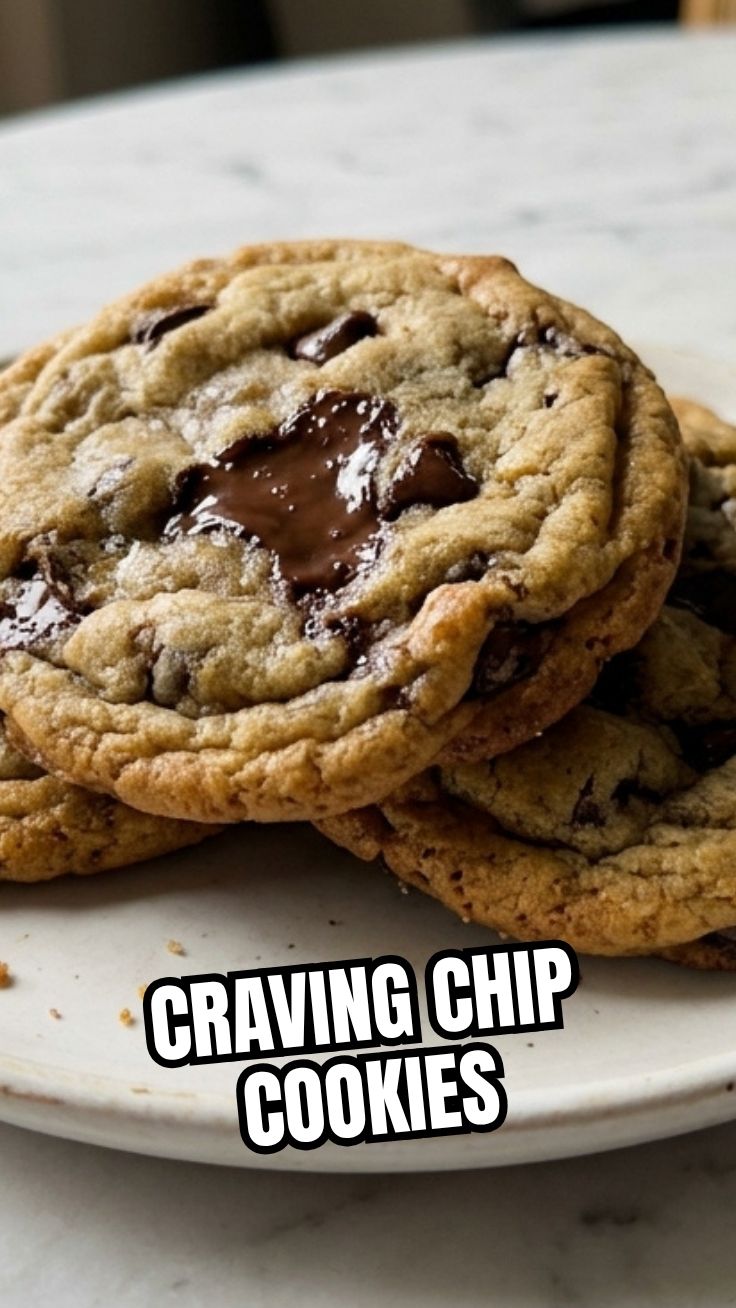
Who can resist the allure of warm, gooey chocolate chip cookies straight from the oven? That irresistible aroma wafting through your home, the anticipation of that first bite—it’s pure magic. While store-bought cookies have their place, there’s an undeniable satisfaction and superior flavor that comes from crafting them yourself. This isn’t just about a sweet treat; it’s about creating memories, sharing joy, and mastering a culinary classic. Today, we’re diving deep into the art and science of baking the perfect Chocolate Chip Cookies, a timeless indulgence that elevates any occasion. Get ready to transform simple ingredients into an extraordinary dessert, and explore how these baking recipes can become a regular, delightful part of your kitchen repertoire.
Ingredients & Kitchen Tools
- All-Purpose Flour (2 ¼ cups): The structural backbone of our cookies. We recommend unbleached for best results.
- Baking Soda (1 teaspoon): Our leavening agent, responsible for that perfect rise and chewy texture.
- Salt (1 teaspoon): Balances sweetness and enhances all the flavors. Don’t skip it!
- Unsalted Butter (1 cup, 2 sticks, softened): Provides richness, flavor, and contributes to the cookie’s tender crumb. Softened, not melted.
- Granulated Sugar (¾ cup): Contributes to browning and gives a crispier edge.
- Brown Sugar (¾ cup, packed): Adds moisture, chewiness, and a deeper, molasses-rich flavor.
- Large Eggs (2): Binds ingredients, adds moisture, and contributes to structure. Best at room temperature.
- Vanilla Extract (1 teaspoon): A flavor enhancer that brings warmth and depth. Use good quality!
- Chocolate Chips (2 cups, semi-sweet or your preference): The star of the show! Feel free to mix milk, dark, or even chopped chocolate bars.
Kitchen Tools:
- Large Mixing Bowl: For combining dry and wet ingredients.
- Electric Mixer (stand or hand-held): Essential for creaming butter and sugars efficiently.
- Rubber Spatula: For scraping down the sides of the bowl and folding in chocolate chips.
- Measuring Cups and Spoons: For accurate ingredient measurement.
- Baking Sheets: Non-stick or lined with parchment paper.
- Parchment Paper or Silicone Baking Mats: Prevents sticking and ensures even baking.
- Wire Cooling Rack: For cooling cookies evenly and preventing sogginess.
- Cookie Scoop (optional, but recommended): Ensures uniform cookie size for even baking.
Prep Time & Cooking Schedule
- Prep Time: 15 minutes
- Chilling Time: 30 minutes (minimum), up to 24 hours (recommended for best flavor and texture)
- Cook Time: 9-12 minutes per batch
- Cooling Time: 5-10 minutes on the baking sheet, then fully on a wire rack
The chilling time is crucial here! It allows the flavors to meld, the flour to fully hydrate, and the butter to firm up, resulting in a more complex flavor and a thicker, chewier cookie that doesn’t spread excessively. Don’t rush this step if you’re aiming for perfection!
Step-by-Step Instructions
1. Preheat & Prepare: Preheat your oven to 375°F (190°C). Line several baking sheets with parchment paper or silicone baking mats.
2. Combine Dry Ingredients: In a medium bowl, whisk together the flour, baking soda, and salt. Set aside.
3. Cream Wet Ingredients: In a large mixing bowl, beat the softened butter with the granulated sugar and brown sugar using an electric mixer on medium speed until light and fluffy, about 2-3 minutes. This creaming process incorporates air, contributing to the cookie’s texture.
4. Add Eggs & Vanilla: Beat in the eggs one at a time, mixing well after each addition. Stir in the vanilla extract. Scrape down the sides of the bowl to ensure everything is well combined.
5. Gradually Add Dry to Wet: With the mixer on low speed, gradually add the dry ingredient mixture to the wet ingredients, mixing just until combined. Be careful not to overmix, as this can lead to tough cookies.
6. Fold in Chocolate Chips: Remove the bowl from the mixer and use a rubber spatula to fold in the Chocolate Chip Cookies. Ensure they are evenly distributed throughout the dough.
7. Chill the Dough: Cover the bowl with plastic wrap and refrigerate for at least 30 minutes. For truly exceptional texture and depth of flavor, chill for 2-24 hours. This step is a game-changer for many baking recipes.
8. Scoop & Bake: Drop rounded tablespoons of dough (or use a cookie scoop for uniformity) onto the prepared baking sheets, leaving about 2 inches between each cookie.
9. Bake to Golden Perfection: Bake for 9-12 minutes, or until the edges are golden brown but the centers still look slightly underdone. This indicates a soft, chewy interior.
10. Cool & Enjoy: Let the cookies cool on the baking sheet for 5-10 minutes before transferring them to a wire rack to cool completely. This prevents them from breaking and helps them firm up.
Nutritional Benefits & Advantages
While often seen as an indulgence, homemade chocolate chip cookies can offer some surprising benefits. Dark chocolate chips, in particular, are rich in antioxidants which can help combat free radicals. Eggs provide protein and essential vitamins, while butter (in moderation) contributes healthy fats and fat-soluble vitamins. Making them at home allows you to control the quality of ingredients, reduce artificial additives, and even customize sugar levels or incorporate healthier flours (like whole wheat pastry flour for a fiber boost).
Tips, Variations & Cooking Advice
- Brown Butter: For an elevated flavor, brown your butter before creaming it with the sugars. This adds a nutty, rich dimension.
- Salt Sprinkle: A light sprinkle of flaky sea salt on top of the cookies just before baking enhances the chocolate flavor dramatically.
- Chocolate Chunks vs. Chips: Experiment with finely chopped chocolate bars (milk, dark, or a mix) instead of chips for a more sophisticated melt and texture.
- Add-ins: Get creative! Nuts (walnuts, pecans), toffee bits, dried cranberries, or even a dash of espresso powder can transform the flavor profile.
- Gluten-Free Version: Substitute an equal amount of a good quality gluten-free all-purpose flour blend (one that contains xanthan gum) for the wheat flour.
- Vegan Version: Use plant-based butter, flax eggs (1 tbsp ground flaxseed + 3 tbsp water per egg), and ensure your chocolate chips are dairy-free.
Common Mistakes to Avoid
- Overmixing the Dough: This develops gluten excessively, resulting in dry, tough cookies. Mix just until combined.
- Not Chilling the Dough: Skipping this step leads to thinner, spread-out cookies with less flavor depth. Patience is key!
- Overcrowding the Baking Sheet: Give cookies space to spread. Crowding can lead to uneven baking and cookies sticking together.
- Baking Too Long: The number one culprit for dry, hard cookies. Pull them from the oven when the edges are golden and centers are still slightly soft. They’ll continue to cook a bit on the hot sheet.
- Using Cold Eggs/Butter: Room temperature ingredients emulsify better, creating a smoother dough and better texture.
Storage & Meal Prep Tips
Store cooled cookies in an airtight container at room temperature for up to 3-5 days. To keep them soft, you can place half a slice of bread in the container (replace daily). For longer storage, freeze baked cookies in an airtight container or freezer bag for up to 3 months. Thaw at room temperature or gently warm in a microwave or oven.
Meal Prep Hack: Form the dough into balls and freeze them on a baking sheet until solid. Transfer the frozen dough balls to a freezer bag. When a craving strikes, simply place the frozen dough balls on a baking sheet and bake for a few extra minutes (approximately 12-15 minutes) – warm, fresh cookies on demand!
Conclusion
There you have it—your definitive guide to baking the most exquisite Chocolate Chip Cookies. By following these steps and incorporating our expert tips, you’re not just making a dessert; you’re creating a moment of pure culinary delight. The joy of warm, freshly baked cookies is unparalleled, and mastering this classic opens up a world of possibilities for exploring other delightful baking recipes. Don’t be afraid to experiment, personalize, and most importantly, enjoy the process. We encourage you to try this recipe, share your delicious creations in the comments below, and let the aroma of homemade goodness fill your kitchen!
FAQs
Q1: Can I use salted butter instead of unsalted?
A1: Yes, but omit the added salt in the recipe, or reduce it to ¼ teaspoon, to prevent the cookies from becoming too salty.
Q2: My cookies spread too much. What went wrong?
A2: Common culprits include butter that was too soft or melted, not chilling the dough sufficiently, or too much leavening. Ensure butter is softened, not melted, and always chill the dough.
Q3: How do I get chewy cookies instead of crispy ones?
A3: For chewier cookies, ensure you’re using a good amount of brown sugar, don’t overbake them (pull them when the centers are still slighty soft), and consider adding an extra egg yolk to the dough.
Q4: Can I make the dough ahead of time?
A4: Absolutely! Chilling the dough for up to 72 hours actually enhances the flavor and texture significantly. Just ensure it’s well-wrapped to prevent drying out.
Q5: What’s the best way to reheat leftover cookies?
A5: For best results, place cookies on a baking sheet and warm them in an oven preheated to 275°F (135°C) for 5-7 minutes, or until just warm and soft. You can also microwave them for 10-15 seconds for a quick warm-up.