Unlock the Secrets to Restaurant-Quality Sesame Chicken at Home
Ever craved that irresistible sweet and savory glaze of your favorite Chinese Takeout but wished you could recreate it in your own kitchen? You’re not alone! The allure of perfectly crispy chicken coated in a sticky, aromatic sauce is undeniable. While the thought of making it from scratch can seem daunting, mastering homemade Sesame Chicken is not only achievable but also incredibly rewarding. Imagine the satisfaction of knowing exactly what goes into your meal, avoiding unnecessary additives, and tailoring the flavors to your exact preference. This comprehensive guide will empower you to ditch the delivery menu and whip up a superior version of this classic that will impress even the most discerning palate.
Ingredients & Kitchen Tools
Crafting the perfect Sesame Chicken requires a blend of pantry staples and a few specialized ingredients that are easily found at most grocery stores.
For the Chicken:
- 1 ½ lbs boneless, skinless chicken thighs or breasts: Thighs offer juicier results; breasts are leaner. Cut into 1-inch pieces.
- ¼ cup cornstarch: Essential for achieving that signature crispy coating.
- 1 egg white: Helps bind the cornstarch to the chicken.
- Pinch of salt and black pepper: Basic seasoning for flavor.
- 2 tablespoons vegetable oil (for frying): Or canola, peanut, or avocado oil.
For the Sesame Sauce:
- ¼ cup soy sauce (low sodium preferred): The umami base.
- 2 tablespoons rice vinegar: Adds a tangy brightness.
- 2 tablespoons honey (or maple syrup): For sweetness and glaze.
- 1 tablespoon brown sugar (packed): Deepens the sweetness and caramelization.
- 1 tablespoon sesame oil (toasted): Crucial for that distinctive nutty aroma.
- 1-2 cloves garlic, minced: Aromatic foundation.
- 1 teaspoon fresh ginger, grated: Zesty and pungent flavor.
- 1 tablespoon cornstarch + 2 tablespoons cold water (slurry): For thickening the sauce.
- 1-2 tablespoons toasted sesame seeds: For garnish and extra crunch.
- Pinch of red pepper flakes (optional): For a touch of heat.
Kitchen Tools:
- Large mixing bowls: For marinating and coating the chicken.
- Whisk: For making the sauce.
- Large non-stick skillet or wok: Ideal for frying chicken and combining with sauce.
- Tongs or slotted spoon: For handling chicken and draining oil.
- Measuring cups and spoons: For precise ingredient portions.
- Cutting board and sharp knife: For preparing chicken and aromatics.
Prep Time & Cooking Schedule
Thoughtful planning can make the cooking process enjoyable and stress-free.
- Prep time: 15 minutes
- Marinating time (optional but recommended): 20-30 minutes (or overnight for deeper flavor)
- Cook time: 15-20 minutes
- Total time: Approximately 50-65 minutes
This schedule allows for a relaxed approach, especially if you chop your ingredients while the chicken marinates. The actual cooking is quite quick, making this an excellent weeknight meal option.
Step-by-Step Instructions
Follow these clear steps to achieve a mouthwatering Sesame Chicken that rivals any Chinese Takeout.
1. Prepare the Chicken: In a medium bowl, whisk together the egg white, salt, and pepper. Add the chicken pieces and toss to coat. Sprinkle in the cornstarch and toss again until each piece is lightly covered. This creates the crispy exterior.
2. Make the Sesame Sauce: In a separate bowl, whisk together the soy sauce, rice vinegar, honey, brown sugar, toasted sesame oil, minced garlic, grated ginger, and red pepper flakes (if using). Set aside. In a small bowl, combine 1 tablespoon of cornstarch with 2 tablespoons of cold water to form a slurry; set aside.
3. Fry the Chicken: Heat the vegetable oil in a large non-stick skillet or wok over medium-high heat. Once shimmering, add the chicken in a single layer, ensuring not to overcrowd the pan. Cook in batches if necessary. Fry for 3-4 minutes per side, or until golden brown and cooked through. The internal temperature should reach 165°F (74°C). Remove the cooked chicken with a slotted spoon and place it on a plate lined with paper towels to drain excess oil.
4. Glaze the Chicken: Carefully pour out any remaining oil from the skillet, leaving about a tablespoon. Return the skillet to medium heat. Pour in the prepared sesame sauce mixture. Bring to a gentle simmer, then slowly whisk in the cornstarch slurry. Continue whisking until the sauce thickens to your desired consistency, about 1-2 minutes.
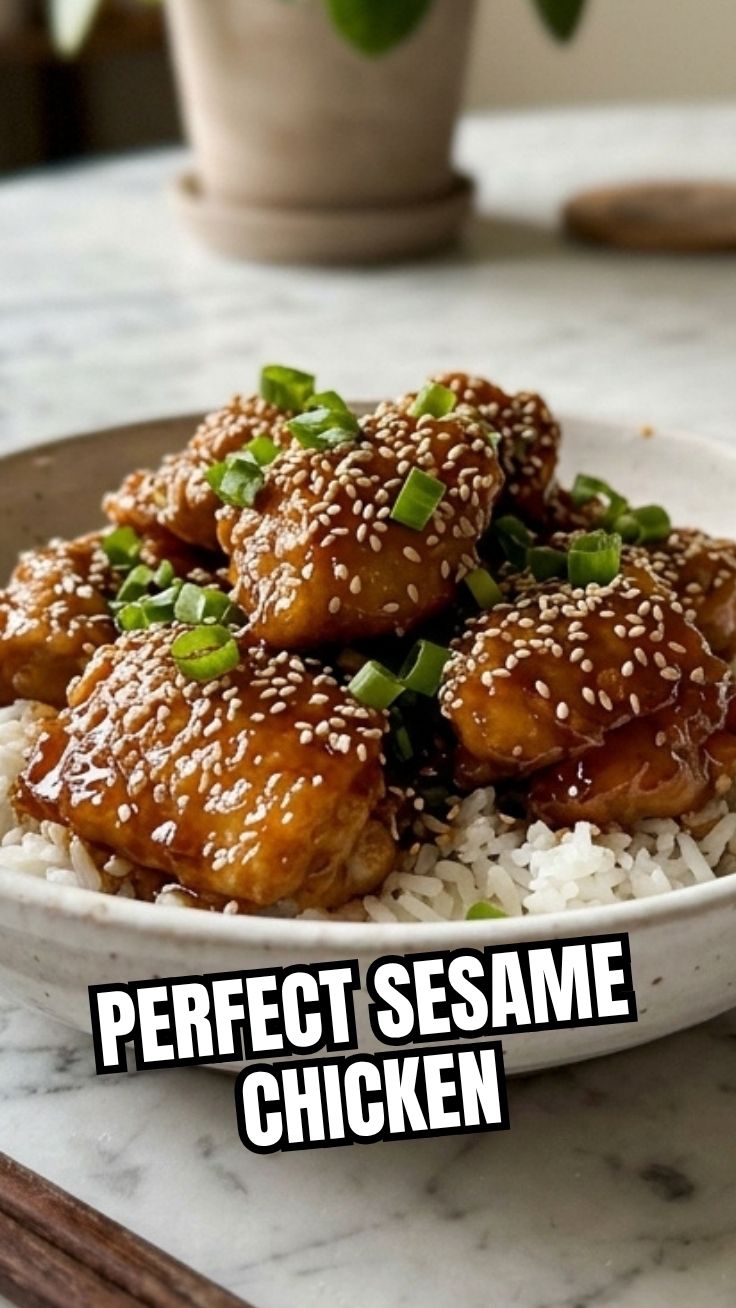
5. Combine and Serve: Add the fried chicken back into the skillet with the thickened sauce. Toss genyly to coat each piece evenly. Remove from heat and stir in the toasted sesame seeds. Serve immediately over steamed rice or with your favorite stir-fried vegetables.
Nutritional Benefits & Advantages
Beyond its delicious taste, homemade Sesame Chicken offers several nutritional advantages. Chicken is an excellent source of lean protein, essential for muscle repair and growth. By preparing it yourself, you control the amount of oil, sugar, and sodium, often significantly reducing these compared to restaurant versions. Sesame seeds contribute healthy fats, fiber, and important minerals like calcium and iron. Ginger and garlic offer anti-inflammatory and immune-boosting properties, making this a flavorful and wholesome meal choice.
Tips, Variations & Cooking Advice
- Marinating Magic: For deeper flavor, marinate the chicken in a little soy sauce and rice vinegar for 20-30 minutes before coating with egg white and cornstarch.
- Crispier Chicken: For extra crispy chicken, you can double-fry it. After the first fry, let the chicken cool slightly, then return it to hotter oil (about 375°F/190°C) for another 1-2 minutes until deeply golden and extra crunchy.
- Vegetarian Option: Substitute chicken with extra-firm tofu, pressed and cut into cubes. Follow the same coating and frying instructions.
- Spice It Up: Increase the red pepper flakes or add a dash of sriracha to the sauce for a spicier kick.
- Veggie Boost: Add bell peppers, broccoli florets, or snow peas to the skillet during the sauce thickening stage for added nutrients and color. Cook until tender-crisp.
Common Mistakes to Avoid
- Overcrowding the Pan: This lowers the oil temperature, leading to steamed rather than crispy chicken. Cook in batches if necessary.
- Excessive Sauce Thickening: The cornstarch slurry works quickly. Add it gradually and whisk continuously to avoid an overly thick or gummy sauce.
- Skimping on Sesame Oil: Toasted sesame oil is a key flavor component. Don’t substitute it with regular vegetable oil.
- Overcooking the Chicken: This can result in dry, tough chicken. Cook until just done.
Storage & Meal Prep Tips
Leftover Sesame Chicken stores wonderfully. Place cooled chicken and sauce in an airtight container and refrigerate for up to 3-4 days. For best results, reheat gently in a skillet over medium-low heat or in the microwave until warmed through. If you prefer to make ahead, you can prepare the sauce ingredients in advance and store them in the refrigerator. The chicken coating is best done just before frying.
Conclusion
Congratulations! You now have all the knowledge and tools to create a truly spectacular homemade Sesame Chicken that easily surpasses any Chinese Takeout experience. The blend of savory, sweet, and nutty flavors, combined with that satisfying crispy texture, makes this dish an instant classic for any home cook. Don’t be afraid to experiment with the spice level or add your favorite vegetables. We encourage you to try this recipe, share your culinary triumphs with us in the comments below, and explore other exciting global flavors on our blog!
FAQs
Q1: Can I bake this Sesame Chicken instead of frying?
A1: Yes, for a healthier option, you can bake the chicken. After coating, arrange the chicken in a single layer on a greased baking sheet. Bake at 400°F (200°C) for 20-25 minutes, flipping halfway, until golden and cooked through. The crispiness won’t be identical to frying but will still be delicious.
Q2: What can I serve with this dish?
A2: Steamed white or brown rice is a classic pairing. Also goes great with stir-fried vegetables like broccoli, snap peas, bok choy, or bell peppers.
Q3: My sauce isn’t thickening. What went wrong?
A3: Ensure your cornstarch slurry is well-mixed before adding, and that the sauce is simmering gently while you whisk it in. If it’s still too thin, mix another small slurry (½ tablespoon cornstarch + 1 tablespoon cold water) and slowly whisk it into the hot sauce.
Q4: Can I use different cuts of chicken?
A4: Boneless, skinless chicken thighs are generally preferred for their juiciness. Chicken breasts work well too but can dry out if overcooked. For convenience, you could even use pre-cooked chicken, adding it at the end to coat with sauce.
Q5: Is this recipe gluten-free?
A5: To make this recipe gluten-free, substitute regular soy sauce with tamari and ensure all other ingredients (like cornstarch) are certified gluten-free.