Elevate Your Snacking Game: The Ultimate Homemade Crunchy Chex Mix Recipe
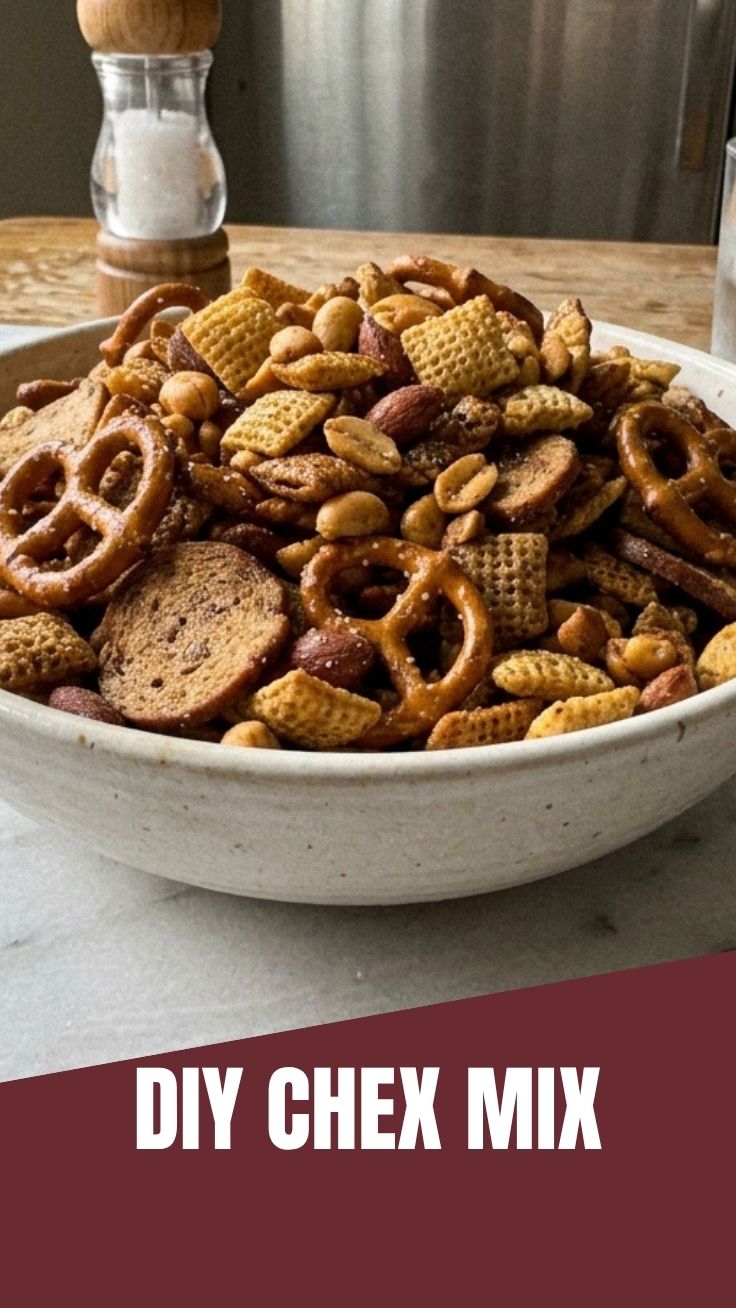
Tired of store-bought snacks that lack that homemade touch? Do you crave a truly satisfying crunch with every bite? Preparing your own Chex Mix at home isn’t just about saving money; it’s about customizing flavors, ensuring freshness, and creating a truly memorable snack mix that will impress everyone. This recipe offers a delightful blend of savory and spiced notes, transforming simple pantry staples into an irresistible treat perfect for movie nights, parties, or simply as a delightful indulgence. Forget bland snacks; this homemade version promises a burst of flavor and a texture sensation that’s simply unmatched, making it a valuable addition to your culinary repertoire.
Ingredients & Kitchen Tools
- 9 cups assorted Chex cereals: (e.g., Rice, Corn, Wheat) – Provides the essential crunchy base for our snack mix. Experiment with your favorite trio for varied textures.
- 3 cups pretzels: (mini twists or sticks) – Adds a salty, crunchy contrast.
- 1 cup mixed nuts: (e.g., peanuts, pecans, walnuts, cashews) – For added richness, protein, and a satisfying bite.
- 1 cup bagel chips or pita chips: (crushed into smaller pieces) – Contributes an extra layer of savory crunch.
- ½ cup unsalted butter: (melted) – The key to a golden, flavorful coating.
- 2 tablespoons Worcestershire sauce: – Imparts a deep, umami flavor.
- 1 tablespoon seasoned salt: – A convenient blend of salt and spices.
- 1 teaspoon garlic powder: – Enhances the savory profile.
- ½ teaspoon onion powder: – Adds aromatic depth.
- ¼ teaspoon cayenne pepper: (optional) – For a subtle kick of heat.
Kitchen Tools:
- Large roasting pan or baking sheets: (at least two) – Essential for even spreading and roasting.
- Large mixing bowl: – To gently combine all ingredients before baking.
- Whisk: – For thoroughly mixing the sauce.
- Measuring cups and spoons: – For accurate ingredient measurement.
- Spatula or heat-resistant spoon: – For stirring during baking.
Prep Time & Cooking Schedule
- Prep Time: 10 minutes
- Cook Time: 60 minutes
- Resting Time: 15 minutes (cooling)
This recipe requires minimal hands-on preparation, making it perfect for last-minute party planning. The majority of the time is spent in the oven, allowing the flavors to meld and the ingredients to crisp beautifully. Plan for an hour of baking, during which you’ll need to stir occasionally, so it’s a good time to catch up on a podcast or another quick kitchen task.
Step-by-Step Instructions
1. Preheat Oven: Preheat your oven to 250°F (120°C). This low and slow temperature is crucial for achieving that signature crispy texture without burning.
2. Combine Dry Ingredients: In your large mixing bowl, gently combine the assorted Chex cereals, pretzels, mixed nuts, and crushed bagel or pita chips. Ensure an even distribution of all components. This forms the delightful base for our homemade Chex Mix.
3. Prepare Sauce: In a separate small bowl, whisk together the melted unsalted butter, Worcestershire sauce, seasoned salt, garlic powder, onion powder, and cayenne pepper (if using). Ensure the spices are fully incorporated into the butter mixture.
4. Coat Ingredients: Pour the butter mixture evenly over the dry ingredients in the large mixing bowl. Using a spatula or your hands, gently toss until all the dry components are lightly and evenly coated. The goal is to avoid soggy spots and ensure every piece contributes to the overall deliciousness of this snack mix.
5. Spread and Bake: Divide the coated mixture evenly between the two large roasting pans or baking sheets. Spread it out in a single layer to ensure even roasting. Bake for 60 minutes, stirring gently every 15 minutes to promote uniform crisping and prevent burning.
6. Cool Completely: Once baked, remove the pans from the oven and let the Chex Mix cool completely on the baking sheets. This resting period is critical for achieving maximum crispness. Avoid covering it while it cools, as this can trap moisture.
Nutritional Benefits & Advantages
This homemade Chex Mix, when made with whole-grain cereals and a variety of nuts, offers more than just deliciousness. Whole-grain cereals provide dietary fiber, aiding in digestion and promoting satiety. Mixed nuts contribute healthy fats, protein, and essential micronutrients like magnesium and vitamin E. While it’s a treat, opting for homemade allows you to control sodium levels and avoid artificial preservatives often found in store-bought alternatives.
Tips Variations & Cooking Advice
- Spice It Up: Experiment with different spice blends! Add smoked paprika for a smoky flavor, a pinch of chili powder for extra heat, or even a dash of dried dill for a unique twist.
- Nutty Alternatives: Not a fan of mixed nuts? Try sunflower seeds, pumpkin seeds, or even roasted chickpeas for a different texture and nutritional profile.
Sweet & Salty: For a delightful contrast, add a cup of candy-coated chocolate pieces or mini marshmallows after* the Chex Mix has cooled completely.
- Gluten-Free Option: Use only gluten-free Chex cereals, certified gluten-free pretzels, and ensure all other ingredients are verified gluten-free.
- Dairy-Free Option: Substitute regular butter with a high-quality dairy-free butter alternative.
Common Mistakes to Avoid
- Overcrowding the Pan: This is the most common mistake! If the ingredients are piled too high, they steam instead of roast, resulting in a less crispy Chex Mix. Use multiple pans if necessary.
- Skipping the Stirring: Failure to stir every 15 minutes will lead to unevenly baked snack mix, with some parts potentially burnt and others undercooked.
- High Heat Baking: Baking at too high a temperature can burn the ingredients quickly before they have a chance to crisp through. Stick to the recommended 250°F (120°C).
- Not Cooling Completely: Removing or packaging the Chex Mix before it’s fully cooled will trap moisture and prevent it from reaching its optimal crispness.
Storage & Meal Prep Tips
Once completely cooled, store your homemade Chex Mix in an airtight container at room temperature. It will stay fresh and crunchy for up to 2-3 weeks. Avoid storing it in the refrigerator, as this can introduce moisture and make it less crispy. This recipe is an excellent make-ahead option for parties or as a convenient snack mix to have on hand for quick pick-me-ups.
Conclusion
Crafting your own crunchy Chex Mix is a rewarding and surprisingly simple culinary adventure. With customizable flavors and guaranteed freshness, this recipe elevates a classic into a homemade masterpiece. We’ve covered everything from precise measurements to crucial baking tips, ensuring your homemade snack mix turns out perfectly crisp and irresistibly delicious every time. Don’t hesitate to try this recipe, experiment with your own flavor variations, and share your delicious results with family and friends! What are you waiting for? Get mixing!
FAQs
Q1: Can I make this a sweet Chex Mix instead of savory?
A1: Absolutely! For a sweet version, omit the seasoned salt and Worcestershire sauce. Instead, use melted butter, brown sugar, a pinch of cinnamon, and a splash of vanilla extract.
Q2: My Chex Mix isn’t as crispy as I’d like. What went wrong?
A2: The most common culprits are overcrowding the baking sheet, not stirring frequently enough, or not allowing it to cool completely. Ensure a single layer on the pans and patient cooling.
Q3: How long does this homemade snack mix last?
A3: When stored in an airtight container at room temperature, it will maintain its freshness and crunch for up to 2-3 weeks.
Q4: Can I add different types of cereals?
A4: Yes, feel free to use other sturdy cereals like Cheerios or pretzel-shaped cereals to diversify the texture and flavor of your snack mix.
Q5: What if I don’t have Worcestershire sauce?
A5: While it adds a complex umami, you can sometimes substitute it with a dash of soy sauce mixed with a tiny bit of apple cider vinegar, or simply increase the seasoned salt and garlic/onion powder for savory depth.