Unlocking Sweet Memories: The Ultimate Guide to Homemade Rice Krispie Treats
Ever wondered how to capture that whimsical, comforting sweetness of your childhood in a few simple steps? Look no further! Today, we’re diving into the delightful world of homemade Rice Krispie Treats, a classic that brings smiles to faces of all ages. Preparing these iconic no-bake wonders at home isn’t just about satisfying a craving; it’s about crafting edible nostalgia, controlling ingredients for healthier options, and enjoying a fun, stress-free baking (or rather, non-baking) experience. With just a handful of ingredients, predominantly rice krispie cereal, you can create a batch of perfectly chewy, melt-in-your-mouth squares that outshine any store-bought version.
Ingredients & Kitchen Tools
To embark on this sweet journey, gather these essentials:
- Unsalted Butter (4 tablespoons): Using unsalted butter allows you to control the overall saltiness of your treats.
- Mini Marshmallows (10 ounces): Mini marshmallows melt more evenly and quickly than large ones, ensuring a smooth, sticky binder.
- Vanilla Extract (1 teaspoon): Enhances the flavor profile with a warm, aromatic note.
- Pinch of Salt: Balances the sweetness and amplifies other flavors.
- 9×13 Inch Baking Dish: The perfect size for a standard batch of treats.
- Large Non-Stick Pot: For melting the butter and marshmallows without sticking.
- Heat-Resistant Spatula or Wooden Spoon: Essential for stirring and mixing.
- Parchment Paper or Wax Paper: For easy lifting and clean-up.
- Cooking Spray or Extra Butter: To prevent sticking when pressing the mixture.
Prep Time & Cooking Schedule
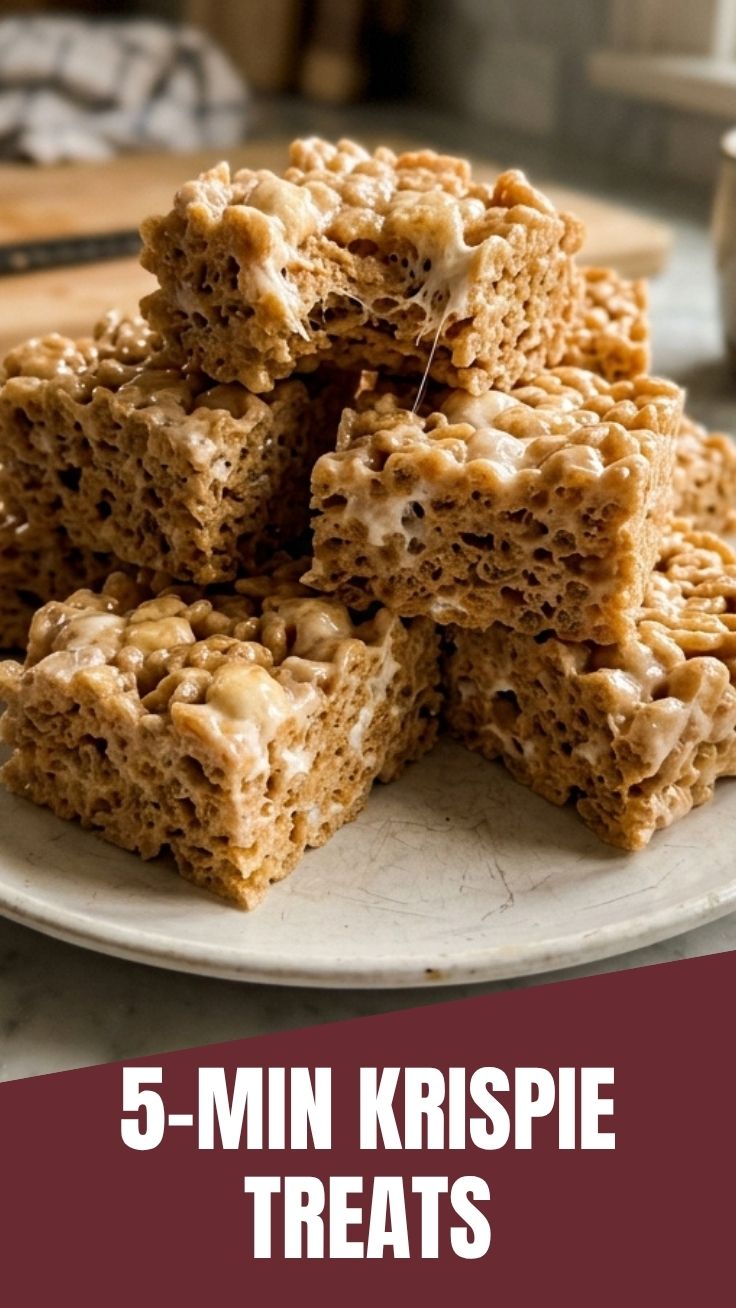
One of the greatest appeals of this recipe is its lightning-fast preparation!
- Prep Time: 5 minutes (gathering ingredients, lining the pan)
- Cook Time: 5-7 minutes (melting butter and marshmallows)
- Resting Time: 30-60 minutes (for the treats to set and firm up)
This schedule makes Rice Krispie Treats an ideal last-minute dessert or a fun activity for a busy afternoon. The active cooking time is minimal, allowing you to quickly move from kitchen to delicious snacking.
Step-by-Step Instructions
1. Prepare Your Pan: Line a 9×13-inch baking dish with parchment paper, leaving an overhang on the sides for easy removal. Lightly grease the parchment paper with cooking spray or a thin layer of butter. This step is crucial for preventing sticking and effortless serving.
2. Melt the Butter: In your large non-stick pot, melt the 4 tablespoons of unsalted butter over low heat. Low heat is key here to prevent the butter from browning too quickly, which can alter the flavor of your treats.
3. Add Marshmallows & Salt: Once the butter is fully melted, add the 10 ounces of mini marshmallows and a pinch of salt. Stir continuously until the marshmallows are completely melted and smooth. The salt helps to cut through the sweetness, creating a more balanced flavor.
4. Remove from Heat & Add Vanilla: Take the pot off the heat. Stir in the 1 teaspoon of vanilla extract. Vanilla at this stage adds a lovely aroma and depth without evaporating due to high heat.
5. Fold in Rice Krispie Cereal: Add the 6 cups of rice krispie cereal to the marshmallow mixture. Using your heat-resistant spatula, gently but quickly fold the cereal into the melted marshmallow until it’s evenly coated. Avoid over-mixing, as this can crush the cereal and result in less crispy treats.
6. Press into Pan: Transfer the mixture into your prepared baking dish. Lightly grease your hands or another piece of parchment paper and gently press the mixture evenly into the pan. Do not press too firmly, as this can lead to hard, dense treats. A light, even pressure is all that’s needed to create perfect Rice Krispie Treats.
7. Set & Slice: Allow the treats to cool and set at room temperature for at least 30-60 minutes. Once firm, use the parchment paper overhang to lift the entire slab out of the pan. Place it on a cutting board and slice into squares of your desired size.
Nutritional Benefits & Advantages
While Rice Krispie Treats are undeniably a sweet indulgence, they do offer a few surprising advantages. The primary ingredient, rice krispie cereal, is typically fortified with essential vitamins and minerals like iron and B vitamins. Being a gluten-free grain, rice cereal makes these treats accessible for those with gluten sensitivities. Furthermore, these are a relatively low-fat dessert compared to many baked goods, and by making them at home, you have full control over the sugar content and can opt for healthier marshmallow alternatives or natural sweeteners if desired.
Tips, Variations & Cooking Advice
- Brown Butter Bliss: For a more complex, nutty flavor, brown the butter slightly before adding the marshmallows. Cook the butter over medium heat until it turns amber and smells fragrant, then proceed with the recipe.
- Chocolate Drizzle: Melt some chocolate chips (milk, dark, or white) and drizzle over the cooled treats for an extra layer of decadence.
- Add-ins: Fold in mini chocolate chips, sprinkles, chopped nuts (if no allergies), or even dried cranberries during the cereal mixing step for added texture and flavor.
- Flavor Extracts: Experiment with almond extract, peppermint extract, or orange zest for seasonal variations.
- Dietary Adaptations:
* Gluten-Free: Ensure your chosen rice krispie cereal and marshmallows are certified gluten-free.
* Dairy-Free: Use a plant-based butter alternative.
* Vegan: Use vegan marshmallows and plant-based butter.
Common Mistakes to Avoid
- Overcooking Marshmallows: High heat can lead to hard, brittle treats. Always melt marshmallows over low heat, stirring constantly.
- Over-compressing: Pressing the mixture too hard into the pan crushes the air out of the cereal, resulting in dense, tough treats rather than light and chewy ones.
- Not Greasing Properly: Forgetting to grease your pan, parchment paper, or spatula will lead to a sticky, frustrating mess.
- Adding Cereal to Hot Marshmallows for Too Long: Work quickly once the cereal is added to avoid it becoming soggy from the heat.
Storage & Meal Prep Tips
Homemade Rice Krispie Treats are best enjoyed within 2-3 days of making them to maintain their optimal texture.
- Room Temperature: Store cooled treats in an airtight container at room temperature. This is crucial to prevent them from drying out or becoming stale.
- Avoid Refrigeration: Refrigerating them can cause them to harden excessively.
- Freezing: While possible, freezing can alter the texture. If you must freeze, wrap individual treats tightly in plastic wrap, then place in an airtight container. Thaw at room temperature.
Conclusion
There you have it – the ultimate guide to creating perfect, chewy, and nostalgic Rice Krispie Treats right in your own kitchen! This simple recipe, centered around the beloved rice krispie cereal, proves that some of life’s greatest pleasures are the easiest to make. So, roll up your sleeves, gather your ingredients, and prepare to bring a burst of joy to your family and friends. We encourage you to try this recipe, experiment with the variations, and share your delightful creations with us! What’s your favorite Rice Krispie Treat variation?
FAQs
Q1: Why are my Rice Krispie Treats hard?
A1: This usually happens from either overcooking the marshmallows (high heat makes them brittle when cooled) or pressing the mixture too firmly into the pan. Use low heat and a gentle touch.
Q2: Can I use large marshmallows instead of mini marshmallows?
A2: Yes, you can! Just ensure you use the same weight (10 ounces) and allow a little extra time for them to melt completely.
Q3: How can I prevent the treats from sticking to my hands when pressing them?
A3: Lightly grease your hands with butter or cooking spray, or use a piece of wax paper or parchment paper to press the mixture down.
Q4: How long do homemade Rice Krispie Treats last?
A4: Stored in an airtight container at room temperature, they are best enjoyed within 2-3 days for optimal freshness and texture.
Q5: Can I reduce the sugar content in this recipe?
A5: You can try using reduced-sugar marshmallows or a smaller quantity. However, marshmallows are critical for both sweetness and binding, so significant reductions may affect the texture. You can also offset sweetness with a pinch more salt.