The Ultimate Guide to Crafting Perfect Homemade Candy Apples
Ever wondered how to capture that iconic fairground magic right in your own kitchen? That shimmering, crackly shell around a crisp, juicy apple? Making homemade Candy Apples is not just about a delicious treat; it’s an art form that brings joy, nostalgia, and a touch of glamour to any occasion. While many people gravitate towards their equally delicious cousin, caramel apples, there’s something uniquely captivating about the translucent, glass-like coating of a perfectly made candy apple. This comprehensive guide will walk you through every step, ensuring your creations are showstoppers, whether for a Halloween party, a autumnal celebration, or just a delightful weekend project.
Ingredients & Kitchen Tools
To embark on your candy apple adventure, gather these essentials:
Apples: 6 medium-sized, firm, crisp apples (e.g., Granny Smith, Honeycrisp, Fuji) – Look for firm, unblemished apples to ensure a good base for your candy coating.*
Granulated Sugar: 2 cups – The foundation of our candy coating.*
Light Corn Syrup: 1 cup – Helps prevent sugar crystallization, ensuring a smooth, glossy finish.*
Water: 1/2 cup – Dissolves the sugar and corn syrup.*
Red Food Coloring: 1 teaspoon (liquid or gel) – Achieves that iconic vibrant red color. Adjust to your desired intensity.*
Vanilla Extract: 1 teaspoon (optional) – Adds a subtle aromatic depth to the candy.*
- Candy Thermometer: Essential for precise temperature control.
- Heavy-Bottomed Saucepan: Prevents scorching and ensures even heating.
- Baking Sheet: Lined with parchment paper or a silicone mat for cooling.
- Wooden Skewers or Craft Sticks: 6 individual skewers for holding and dipping.
- Pastry Brush: For brushing down sugar crystals from the sides of the pan.
Prep Time & Cooking Schedule
- Prep Time: 20 minutes (Includes washing apples, inserting sticks, and setting up your workspace).
- Cook Time: 15-20 minutes (Actively cooking the candy syrup).
- Cooling/Setting Time: 30-60 minutes (Allows the candy shell to harden completely).
Plan to make these when you have a clear block of time, as the candy syrup requires constant attention. It’s best to prepare your apples and cooling station before you start cooking the sugar.
Step-by-Step Instructions
1. Prepare Your Apples: Wash and thoroughly dry each apple. It’s crucial to remove any wax coating, as this can prevent the candy from adhering. You can lightly scrub them with a rough cloth or briefly dip them in boiling water, then wipe completely dry. Insert a wooden skewer firmly into the stem end of each apple, pushing about halfway through. Arrange them on your prepared baking sheet.
2. Make the Candy Syrup: In the heavy-bottomed saucepan, combine the granulated sugar, light corn syrup, and water. Stir gently over medium heat until the sugar dissolves.
3. Boil to Temperature: Once the sugar is dissolved, stop stirring. Insert your candy thermometer. Allow the mixture to boil steadily. If sugar crystals form on the sides of the pan, use a wet pastry brush to gently brush them back into the syrup. Continue cooking until the thermometer reaches 300-310°F (149-154°C), known as the “hard crack” stage. This is the critical temperature for achieving the brittle, glass-like coating for your Candy Apples.
4. Add Color and Flavor: Immediately remove the pan from the heat. Stir in the red food coloring and vanilla extract (if using) until well combined. Work quickly, as the candy will begin to cool and thicken.
5. Dip the Apples: Carefully tilt the saucepan to create a deeper pool of candy syrup. Holding an apple by its skewer, dip it into the hot candy, rotating to ensure a complete, even coating. Allow any excess syrup to drip back into the pan. If the syrup becomes too thick during dipping, you can briefly return it to very low heat to re-liquefy, but be careful not to overcook.
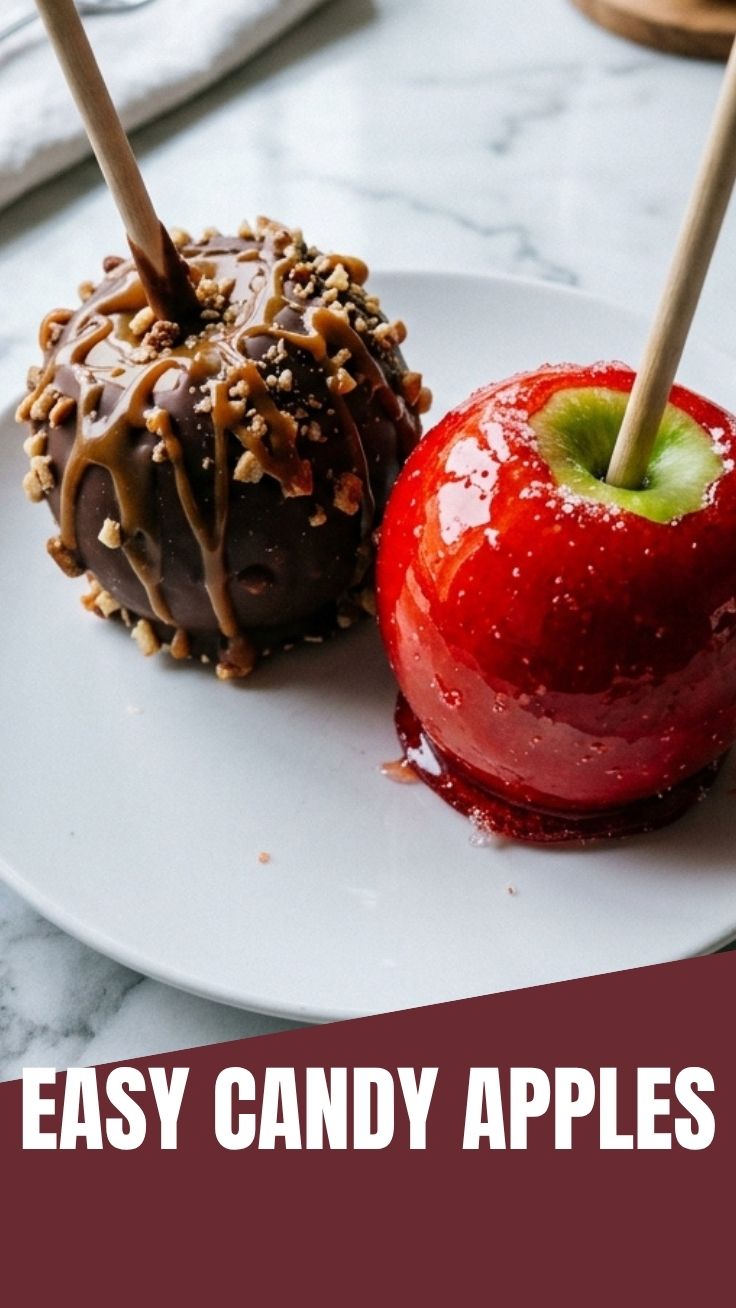
6. Cool and Set: Place each dipped apple onto the prepared baking sheet. Repeat with the remaining apples. Let them cool completely at room temperature until the candy shell is hard and glossy – a perfect crisp coating, unlike the softer texture you’d expect from caramel apples.
Nutritional Benefits & Advantages
While Candy Apples are undeniably a treat, they do offer an interesting synergy. The apple itself provides dietary fiber, vitamins (like Vitamin C), and essential antioxidants. The hard candy shell, primarily sugar, provides quick energy. Opting for healthier, organic apples can slightly boost the nutritional profile. It’s a delightful way to enjoy fruit in a festive, indulgent form.
Tips, Variations & Cooking Advice
- Flavor Variations: Experiment with different extracts! Try cinnamon, almond, or even a few drops of food-grade essential oils (like peppermint).
- Color Play: Beyond classic red, use green or black food coloring for spooky Halloween apples, or multi-colors for a vibrant party display.
Toppings: After dipping, but before* the candy hardens completely, you can roll the apples in sprinkles, chopped nuts, or even crushed candies for extra texture and visual appeal.
- Troubleshooting: If your candy turns out sticky, it likely didn’t reach the hard crack stage (300-310°F). If it’s too thick to dip, put it back on very low heat for a moment.
Common Mistakes to Avoid
- Not Cleaning Apples Properly: Any wax or moisture on the apple skin will cause the candy to slide off. Dry thoroughly!
- Stirring Too Much: Once the sugar has dissolved, excessive stirring can encourage crystallization, leading to grainy candy.
- Incorrect Temperature: This is paramount! Too low, and the candy will be soft and sticky; too high, and it will burn. A candy thermometer is your best friend.
- High Humidity: Making candy on a humid day can make it difficult for the candy to set properly and stay crisp. Aim for a dry day.
Storage & Meal Prep Tips
Homemade Candy Apples are best enjoyed within 1-2 days of making them. Store them individually wrapped in plastic wrap or in an airtight container at room temperature. Refrigerating them can cause the candy to become sticky and less shiny due to condensation. They are not suitable for freezing. For meal prep, you can wash and skewer the apples in advance, then prepare the candy coating just before dipping.
Conclusion
Crafting your own Candy Apples is a rewarding culinary experience that yields a spectacular, treat. From ensuring perfectly clean apples to mastering the hard crack stage of your candy syrup, each step contributes to that ultimate, glossy crunch. While caramel apples offer a soft chew, the satisfaction of biting into a perfectly brittle candy apple is unparalleled. Don’t be afraid to experiment with colors and flavors, and share your delightful creations! What’s your favorite apple variety for this classic treat?
FAQs
Q1: Why is my candy sticky instead of hard?
A1: Your candy syrup likely didn’t reach the “hard crack” stage (300-310°F/149-154°C). Ensure you’re using an accurate candy thermometer and cooking to the specified temperature. Humidity can also contribute to stickiness.
Q2: Can I use different types of apples?
A2: Yes, almost any firm, crisp apple will work. Granny Smith offers a lovely tart contrast to the sweet candy, while Honeycrisp or Fuji provide a sweeter, juicier bite.
Q3: How do I prevent the candy from sliding off the apple?
A3: The most common culprit is wax or moisture on the apple skin. Thoroughly wash and dry your apples, and consider a quick wipe with rubbing alcohol if they have a heavy wax coating, ensuring they are completely dry afterward.
Q4: My candy syrup turned grainy. What happened?
A4: Graininess usually occurs from sugar crystals forming in the syrup. Avoid stirring once the sugar has dissolved, and brush down any crystals from the sides of the pan with a wet pastry brush.
Q5: Can I make these in advance for a party?
A5: While they’re best enjoyed fresh, you can make them 1-2 days in advance. Store them individually wrapped at room temperature. Make sure they are fully set before wrapping to prevent sticking.