Master the Art of Homemade Stuffing: Your Ultimate Guide
Ever wondered how to achieve that perfectly golden, flavor-packed Stuffing that’s the star of any holiday table? While store-bought options can be convenient, there’s an undeniable magic in preparing Stuffing from scratch. This comprehensive guide will not only lead you to culinary triumph but also demonstrate the remarkable ease and deliciousness of a homemade, even a delightful gluten-free Thanksgiving stuffing. Crafting this iconic side dish at home allows for unparalleled customization, ensuring every bite is tailored to your taste and dietary needs. Let’s dive into making a truly unforgettable Stuffing that will impress everyone.
Ingredients & Kitchen Tools
Gathering your mise en place is key to a smooth cooking experience.
Ingredients:
- 1 loaf (1 pound) stale bread, preferably sourdough or challah, cubed (1-inch pieces): Stale bread is essential as it absorbs liquids without becoming mushy. For a gluten-free Thanksgiving stuffing, simply use a high-quality gluten-free bread.
- ½ cup (1 stick) unsalted butter: Adds rich flavor and helps sauté aromatics.
- 2 large yellow onions, finely chopped: Provides a foundational sweet and savory base.
- 4 stalks celery, finely chopped: Contributes earthy notes and a subtle crunch.
- 3 cloves garlic, minced: Enhances the depth of flavor.
- 1 bunch fresh sage, finely chopped (about 2 tablespoons): Classic aromatic for Stuffing, offering a warm, peppery essence.
- 1 bunch fresh thyme, finely chopped (about 1 tablespoon): Complements sage with its earthy and slightly floral notes.
- 1 teaspoon salt, or to taste: Essential for seasoning.
- ½ teaspoon black pepper, or to taste: Provides a gentle warmth and spice.
- 2 cups chicken or vegetable broth: Moistens the bread and infuses flavor. Use low-sodium to control salt content.
- 2 large eggs, lightly beaten: Acts as a binder, helping the Stuffing hold its shape.
Kitchen Tools:
- Large mixing bowl: For combining all ingredients.
- Large skillet or Dutch oven: For sautéing vegetables.
- 9×13 inch baking dish: To bake the Stuffing.
- Sharp knife and cutting board: For preparing ingredients.
- Measuring cups and spoons: For precise ingredient amounts.
- Spatula or wooden spoon: For stirring.
Prep Time & Cooking Schedule
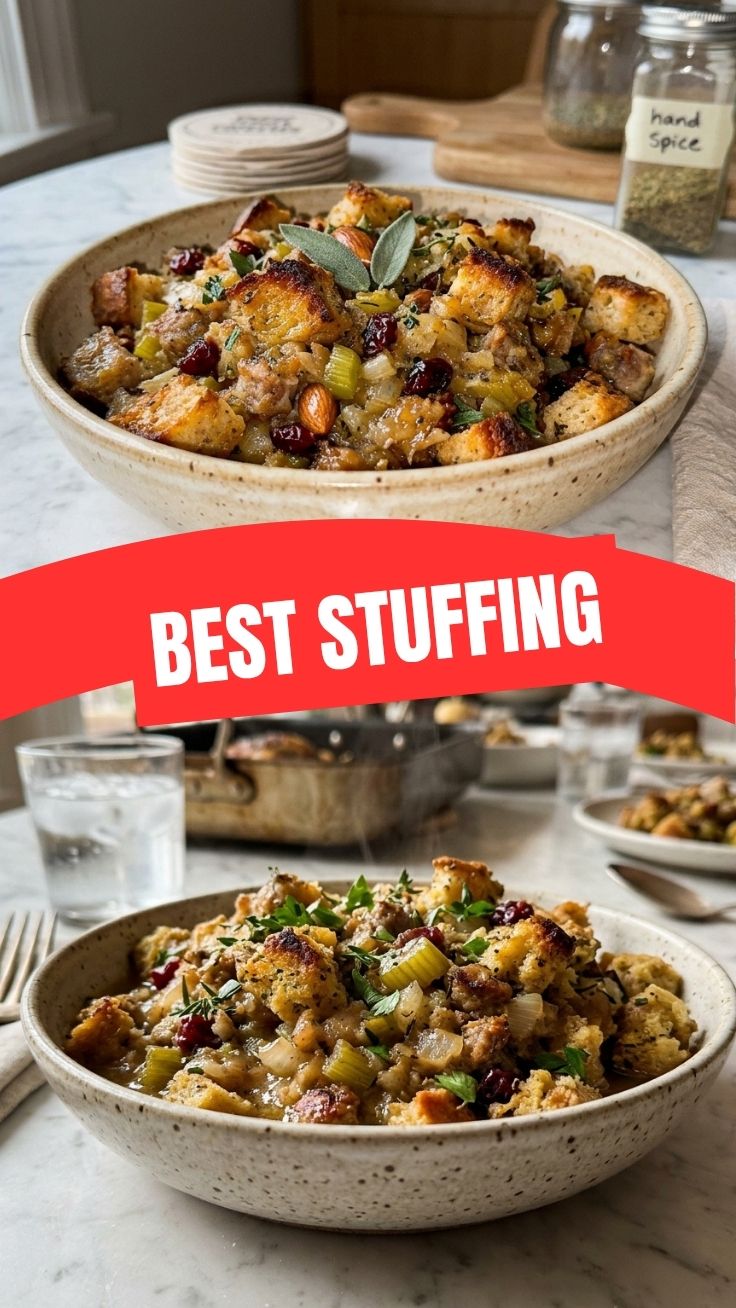
Efficient planning ensures a stress-free cooking experience, especially during busy holiday preparations.
- Prep Time: 25 minutes
- Cook Time: 40-50 minutes
- Resting Time: 10 minutes
Start by Cubing your bread the day before and letting it air dry overnight. This step significantly improves the texture of your Stuffing. The vegetable chopping can be done a few hours in advance, or even the day before, to save time on the main cooking day.
Step-by-Step Instructions
Follow these steps to create a perfect Stuffing.
1. Prepare the Bread: If your bread isn’t stale, preheat your oven to 300°F (150°C). Spread the bread cubes on a large baking sheet and bake for 10-15 minutes, flipping halfway, until lightly toasted and dry.
2. Sauté Aromatics: In a large skillet or Dutch oven, melt the butter over medium heat. Add the chopped onions and celery. Cook, stirring occasionally, for 8-10 minutes until softened and translucent. Add the minced garlic, chopped fresh sage, and thyme. Cook for another 1-2 minutes until fragrant. Be careful not to burn the garlic.
3. Combine Ingredients: Transfer the toasted bread cubes to a large mixing bowl. Add the sautéed aromatic mixture, salt, and pepper. Gently toss to combine.
4. Moisten and Bind: In a separate bowl, whisk together the chicken or vegetable broth and the lightly beaten eggs. Pour this liquid mixture over the bread and vegetable mixture. Use your hands or a spatula to gently toss until the bread is evenly moistened. Ensure the bread soaks up the liquid but isn’t overly saturated, which could lead to a soggy gluten-free Thanksgiving stuffing.
5. Bake: Transfer the Stuffing mixture to the prepared 9×13 inch baking dish. Bake in a preheated oven at 375°F (190°C) for 40-50 minutes, or until the top is golden brown and crispy, and the inside is cooked through. For an extra crispy top, you can turn on the broiler for the last 2-3 minutes, watching carefully to prevent burning.
6. Rest and Serve: Allow the Stuffing to rest for 10 minutes before serving. This allows the flavors to meld and the internal temperature to equalize.
Nutritional Benefits & Advantages
Homemade Stuffing offers several advantages over store-bought versions. By controlling the ingredients, you can reduce sodium, unhealthy fats, and artificial additives. Using fresh herbs like sage and thyme not only boosts flavor but also provides antioxidants and anti-inflammatory compounds. If made with whole-grain bread and plenty of vegetables, it can contribute dietary fiber, supporting digestive health. Opting for a gluten-free Thanksgiving stuffing recipe opens up this delicious dish to those with gluten sensitivities or celiac disease, ensuring everyone can enjoy a classic holiday staple.
Tips Variations & Cooking Advice
- Additions: Consider adding cooked sausage (pork or plant-based), chopped apples, dried cranberries, or toasted pecans/walnuts for extra flavor and texture.
- Herb Power: Experiment with different fresh herbs like rosemary or marjoram for a unique twist.
- Broth Flavor: Enhance the broth by simmering it with onion scraps, carrot, and celery for 15-20 minutes before use.
- Dairy-Free: Substitute unsalted butter with a plant-based butter alternative and ensure your broth is dairy-free.
- Crispy Top: For an even crispier top, dot with small pieces of butter before baking.
- Moisture Control: Adjust broth amount based on bread type. Denser breads may need more liquid.
Common Mistakes to Avoid
- Soggy Stuffing: This often happens from not using stale bread or adding too much liquid. Ensure your bread is dry and don’t over-saturate.
- Bland Flavor: Skimping on fresh herbs and not properly seasoning can lead to a dull dish. Don’t be afraid to taste and adjust the salt and pepper.
- Dry Stuffing: Over-baking can dry out your Stuffing. Keep an eye on it and cover loosely with foil if it’s browning too quickly.
- Using Fresh Bread: Fresh bread will absorb less liquid and result in a gummy texture. Always use stale or lightly toasted bread.
Storage & Meal Prep Tips
Leftover Stuffing is a delight! Store cooled Stuffing in an airtight container in the refrigerator for up to 3-4 days. For longer storage, it can be frozen for up to 3 months. To reheat, thaw if frozen, then place in an oven-safe dish, cover with foil to prevent drying, and bake at 325°F (160°C) until heated through, about 20-30 minutes. You can also microwave individual portions, though the texture may be softer.
Conclusion
Creating your own homemade Stuffing is a rewarding experience that elevates any meal, especially during the holidays. By following these steps and incorporating our tips, you’ll achieve a dish that’s rich in flavor, perfect in texture, and tailored to your preferences, whether you’re making a traditional version or a delicious gluten-free Thanksgiving stuffing. This guide ensures your Stuffing will be a cherished highlight on your table. Give this recipe a try and share your own delicious results with us!
FAQs
Q: Can I prepare the Stuffing ahead of time?
A: Yes! You can assemble the entire Stuffing mixture (without baking) and refrigerate it for up to 1-2 days. Let it come to room temperature for about 30 minutes before baking.
Q: What kind of bread is best for Stuffing?
A: Sourdough, challah, or day-old white sandwich bread work wonderfully. The key is that it’s stale or toasted to absorb moisture effectively without becoming mushy.
Q: How do I prevent my Stuffing from being too dry or too soggy?
A: For dryness, ensure you have enough liquid (broth and eggs) and cover the dish with foil for most of the baking time. For sogginess, make sure your bread is stale and don’t over-saturate with liquid. The bread should be moist but not swimming.
Q: Can I bake this Stuffing inside a turkey?
A: While traditionally some prefer to stuff their turkey, it’s generally safer and often results in a better texture when baked separately. Baking inside the bird can lead to uneven cooking and food safety concerns if the internal temperature of the Stuffing doesn’t reach 165°F (74°C).