The Ultimate Guide to Crafting the Perfect Homemade Apple Crisp
Ever wondered if you could recreate that comforting, warm, and crumbly dessert experience right in your own kitchen? The answer is a resounding yes! There’s an undeniable magic in a homemade dessert, especially when it comes to the classic Apple Crisp. While many gravitate towards the familiar allure of Apple Pie, this crisp offers a simpler, yet equally satisfying, journey into autumnal bliss. Preparing it at home allows for personalized touches, fresh ingredients, and the invaluable aroma that transforms your kitchen into a haven of warmth and delicious anticipation. Plus, knowing exactly what goes into your dessert gives you peace of mind and unlocks endless opportunities for customization to suit your palate.
Ingredients & Kitchen Tools
Gathering your culinary arsenal and fresh produce is the first step towards a delightful Apple Crisp.
- For the Apple Filling:
* 6-8 medium Granny Smith or Honeycrisp Apples: Choose firm, slightly tart apples for best texture and flavor. Peel, core, and slice them about ¼ inch thick.
* ¼ cup Granulated Sugar: Sweetens the apples. Adjust to your apple’s sweetness.
* 2 tablespoons All-Purpose Flour: Thickens the apple juices.
* 1 teaspoon Ground Cinnamon: Adds warmth and signature apple pie spice.
* ½ teaspoon Ground Nutmeg: Aromatic complement to cinnamon.
* Pinch of Salt: Enhances all the flavors.
* 1 tablespoon Lemon Juice: Prevents browning and brightens the flavor.
- For the Crisp Topping:
* 1 cup All-Purpose Flour: Forms the base of the crumble.
* ½ cup Rolled Oats (not instant): Provides delightful chewiness and texture.
* ½ cup Packed Light Brown Sugar: Adds moisture and a caramel-like sweetness.
* ¼ cup Granulated Sugar: Balances the sweetness.
* ½ teaspoon Ground Cinnamon: Echoes the filling’s spice.
* ¼ teaspoon Salt: Balances the sweetness.
* ½ cup (1 stick) Unsalted Butter, cold and cubed: Creates the perfect crumbly texture. You can substitute with chilled coconut oil for a dairy-free version.
- Kitchen Tools:
* 9×13 inch Baking Dish: Ideal size for this recipe.
* Large Mixing Bowls (2): For preparing the apple filling and the crisp topping separately.
* Vegetable Peeler: For effortlessly peeling apples.
* Sharp Knife and Cutting Board: For safe and efficient apple slicing.
* Pastry Blender or Your Fingertips: For incorporating butter into the dry topping ingredients.
* Measuring Cups and Spoons: For accurate ingredient measurement.
Prep Time & Cooking Schedule
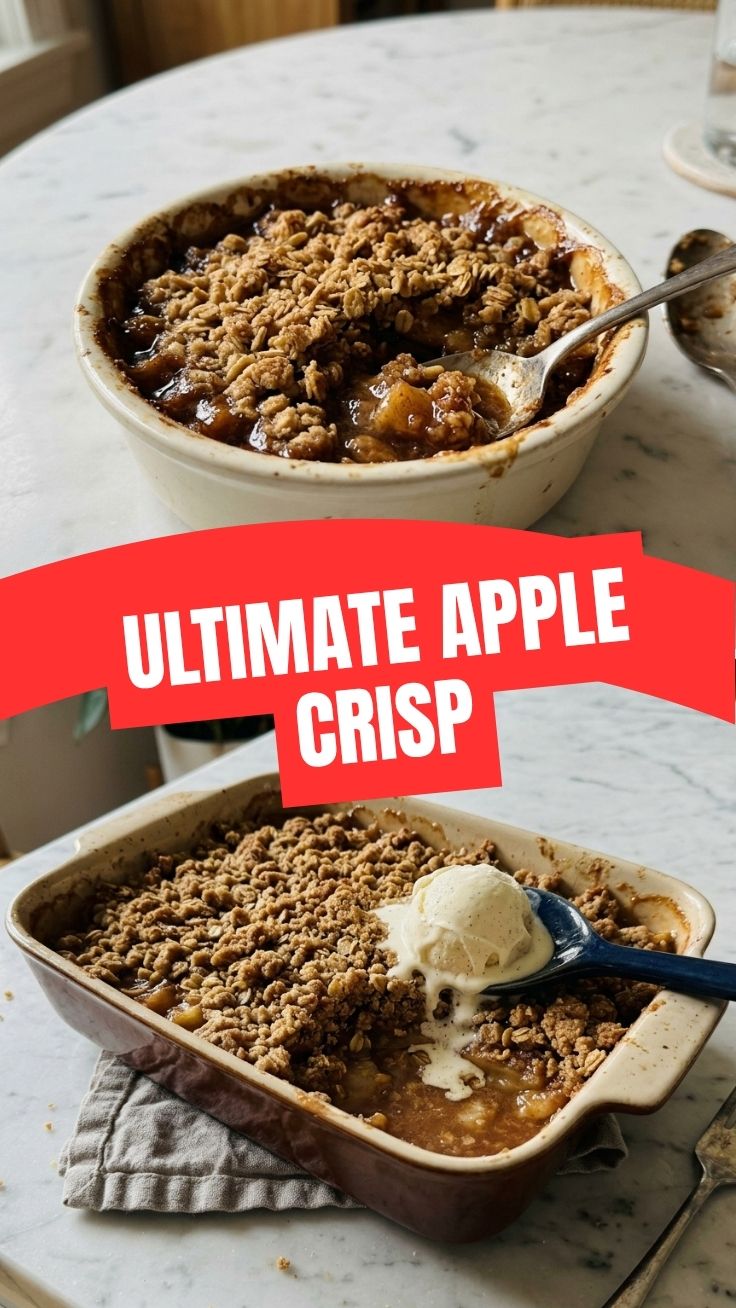
This recipe is designed for ease and efficiency, making it perfect for a weekend treat or a heartwarming weeknight dessert.
- Prep Time: 20-25 minutes (primarily peeling and slicing apples)
- Cook Time: 45-55 minutes
- Resting Time: 10-15 minutes (allowing the crisp to set and cool slightly before serving for optimal texture)
Plan to start about 1.5 hours before you want to serve, especially if you enjoy it warm with a scoop of vanilla ice cream!
Step-by-Step Instructions
Let’s craft this irresistible dessert, guiding you through each stage to achieve a perfect balance of tender apples and a crunchy, golden topping.
1. Preheat and Prepare: Preheat your oven to 375°F (190°C). Lightly grease your 9×13 inch baking dish. This prevents sticking and ensures easy serving.
2. Make the Apple Filling: In a large mixing bowl, combine the sliced apples, granulated sugar, flour, cinnamon, nutmeg, salt, and lemon juice. Toss gently until the apples are evenly coated. Pour the apple mixture into the prepared baking dish, spreading it into an even layer. This aromatic base is truly what differentiates a stellar Apple Crisp from a mere fruit bake.
3. Prepare the Crisp Topping: In another large bowl, whisk together the flour, rolled oats, brown sugar, granulated sugar, cinnamon, and salt. Add the cold, cubed butter. Using a pastry blender, or your fingertips, cut the butter into the dry ingredients until the mixture resembles coarse crumbs with some pea-sized pieces of butter remaining. This texture is crucial for a perfectly craggy, golden-brown topping, a hallmark of superior fruit desserts like this and its cousin, the Apple Pie‘s crumb topping.
4. Assemble and Bake: Evenly sprinkle the crisp topping over the apple filling in the baking dish. Place the dish on a baking sheet (to catch any potential drips). Bake for 45-55 minutes, or until the topping is golden brown and bubbling, and the apples are tender when pierced with a fork. If the topping browns too quickly, loosely tent it with aluminum foil.
5. Cool and Serve: Remove from the oven and let it cool for at least 10-15 minutes before serving. This allows the juices to thicken slightly, preventing a watery result. Serve warm, ideally with a scoop of vanilla bean ice cream or a dollop of whipped cream.
Nutritional Benefits & Advantages
Beyond its comforting appeal, this homemade Apple Crisp offers several nutritional advantages. Apples are a fantastic source of dietary fiber, promoting digestive health and helping to stabilize blood sugar levels. They also provide essential vitamins, such as Vitamin C, and various antioxidants. Using oats in the topping adds more fiber and contributes to heart health. By making it yourself, you control the amount of sugar, allowing for a healthier dessert option compared to many store-bought alternatives.
Tips, Variations & Cooking Advice
- Apple Choice: While Granny Smith offers a tart balance, Honeycrisp, Fuji, or Braeburn also work beautifully. A mix of two apple varieties provides a more complex flavor profile.
- Spice It Up: Add a pinch of ground ginger or cardamom to the filling for an exotic twist.
- Nutty Topping: For extra crunch and flavor, incorporate ½ cup of chopped pecans or walnuts into the crisp topping.
- Gluten-Free: Substitute the all-purpose flour in both the filling and topping with a gluten-free all-purpose flour blend (ensure it contains xanthan gum). Use certified gluten-free oats.
- Dairy-Free/Vegan: Use chilled coconut oil or a plant-based butter substitute in place of dairy butter.
- Individual Servings: Bake in individual ramekins for perfectly portioned desserts. Adjust baking time accordingly (around 30-40 minutes).
Common Mistakes to Avoid
- Undercooked Apples: Ensure apples are sliced evenly and cooked until tender. Hard apples are a crisp killer!
- Soggy Topping: Don’t overmix the topping; coarse crumbs are key. Also, cold butter is essential for a crispy, not cakey, finish.
- Excessive Moisture: If your apples are very juicy, you might want to slightly increase the flour in the filling by an extra tablespoon to prevent a watery bottom.
- Burning the Topping: Keep an eye on it during the last 15-20 minutes of baking. If it’s browning too fast, tent with foil.
Storage & Meal Prep Tips
Leftover Apple Crisp can be stored in an airtight container in the refrigerator for up to 3-4 days. To reheat, you can microwave individual servings, or for a crispier topping, warm in an oven at 300°F (150°C) for 15-20 minutes. Freezing is also an option; once completely cooled, cover tightly with plastic wrap and then foil. It can be frozen for up to 2-3 months. Thaw overnight in the refrigerator before reheating. This dessert can also be assembled ahead of time and refrigerated for up to 24 hours before baking. Just add about 10-15 minutes to the baking time if baking from cold.
Conclusion
Mastering the art of a homemade Apple Crisp is a truly rewarding culinary experience. With its warm, spiced apple filling and irresistible buttery, crunchy topping, it offers all the comforting flavors of autumn in an approachable format that even rivals the beloved Apple Pie in its cozy appeal. We encourage you to try this recipe, experiment with the variations, and savor the delightful aroma and taste of your own creation. Share your crisp creations in the comments below, or tell us your favorite fruit dessert!
FAQs
- Q: Can I use other fruits instead of apples?
A: Absolutely! Pears, berries, peaches, or a mix of fruits work wonderfully. Adjust sugar content based on the sweetness of your chosen fruit.
- Q: Why is my crisp topping not crispy?
A: Ensure your butter is very cold and cut into the dry ingredients until it forms coarse crumbs, not a smooth paste. Overmixing can lead to a less crispy result.
- Q: How do I know when the apples are cooked through?
A: Gently poke an apple slice with a fork; it should be tender with slight resistance. The bubbling juices around the edges of the dish are also a good indicator.
- Q: Can I make this vegan or dairy-free?
A: Yes, substitute butter with chilled coconut oil or a plant-based butter alternative in the same quantity. Ensure other ingredients are vegan-friendly.
- Q: What’s the best way to prevent the topping from burning?
A: If the topping starts to brown too quickly before the apples are tender, loosely tent the baking dish with aluminum foil for the remaining baking time.