Crafting Culinary Magic: Your Guide to the Perfect Homemade Stuffing
Ever wondered what truly elevates a festive meal from good to unforgettable? It’s often the unsung heroes, the dishes that steal the show without even trying, and for many, that hero is perfectly prepared Stuffing. This isn’t just about a side dish; it’s about crafting an experience, a medley of flavors and textures that evoke comfort, nostalgia, and pure culinary joy. Preparing this dish at home isn’t just budget-friendly; it allows for unparalleled customization, ensuring every bite reflects your personal taste and dietary preferences. Today, we’re diving deep into mastering the art of homemade Stuffing, focusing on meticulous planning and the finest ingredients to achieve a side dish that will undoubtedly become a treasured tradition.
Ingredients & Kitchen Tools
To embark on this delightful culinary journey, gather the following essential ingredients and tools:
- 1 loaf (1 pound) day-old, crusty bread: preferably sourdough or artisan-style, cut into 1/2-inch cubes. Day-old bread is crucial for absorbing moisture without becoming soggy.
- 1 cup (2 sticks) unsalted butter: for sautéing and richness.
- 2 large yellow onions, diced: a foundational aromatic for depth of flavor.
- 4 stalks celery, diced: adds a subtle crunch and classic savory notes.
- 2 large apples (e.g., Gala, Honeycrisp), cored and diced: introduces a touch of sweetness and moisture.
- 1 pound breakfast sausage (bulk or removed from casings): provides a savory, meaty element. (Optional: for a vegetarian version, omit sausage and add an extra cup of sautéed mushrooms).
- 4 cups chicken or vegetable broth, hot: the liquid backbone for moisture and flavor. Low-sodium is recommended for better salt control.
- 2 large eggs, lightly beaten: acts as a binder, creating a cohesive texture.
- 1/4 cup fresh parsley, chopped: for a fresh, herbaceous note.
- 2 tablespoons fresh sage, chopped: essential for that classic savory, earthy stuffing flavor.
- 1 tablespoon fresh thyme, chopped: adds another layer of aromatic goodness.
- 1 teaspoon salt: seasons the dish. Adjust to taste.
- 1/2 teaspoon black pepper: for a hint of spice.
Kitchen Tools:
- Large mixing bowls
- Large skillet or Dutch oven
- 9×13 inch baking dish (or similar size)
- Cutting board and sharp knife
- Measuring cups and spoons
- Spatula or wooden spoon
Prep Time & Cooking Schedule
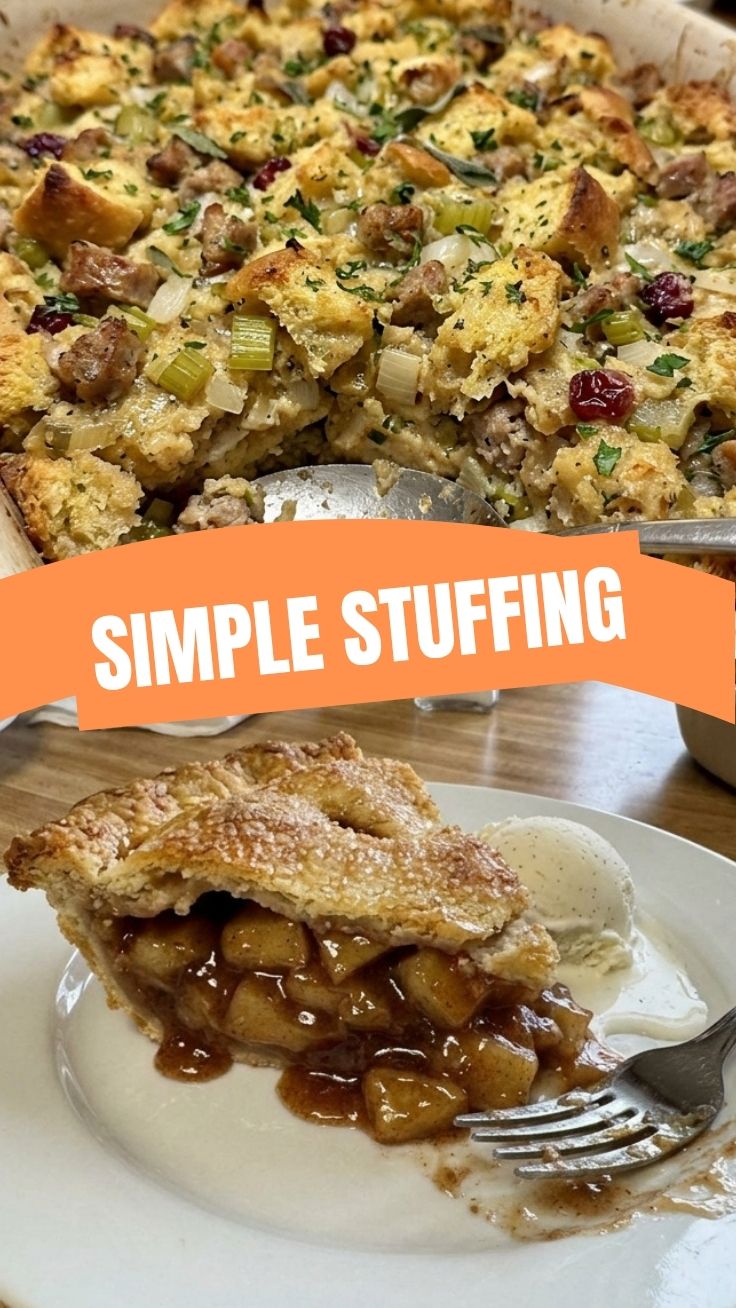
Thoughtful planning is key to a stress-free cooking experience.
- Prep Time: 30 minutes (dicing, cubing, chopping)
- Cook Time: 45-60 minutes (baking)
- Overall Time: 1 hour 15 minutes to 1 hour 30 minutes
Planning Ahead: You can cube the bread and leave it out overnight to dry further. Dice onions, celery, and apples the day before and store them in airtight containers in the refrigerator. Chop herbs shortly before cooking to maintain freshness. The entire stuffing can be assembled up to two days in advance and refrigerated, then baked on the day it’s served.
Step-by-Step Instructions
1. Prepare the Bread: Preheat oven to 300°F (150°C). Spread the cubed bread on a large baking sheet. Toast for 15-20 minutes, or until lightly golden and dry. This step is crucial for preventing soggy Stuffing. Transfer bread to an extra-large mixing bowl.
2. Sauté Aromatics and Sausage: In a large skillet or Dutch oven, melt 4 tablespoons of butter over medium heat. Add the breakfast sausage and cook, breaking it apart with a spoon, until browned and cooked through. Remove sausage with a slotted spoon to a separate plate, leaving any rendered fat in the skillet.
3. Soften Vegetables: Add the remaining butter to the skillet. Once melted, add the diced onions, celery, and apples. Sauté for 8-10 minutes, or until the vegetables are softened and translucent but not browned.
4. Combine Ingredients: Add the cooked sausage, sautéed vegetables, fresh parsley, sage, thyme, salt, and pepper to the bowl with the toasted bread cubes. Toss gently to combine all the delectable ingredients.
5. Moisten and Bind: In a separate medium bowl, whisk together the hot chicken or vegetable broth and the lightly beaten eggs. Pour this liquid mixture over the bread and vegetable mixture. Gently fold until the bread has absorbed most of the liquid. Be careful not to overmix, as this can make the stuffing dense. The mixture should be moist but not swimming in liquid.
6. Bake: Transfer the mixture to your prepared 9×13 inch baking dish, spreading it evenly. You can cover with foil for the first 30 minutes to ensure it cooks through, then uncover for the last 15-20 minutes to achieve a golden-brown, crispy top.
7. Rest and Serve: Once baked, let the stuffing rest for 10-15 minutes before serving. This allows the flavors to meld and the structure to set.
Nutritional Benefits & Advantages
This homemade Stuffing, while traditionally seen as indulgent, offers several advantages. Using fresh vegetables like onions, celery, and apples boosts fiber content and provides essential vitamins and minerals. The choice of lean breakfast sausage (or a vegetarian alternative) can help manage fat intake. Furthermore, by making it at home, you control the amount of sodium and unhealthy fats, allowing for a more wholesome dish compared to many store-bought options. It’s a satisfying, comforting side that can be surprisingly nutrient-dense.
Tips Variations & Cooking Advice
- Herb Power: Experiment with other fresh herbs like marjoram or rosemary for a different aromatic profile.
- Fruitful Additions: Add dried cranberries or chopped apricots for extra bursts of sweetness and chewiness.
- Nutty Crunch: Toasted pecans or walnuts can provide wonderful texture and a rich, earthy flavor.
- Umami Boost: For a deeper umami flavor, add a handful of sautéed mushrooms or a teaspoon of mushroom powder to the vegetable mixture.
- Gluten-Free: Easily adapt this recipe by using gluten-free bread. Ensure your broth and sausage are also certified gluten-free.
- Dairy-Free: Substitute dairy-free butter or olive oil for the butter.
- Crispier Top: For an extra crispy crust, broil the stuffing for the last 3-5 minutes, watching carefully to prevent burning.
Common Mistakes to Avoid
- Soggy Stuffing: This is the most common pitfall. Ensure your bread is thoroughly dried or toasted. Too much broth can also lead to sogginess, so add it gradually.
- Under-Seasoning: Don’t be shy with the salt, pepper, and herbs. Taste as you go and adjust. The bread will absorb a lot of the seasoning.
- Overmixing: Overmixing the stuffing can activate the gluten in the bread, leading to a tough and dense texture. Fold gently.
- Cold Broth: Using cold broth will take longer to absorb and can cool down the mixture, affecting the final texture. Hot broth is best.
Storage & Meal Prep Tips
Storage: Leftover homemade Stuffing should be stored in an airtight container in the refrigerator for up to 3-4 days.
Freezing: This dish freezes beautifully! Once completely cooled, transfer portions to freezer-safe containers or bags. It can be frozen for up to 2-3 months. Thaw overnight in the refrigerator before reheating.
Reheating: For best results, reheat in a preheated oven at 300°F (150°C) until warmed through, often about 20-30 minutes for a single serving or covered in a larger dish to prevent drying out. A splash of extra broth can be added before reheating to maintain moisture. Microwaving also works for individual portions but may result in a softer texture.
Conclusion
Crafting your own batch of homemade Stuffing doesn’t have to be daunting. By following these detailed steps, understanding the role of each component, and selecting high-quality ingredients, you can achieve a dish that’s rich in flavor, perfectly textured, and truly memorable. We encourage you to try this recipe, personalize it to your taste, and share your delicious creations! What are your favorite additions to this classic side? Let us know in the comments!
FAQs
Q1: Can I make this stuffing ahead of time?
A1: Absolutely! You can assemble the entire dish up to 2 days in advance and refrigerate it. Just cover tightly with foil and bake when ready to serve.
Q2: What’s the best type of bread for stuffing?
A2: Day-old, crusty breads like sourdough, French bread, or artisan white bread work best. Their sturdier texture holds up well to the moisture, preventing sogginess.
Q3: How can I make my stuffing less soggy?
A3: Ensure your bread is thoroughly dried or toasted before mixing. Don’t add too much liquid; the bread should be moist but not saturated. Also, ensure the baking dish isn’t overcrowded.
Q4: Can I add different meats to this stuffing?
A4: Yes, cooked ground beef, turkey sausage, or even chopped bacon can be excellent additions or substitutions for the breakfast sausage.
Q5: My stuffing top isn’t crispy. What went wrong?
A5: For a crispier top, ensure you remove the foil cover for the last 15-20 minutes of baking. You can also finish it under the broiler for a few minutes, watching closely.