Unleash Your Inner Baker: The Ultimate Guide to Irresistible Homemade Peanut Butter Cookies
Ever bite into a cookie that instantly transports you back to childhood, conjuring up feelings of warmth, comfort, and pure deliciousness? That’s the magic of a perfectly baked homemade cookie. And if there’s one classic that consistently delivers that nostalgic punch, it’s the humble yet mighty peanut butter cookie. Preparing these delightful treats at home isn’t just about saving a few bucks; it’s about infusing love into every crumb, controlling the quality of your ingredients, and customizing them to your exact preferences. Get ready to embark on a culinary journey where we’ll master the art of crafting the most unbelievably soft, chewy, and flavorful Peanut Butter Cookies, ensuring every batch is a triumph. This comprehensive guide will walk you through everything you need to know to create a show-stopping peanut butter cookie recipe that will have everyone asking for more.
Ingredients & Kitchen Tools
Crafting the perfect batch of these nutty delights requires a few pantry staples and essential kitchen tools.
- All-Purpose Flour (2 ¼ cups): The structural backbone of our cookies. Sifted to avoid lumps.
- Baking Soda (1 teaspoon): The leavening agent that gives our cookies a soft, chewy texture.
- Salt (½ teaspoon): Enhances the sweet and nutty flavors. Always use fine-grained salt.
- Unsalted Butter (1 cup / 2 sticks), softened: Provides richness and tenderness. If using salted butter, reduce added salt by ¼ teaspoon.
- Granulated Sugar (¾ cup): Contributes to sweetness and helps with crisp edges.
- Packed Light Brown Sugar (¾ cup): Adds moisture, chewiness, and a lovely molasses flavor.
- Creamy Peanut Butter (1 cup): The star of the show! Use a good quality, unsweetened, creamy variety for best results. Steer clear of natural peanut butter with oil separation as it can alter texture.
- Large Eggs (2), room temperature: Bind the ingredients together and add moisture.
- Vanilla Extract (1 teaspoon): A flavor enhancer that complements the peanut butter beautifully. Use pure vanilla for superior taste.
Kitchen Tools:
- Large Mixing Bowls (2): For wet and dry ingredients.
- Electric Mixer (stand or hand-held): Essential for creaming butter and sugars.
- Rubber Spatula: For scraping down bowls and folding ingredients.
- Measuring Cups & Spoons: For accurate ingredient portions.
- Baking Sheets: Heavy-duty ones prevent burning.
- Parchment Paper or Silicone Baking Mats: For non-stick baking and easy cleanup.
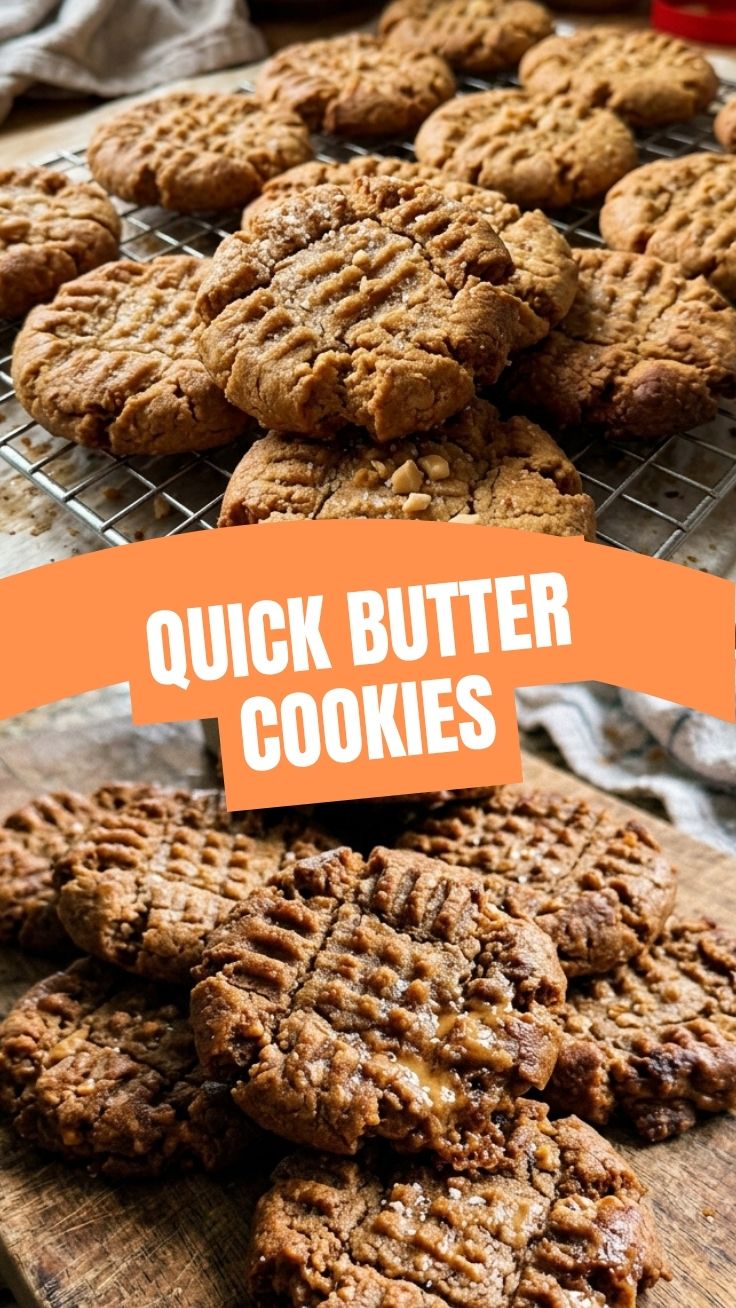
- Fork: For creating the classic crosshatch pattern.
- Wire Cooling Rack: For even cooling.
Prep Time & Cooking Schedule
- Prep Time: 15-20 minutes (includes gathering ingredients and mixing)
- Cook Time: 8-10 minutes per batch
- Chilling Time (Optional but Recommended): 30 minutes to 1 hour (helps prevent spreading and deepens flavor)
These timings make this an ideal recipe for a spontaneous baking session or for preparing ahead for an event. The optional chilling time significantly improves the cookie’s structure and flavor development, so consider it if you have the extra time.
Step-by-Step Instructions
1. Preheat & Prep: Preheat your oven to 375°F (190°C). Line baking sheets with parchment paper or silicone mats.
2. Combine Dry Ingredients: In a medium bowl, whisk together the all-purpose flour, baking soda, and salt. Set aside.
3. Cream Wet Ingredients: In a large mixing bowl, using an electric mixer, cream together the softened unsalted butter, granulated sugar, and packed light brown sugar on medium speed until light and fluffy (about 2-3 minutes).
4. Add Peanut Butter & Eggs: Beat in the creamy peanut butter until well combined. Then, add the large eggs one at a time, mixing well after each addition. Stir in the vanilla extract.
5. Combine All: Gradually add the dry ingredient mixture to the wet ingredients, mixing on low speed until just combined. Be careful not to overmix, as this can lead to tough cookies.
6. Chill (Optional): For chewier cookies and less spreading, cover the dough and refrigerate for 30 minutes to an hour.
7. Form & Bake: Roll the dough into 1-inch balls. Place them about 2 inches apart on the prepared baking sheets. Using the tines of a fork, gently press down on each cookie ball to create a crosshatch pattern. This isn’t just for aesthetics; it helps the cookies bake evenly. Bake for 8-10 minutes, or until the edges are lightly golden and the centers are still slightly soft. Do not overbake! This expertly crafted Peanut Butter Cookies will be the envy of all your friends.
8. Cool: Let the cookies cool on the baking sheets for 5 minutes before transferring them to a wire cooling rack to cool completely. Enjoy your perfect batch of peanut butter cookie recipe cookies!
Nutritional Benefits & Advantages
Beyond their undeniable deliciousness, peanut butter cookies offer some surprising nutritional perks. Peanut butter itself is a good source of healthy monounsaturated fats, protein, and dietary fiber, which contribute to satiety and sustained energy. It also contains essential vitamins like E and B6, and minerals such as magnesium, potassium, and zinc. While these cookies are a treat, the protein and healthy fats from the peanut butter can help mitigate the sugar rush, making them a more satisfying indulgence than some other dessert options.
Tips, Variations & Cooking Advice
- Chocolate Chip Swirl: Fold in ½ cup of semi-sweet chocolate chips for a classic variation.
- Nutty Crunch: Add ¼ cup of finely chopped peanuts or pecans to the dough for extra texture.
- Spice It Up: A pinch of cinnamon or nutmeg can add a warm, comforting note.
- Gluten-Free: Substitute all-purpose flour with a 1:1 gluten-free baking flour blend.
- Vegan Version: Use a plant-based butter substitute, an egg replacer (such as flax eggs), and ensure your peanut butter is vegan-friendly.
- Portion Control: Make smaller cookies for easier snacking or larger ones for a more substantial treat. Adjust baking time accordingly.
- Don’t Overmix: Overmixing develops the gluten in the flour, leading to tough cookies. Mix only until the ingredients are just combined.
Common Mistakes to Avoid
- Overbaking: The most common culprit for dry, hard cookies. Bake until the edges are set and lightly golden, but the centers still look slightly soft. They will firm up as they cool.
- Not Chilling the Dough: Warm dough spreads more, leading to flat, crispy cookies instead of soft, chewy ones.
- Using Natural Peanut Butter with Oil Separation: The inconsistent texture can mess with the cookie’s structure. Opt for creamy, no-stir peanut butter.
- Overcrowding the Baking Sheet: Give cookies enough space (at least 2 inches) to spread without merging.
- Incorrect Oven Temperature: An oven thermometer is your friend! Ensure your oven is accurately heated to prevent under or over-baking.
Storage & Meal Prep Tips
Store leftover Peanut Butter Cookies in an airtight container at room temperature for up to 5-7 days. To prolong freshness, you can place a slice of bread in the container; the cookies will absorb moisture from the bread, keeping them soft. For longer storage, freeze baked cookies in a freezer-safe bag or container for up to 3 months. Thaw at room temperature or warm briefly in the microwave for a fresh-from-the-oven feel. You can also freeze portions of raw dough, then simply bake from frozen, adding an extra minute or two to the baking time.
Conclusion
Mastering the art of homemade Peanut Butter Cookies is a truly rewarding experience, yielding treats that are far superior to their store-bought counterparts. By following this detailed peanut butter cookie recipe, you’re not just baking; you’re creating moments of joy, warmth, and deliciousness. We hope you feel empowered to whip up a batch of these classic cookies and share them with your loved ones. Don’t hesitate to experiment with the variations, personalize them to your taste, and make this recipe your own. We’d love to hear about your baking triumphs in the comments below! What are your favorite cookie memories?
FAQs
Q1: Can I use crunchy peanut butter instead of creamy?
A1: Yes, you can! Crunchy peanut butter will add a delightful texture to your cookies. The overall consistency of the dough might be slightly different, but the flavor will still be fantastic.
Q2: My cookies spread too much. What went wrong?
A2: Common reasons for spreading include dough that wasn’t chilled, butter that was too soft or melted, an oven that isn’t hot enough, or too much leavening agent. Ensure your butter is at room temperature (not melted) and consider chilling your dough for at least 30 minutes.
Q3: How do I get those perfect fork marks without the dough sticking?
A3: Dip your fork in a little granulated sugar or flour between pressing each cookie. This prevents sticking and gives a nice, defined pattern.
Q4: Can I make the dough ahead of time?
A4: Absolutely! Cookie dough can be stored in an airtight container in the refrigerator for up to 3-4 days. This is great for meal prepping or when you want fresh cookies on demand.
Q5: What’s the best way to ensure even baking?
A5: Use light-colored baking sheets and parchment paper, and rotate your baking sheets halfway through the cooking time. Avoid opening the oven door too frequently, as this can cause temperature fluctuations.