Crafting the Perfect Juneteenth Red Velvet Cake: A Celebration of Flavor and Heritage
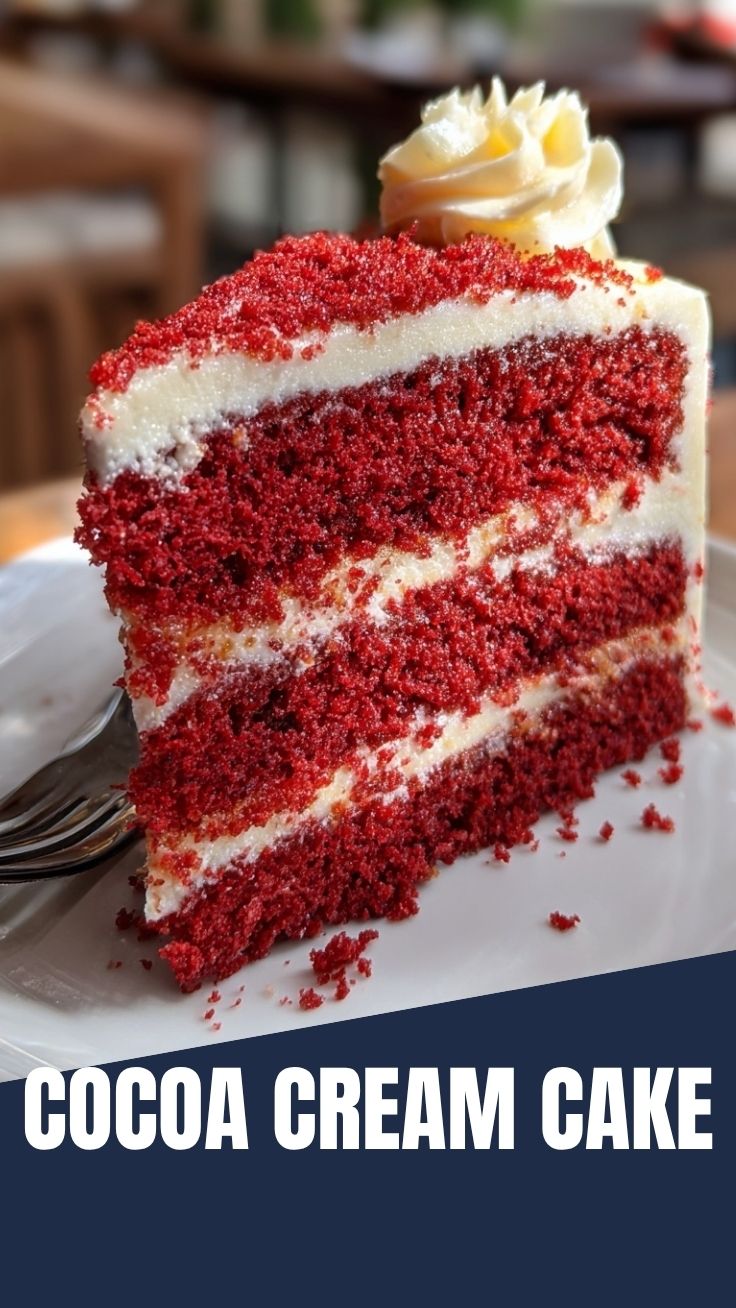
Are you searching for a dessert that embodies both rich history and irresistible flavor? This Juneteenth Red Velvet Cake recipe is more than just a sweet treat; it’s a culinary journey, a vibrant centerpiece for your celebrations, and a delicious way to honor an important holiday. Preparing this iconic cake at home allows you to infuse every step with intention and love, ensuring a truly special outcome that store-bought options simply can’t replicate. And when it comes to Juneteenth celebration desserts, this red velvet masterpiece stands out as a prime example of both tradition and indulgence.
Ingredients & Kitchen Tools
Here’s everything you’ll need to create this show-stopping cake:
- All-Purpose Flour (2 ½ cups): The structural backbone of our cake. Sifting ensures a lighter texture.
- Granulated Sugar (1 ½ cups): Sweetness and moisture.
- Unsweetened Cocoa Powder (2 tbsp): Gives red velvet its characteristic subtle chocolate flavor and depth.
- Baking Soda (1 tsp): Our primary leavening agent for a tender crumb.
- Salt (1 tsp): Balances sweetness and enhances other flavors.
- Large Eggs (2): Binds ingredients and adds richness.
- Buttermilk (1 cup): Reacts with baking soda for lift and tanginess. Essential for classic red velvet.
- Vegetable Oil (1 cup): Contributes to a moist and tender cake.
- Red Food Coloring (2 oz bottle): The iconic hue! Gel coloring provides a more vibrant color with less liquid.
- White Vinegar (1 tsp): Reacts with baking soda and buttermilk for added fluffiness.
- Vanilla Extract (1 tsp): Essential for flavor depth and aroma.
- Cream Cheese (8 oz, softened): Foundation for our luscious frosting.
- Unsalted Butter (½ cup/1 stick, softened): For rich, creamy frosting.
- Powdered Sugar (3 ½ cups, sifted): For smooth, sweet frosting. Sifting prevents lumps.
Kitchen Tools:
- Two 9-inch Round Cake Pans: For baking perfectly even layers.
- Parchment Paper: Prevents sticking and ensures easy cake release.
- Large Mixing Bowls (2): For wet and dry ingredients.
- Electric Mixer (stand or hand-held): For efficient mixing of both cake batter and frosting.
- Whisk: To combine dry ingredients evenly.
- Spatula: For scraping bowls and folding.
- Measuring Cups and Spoons: For accurate ingredient quantities.
- Wire Rack: For cooling cakes completely.
- Offset Spatula or Butter Knife: For spreading frosting smoothly.
Prep Time & Cooking Schedule
- Prep Time: 30 minutes
- Bake Time: 30-35 minutes
- Cooling Time: 1-2 hours (crucial for frosting success!)
- Total Time: Approximately 2.5 – 3 hours
Allowing ample cooling time for the cake layers is absolutely critical. Frosting a warm cake will lead to a melty, messy disaster. Plan to bake your cakes well in advance, even the day before, to ensure they are completely cooled. This strategic scheduling ensures a stress-free decorating process.
Step-by-Step Instructions
1. Prepare Your Pans: Preheat oven to 350°F (175°C). Grease and flour two 9-inch round cake pans, then line the bottoms with parchment paper. This meticulous preparation is key to preventing sticking.
2. Combine Dry Ingredients: In a large bowl, whisk together the flour, sugar, cocoa powder, baking soda, and salt. Ensure there are no lumps for a consistently smooth batter.
3. Mix Wet Ingredients: In a separate medium bowl, whisk together the eggs, buttermilk, vegetable oil, red food coloring, vinegar, and vanilla extract until well combined and the color is vibrant and uniform.
4. Combine Wet and Dry: Gradually add the wet ingredients to the dry ingredients, mixing on low speed with an electric mixer until just combined. Be careful not to overmix, as this can lead to a tough cake. The batter will be slightly thick and beautifully red.
5. Bake the Cakes: Divide the batter evenly between the two prepared pans. Bake for 30-35 minutes, or until a wooden skewer inserted into the center comes out clean.
6. Cool Completely: Remove cakes from oven and let them cool in the pans for 10-15 minutes before inverting them onto a wire rack to cool completely. This is a non-negotiable step to fully enjoy your perfectly baked Juneteenth Red Velvet Cake.
7. Prepare the Frosting: While the cakes cool, prepare the cream cheese frosting. In a large bowl, beat the softened cream cheese and butter with an electric mixer until light and fluffy. Gradually add the sifted powdered sugar and vanilla extract, beating until smooth and creamy.
8. Assemble and Frost: Once the cakes are completely cool, level them if necessary with a serrated knife. Place one cake layer on your serving plate. Spread a generous layer of frosting over the top. Carefully place the second cake layer on top and cover the entire cake with the remaining frosting. Garnish as desired; for Juneteenth celebration desserts, consider fresh berries in a nod to the pan-African flag colors.
Nutritional Benefits & Advantages
While red velvet cake is a decadent treat, there are slight advantages. The buttermilk aids in digestion due to its probiotics, and cocoa powder offers antioxidants. Choosing to bake at home gives you full control over ingredient quality, allowing for options like organic eggs or reducing sugar slightly if desired, making it a more mindful indulgence compared to processed alternatives.
Tips, Variations & Cooking Advice
- Vibrant Color: For an even deeper red, use a high-quality gel food coloring instead of liquid.
- Flavor Boost: A teaspoon of espresso powder can enhance the cocoa flavor without making the cake taste like coffee.
- Dairy-Free: Substitute buttermilk with dairy-free milk mixed with a tablespoon of vinegar. Use a plant-based butter and cream cheese for the frosting.
- Cupcakes: This recipe can easily be adapted for cupcakes. Reduce baking time to 18-22 minutes.
- Garnish: Beyond classic crumbs, consider fresh raspberries, blueberries, or even a sprinkle of toasted coconut for an extra layer of flavor and visual appeal, especially for festive Juneteenth celebration desserts.
Common Mistakes to Avoid
- Overmixing the Batter: Leads to a tough, dense cake. Mix only until ingredients are just combined.
- Not Sifting Dry Ingredients/Powdered Sugar: Can result in lumpy batter/frosting.
- Frosting Warm Cakes: A common rookie mistake! Always ensure cakes are completely cool to prevent frosting from melting.
- Too Much Food Coloring: While tempting, excessive food coloring can sometimes impart a slightly bitter taste. Stick to the recommended amount or a high-quality gel for better results.
Storage & Meal Prep Tips
Store leftover Juneteenth Red Velvet Cake in an airtight container in the refrigerator for up to 3-4 days. This cake freezes beautifully! Wrap individual slices or whole unfrosted layers tightly in plastic wrap, then aluminum foil, and freeze for up to 2-3 months. Thaw in the refrigerator overnight before serving or frosting.
Conclusion
Creating this Juneteenth Red Velvet Cake is a truly rewarding experience, a perfect blend of tradition, flavor, and culinary artistry. It’s a dessert that speaks volumes, ideal for any gathering and an especially poignant addition to your Juneteenth celebration desserts table. Don’t be shy – dive into this recipe and share your delectable results with us!
FAQs
1. Can I substitute regular milk for buttermilk?
While possible, it’s not recommended for classic red velvet. If you must, add 1 tablespoon of white vinegar or lemon juice to regular milk and let it sit for 5-10 minutes before using.
2. Why did my cake turn brown instead of red?
Ensure you’re using a sufficient amount of high-quality red food coloring, preferably gel. Also, the cocoa powder adds a dark base, so enough red is needed to overcome it.
3. How can I make the frosting less sweet?
You can slightly reduce the amount of powdered sugar, but don’t cut too much as it affects the consistency. A pinch of salt in the frosting can also help balance the sweetness.
4. Can I make this cake gluten-free?
Yes! Substitute the all-purpose flour with a 1-to-1 gluten-free baking flour blend that contains xanthan gum.
5. My cake layers are domed. How do I make them flat?
This is common. After cooling, use a long, serrated knife to carefully level the tops of the cakes. The removed cake scraps are delicious for snacking or garnishing!